Overview#
After creating some basic cardboard swords when the kids were younger, for Halloween 2021, we (ok... I) wanted to try something more recognizable and challenging. We'd just gotten into Legend of Zelda - Breath Of the Wild, so the Master Sword as an obvious choice!
I love working with cardboard as a quick and easy building material. Coupled with some glue and paint you can quickly make something that looks impressive and is sturdy enough to withstand the enthusiastic swings of a 7-year-old - no small feat for a cardboard creation! If you like this one, also check out the Savage Lynel Sword that we built during the same Halloween.
Materials Used#
- Corrugated cardboard (scavenged from delivery packaging)
- Small wooden dowel for structural support
- Toilet paper roll tube for the handle grip
- PVC wood glue (for hardening edges)
- Spray paint (metallic silver, purple, and gold)
- Masking tape for marking areas during painting
- Basic craft tools (utility knife, scissors, ruler)
Creating the Template#
Before cutting any cardboard, we needed a proper template. Here's the process I used for this sword (and all subsequent sword projects):
Find reference images: I used resources like gaming Tumblr blogs (such as Maldrea Shoots Stuff ) and official Zelda guides like "The Legend of Zelda - Breath of the Wild: Creating a Champion " and "The Legend of Zelda - Breath of the Wild: The Complete Official Guide - Expanded Edition " for accurate references. If all else fails, a quick Google Images search normally provides a starting point.
Digital tracing: Using Inkscape (free) or Illustrator, I imported the reference images and traced the outline and key details of the sword.
Scaling: Once traced, I scaled the design to the appropriate size for my little guy. Keep in mind some of the detail elements you want to create. Getting too small with cardboard isn't feasible.
Print and assemble: Your final design will be larger than a standard page. Print the scaled template across multiple sheets, then tape them together to create the full-sized pattern.
Transfer to cardboard: With the completed paper template, cut it out and I trace the design onto cardboard ready for cutting.
For later sword projects in this series, I've kept the digital templates and made them available for download, but unfortunately, I didn't keep it for the Master Sword. Best of luck making yours :)
The Building Process#
Creating the Core Structure#
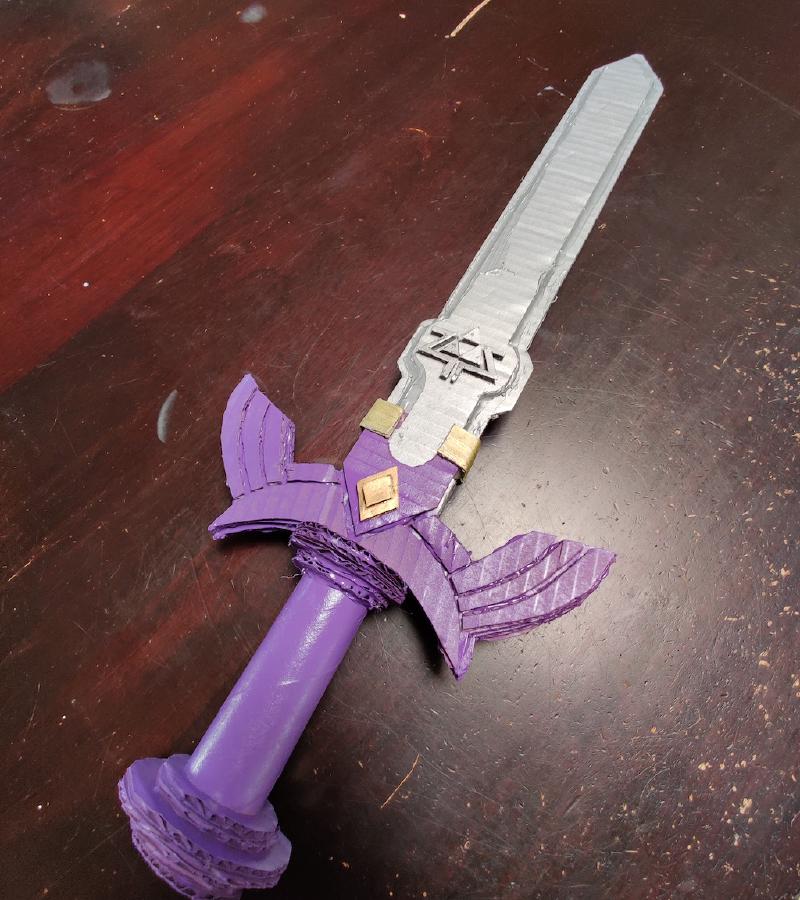
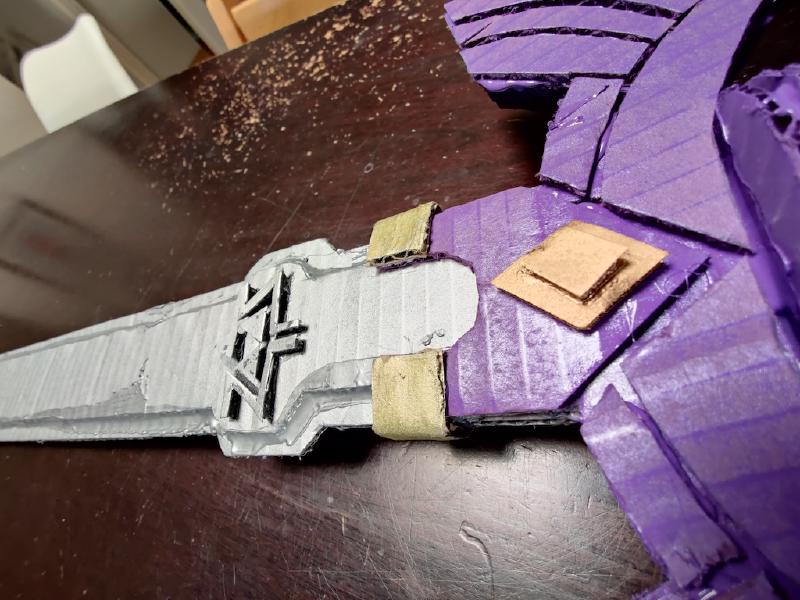
The key to a sturdy cardboard sword is layering. This Master Sword blade is 3 layers of cardboared. I traced our sword design onto each pieces of cardboard, carefully cutting each layer with a sharp utility knife (adult supervision required for this part!). Important to keep your knife sharp or you'll start tearing the cardboard!
IMPORTANT When cutting and gluing the layers together, make sure to alternate the direction of the cardboard corrugation with each layer. This cross-hatching technique significantly increases the structural strength of the finished piece, preventing it from flexing or bending during play.
Adding Structural Support#
For additional rigidity, I inserted a wooden dowel through the center of the blade and into the hilt. This simple addition made a huge difference in how the sword handled, eliminating the sword simply folding in half after a few wild swings from an enthusiastic little person!
Finishing the Handle#
One of the most difficult aspects of this project was cutting the circular sections for the pommel and hand guard. Cutting perfect circles in cardboard is surprisingly challenging - the corrugation wants to guide your knife in straight lines, not curves. This part was definitely an adult job and required patience and a very sharp blade for clean cuts.
For the wing-shaped cross-guard, I had to cut multiple small pieces and layer them to create the curved shapes seen in the game. This attention to detail took time but made a big difference in the final appearance.
For the handle, I used a toilet paper roll tube, which provided a comfortable grip that was the perfect size for smaller hands. Glue is your friend in cardboard projects, you almost can't have enough of it. So as long as it's not ruining the look, more glue is better than less!
The Edge Hardening Technique#
One issue with carboard "weapons" like this is they have a short life span.
To combat this issue, I hardening the blade edges with PVC wood glue. By applying a generous bead of glue along all the edges of the blade, pushing it into the corrugation and allowing it to dry completely, you can create a clear, hard surface that significantly improves durability. This is an essential step for surviving enthusiastic play sessions - without it the edges would have quickly become frayed and bent and quickly become a piece of recycling.
Detailing and Painting#
Cardboard loves to be painted and simple rattle can spray paint from the hardware store gets the job done quick! Grab some colours of your choice (chrome for the blade naturally!), some painters tape to mask out differents areas as you get to them and go to town!
The Finished Sword#
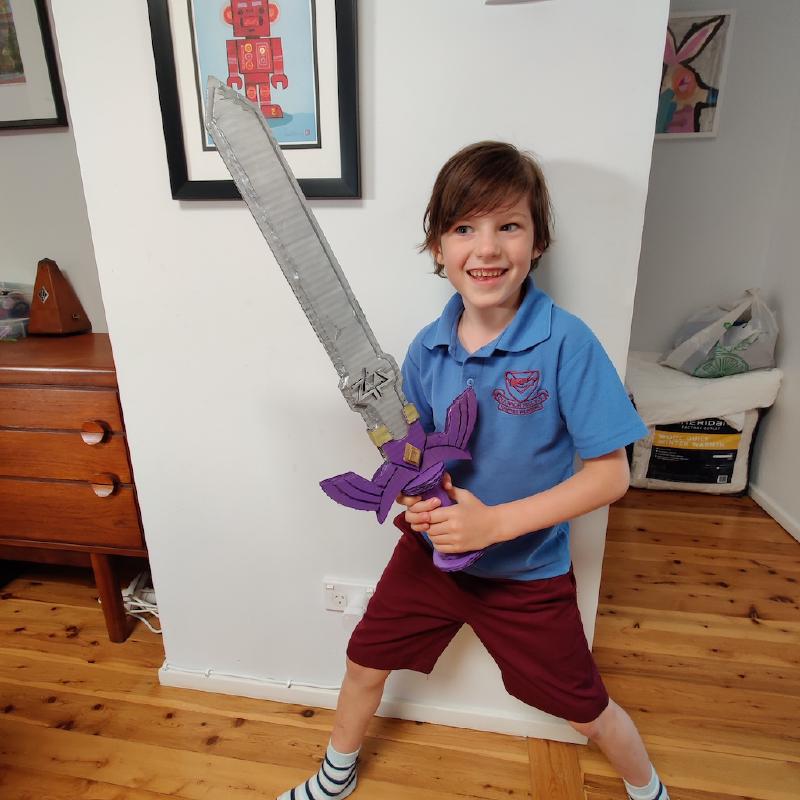
The completed Master Sword was an instant hit. It's pretty rough & ready but a prefect project for a rainy weekend where fun not perection is the goal. Despite being made entirely of cardboard, it looked remarkably like its in-game counterpart and proved sturdy enough for plenty of swings, hit and misses, without hurting anyone or anything in the house (much). My son was thrilled with the result and immediately set off an Zelda themed adventures around our house.
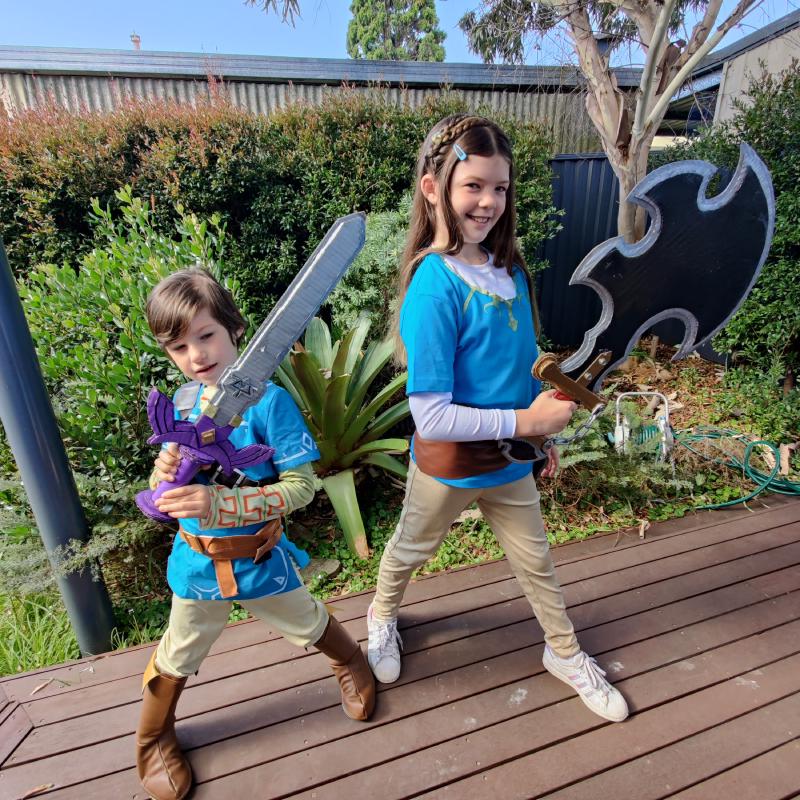
Along with the companion piece to this project, the Savage Lynel Sword , which I created using similar techniques, it made for a great looking Zelda themed Halloween 2021!
Final Thoughts#
The Master Sword project proved that with some thoughtful engineering, even cardboard can be quickly transformed into a durable, playable prop that can be made in less than a weekend. The sword survived numerous backyard adventures and still (mostly) survives to this day (several years later). Even better, repairs are simple with more cardboard, glue and paint.
For more Zelda and Sword related projects that grow in complexity beyond this one, take a look at the Swords-n-Stuff series. For many, I've included downloadable templates so you can make the projects too!