Overview#
This is my first WLED project running on an ESP32 Microcontroller. If you haven't played with WLED or ESPs before, give it a go - I'm far from an electronics nerd and average at soldering at best. It's easier than you think!
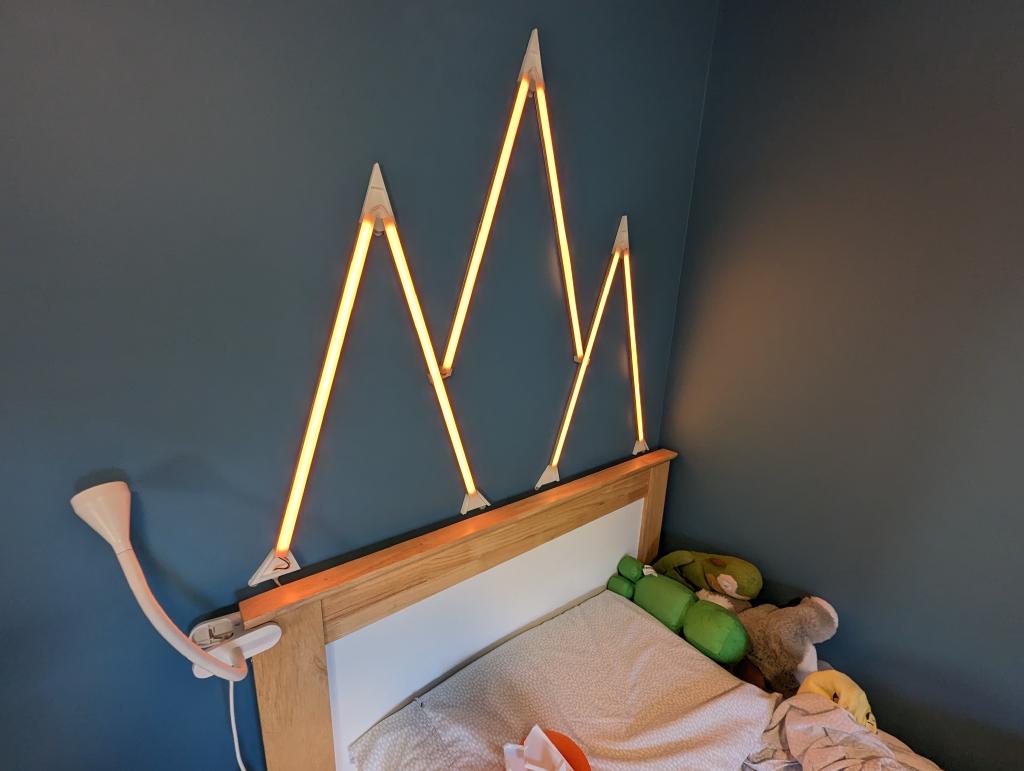
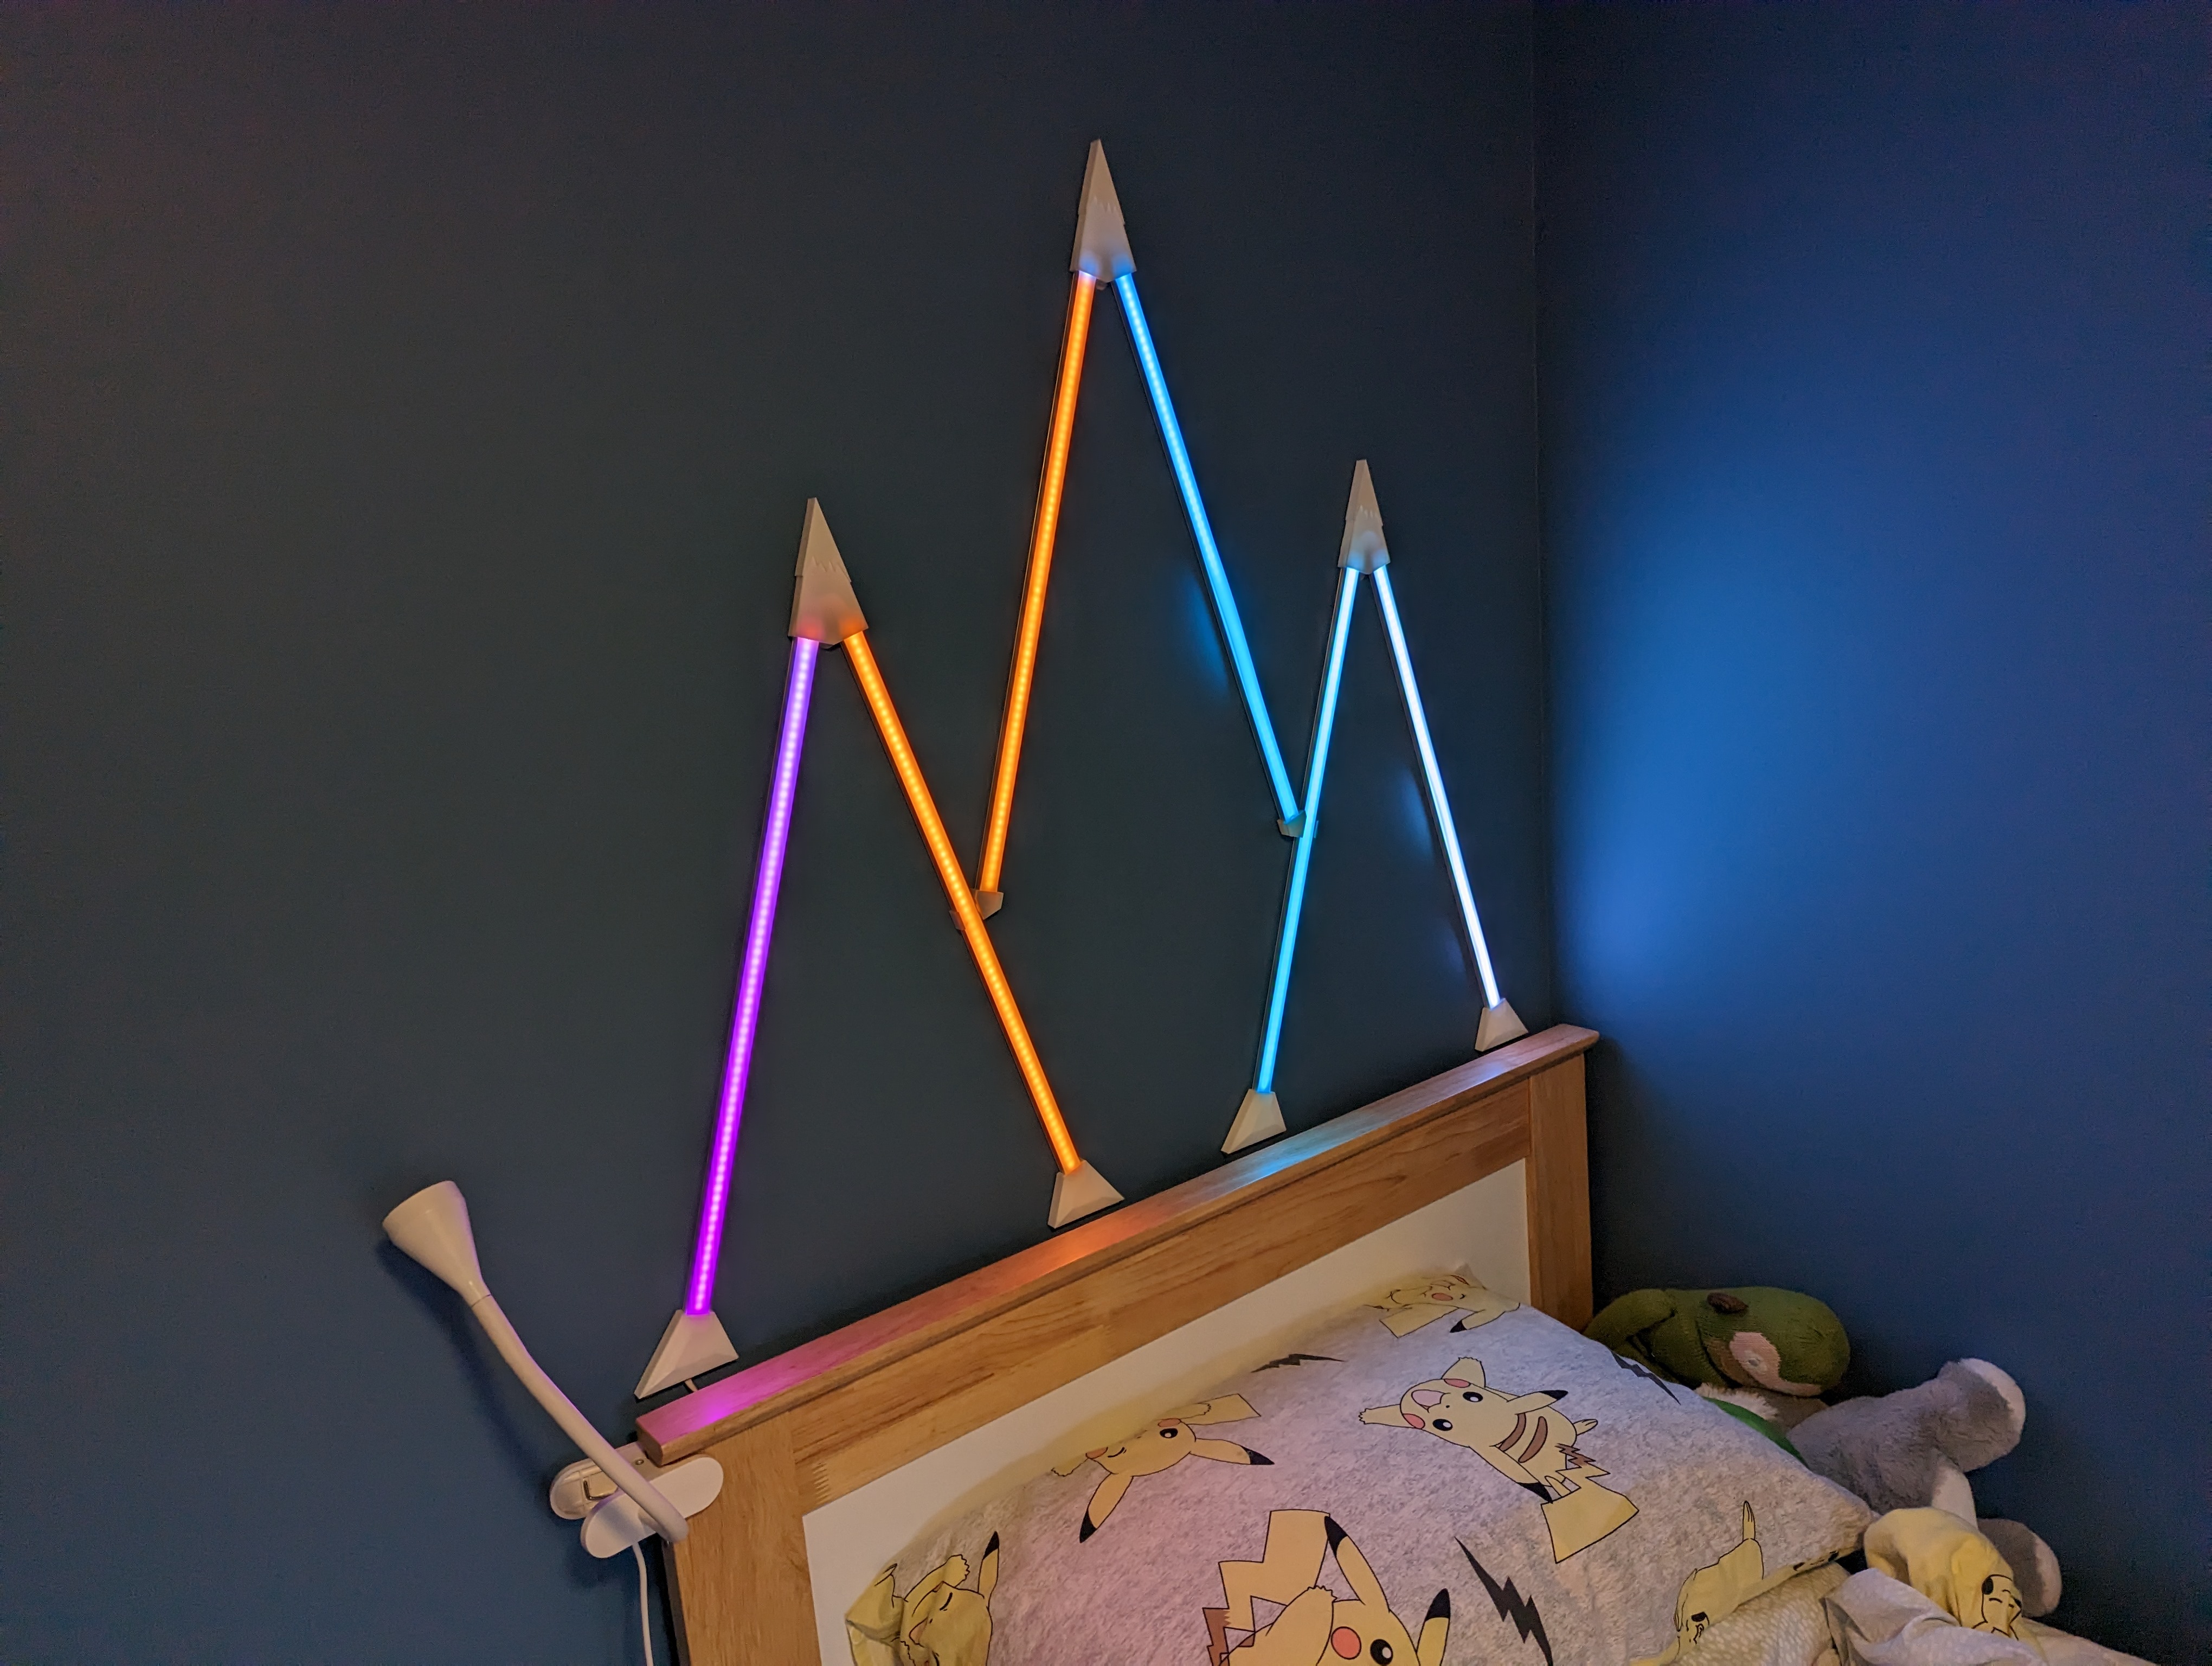
I built this project for my son's room. It combines some aluminium profiles, with addressable RGB LEDs, custom 3d printed connectors on each end to hold the profiles. It runs using the WLED project firmware and you'll need to either buy (booo!) or build (yay!) a controller. I've provided my schematic and a bill of materials for mine below. I built this project all as one piece, which does make it a little challenging to put on the wall or to repair when one of the LED in the second last segment dies (yes this happened about a week after we put it on the wall).
If you like this project, see also my Legend of Zelda Triforce Wall Art WLED wall art project using the same controller design.
What you'll need#
- WS2812b RBG Led strip - I used 144 LEDs/m
- 6 x 50cm Aluminium profiles w/ milky diffuser
- Connecting wire. I used this 28AWG silicone insulated wire
- WLED firmware and controller - see my Legend of Zelda Triforce Wall Art project for the components, case and schematic.
How it was done#
3d printed end caps#
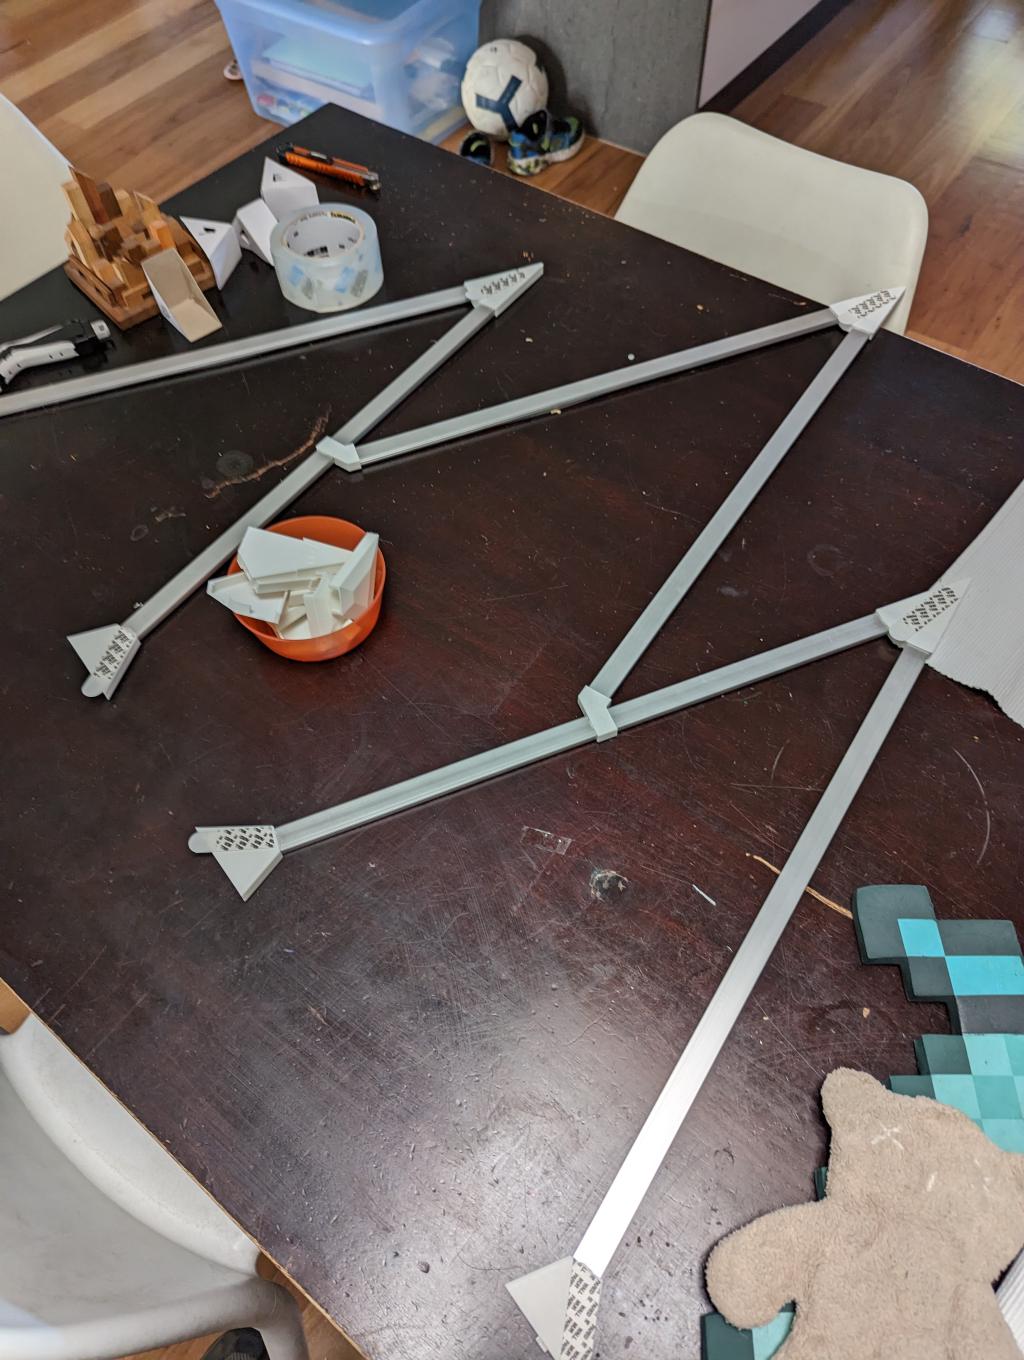
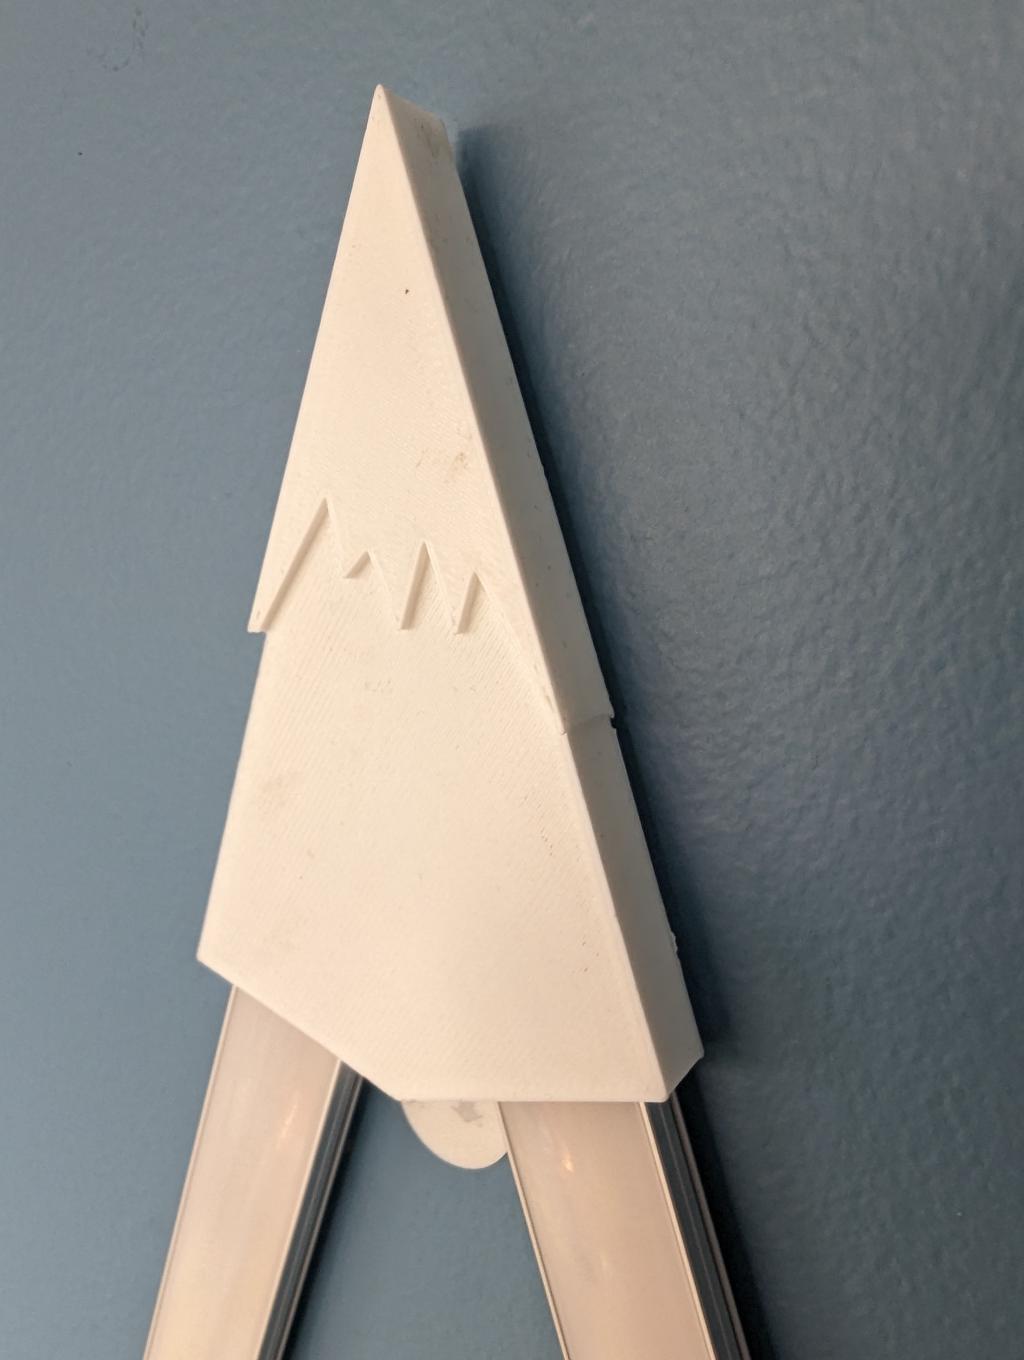
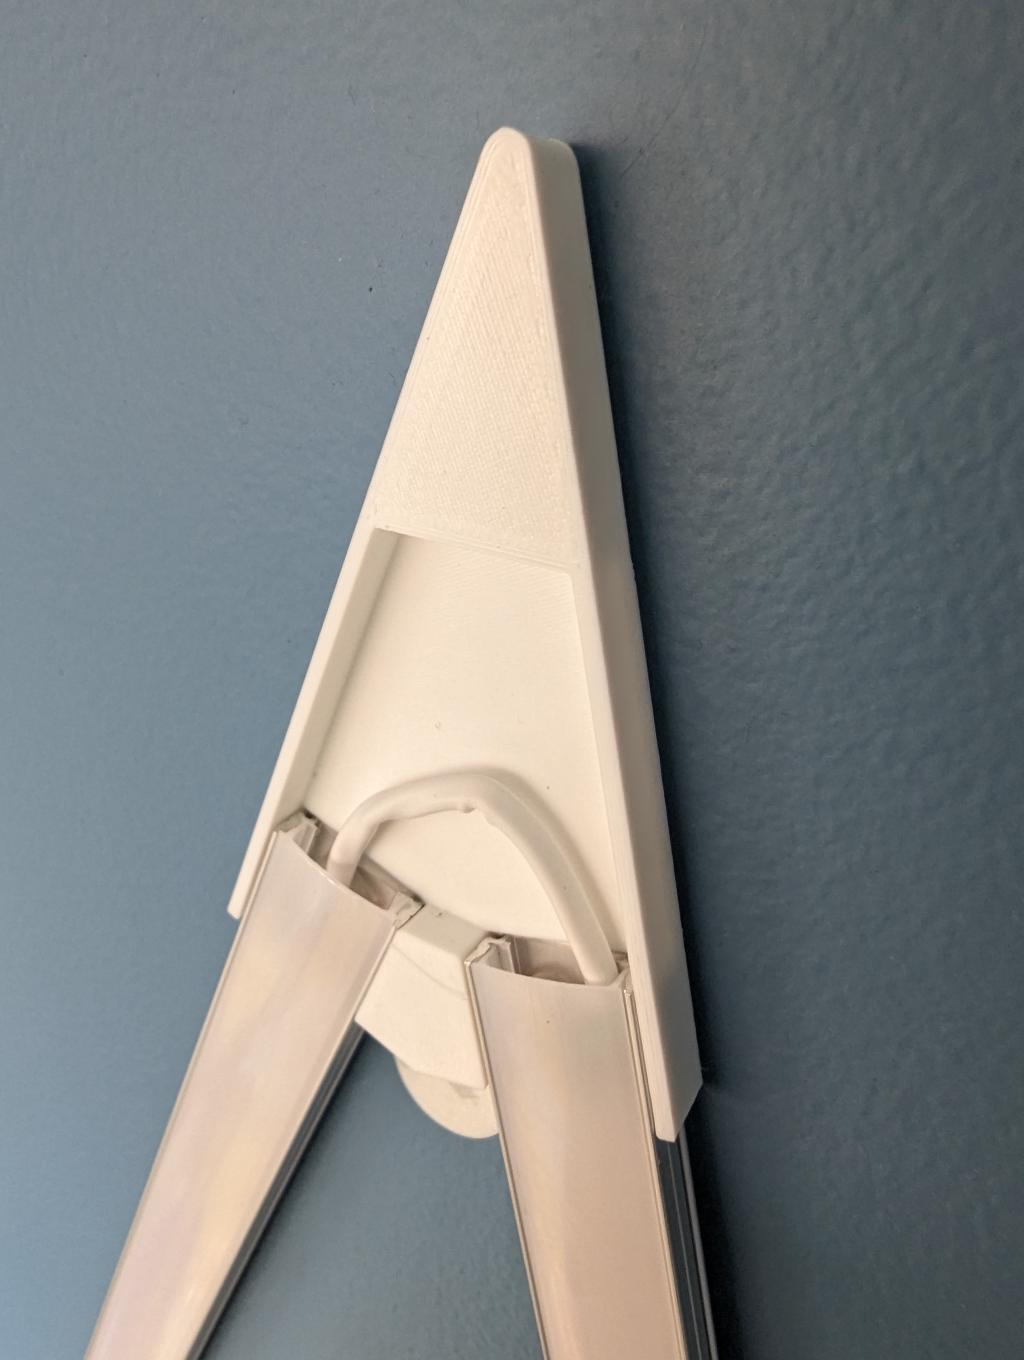
To hold the LED strips and cover the joins between the cut strips, I've designed and printed custom holders for each foot and mountain peak.

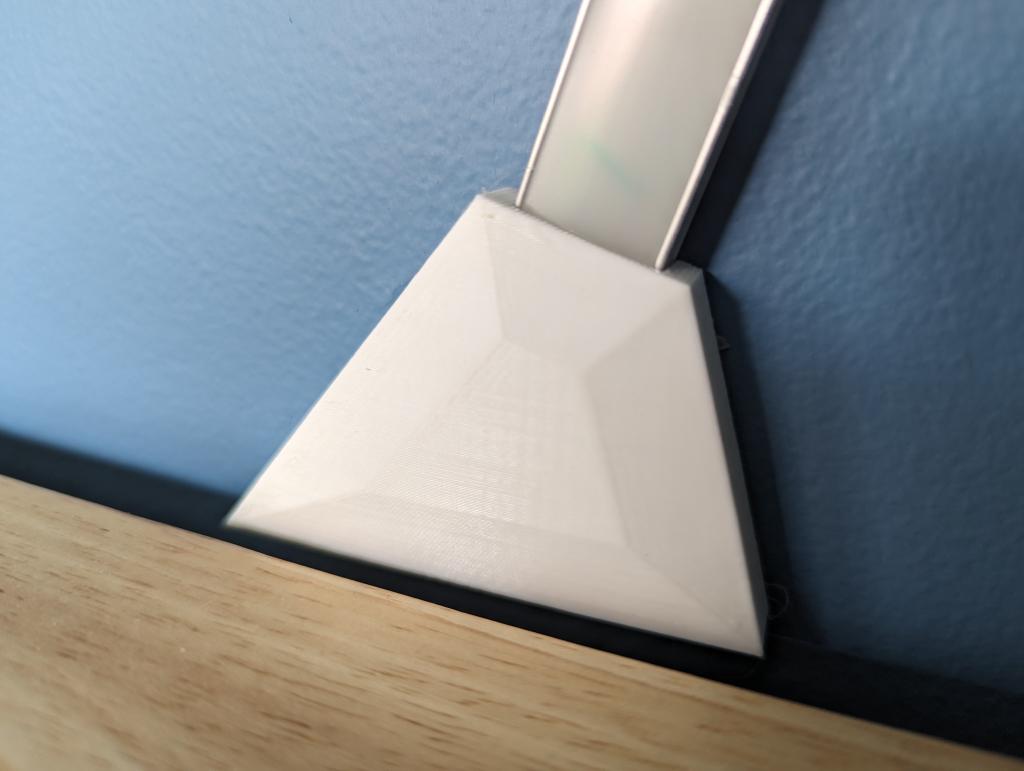
There are 3 main items to print:
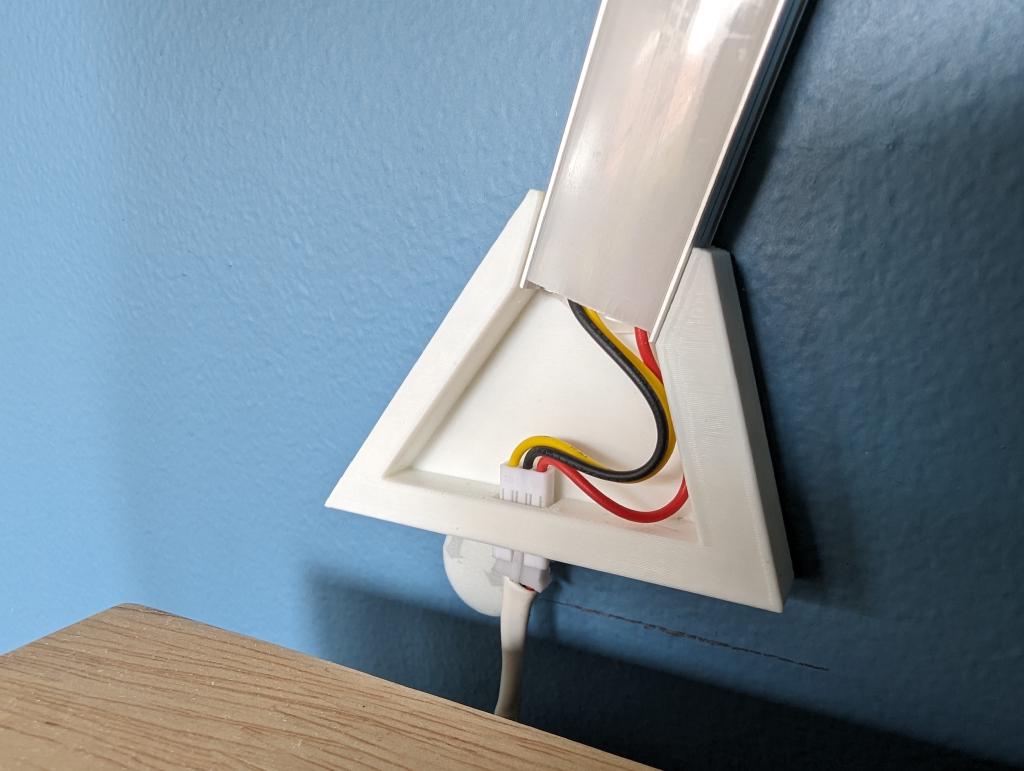
- The feet. There are essentially 3 types, left, right and left with power connector. Each has a cover that sits on top.
- The peaks. Just one type, printed twice (or however many peaks you want)
- Centre connector. Both left and right types, each with a cover to hide the wiring
LED Strip#
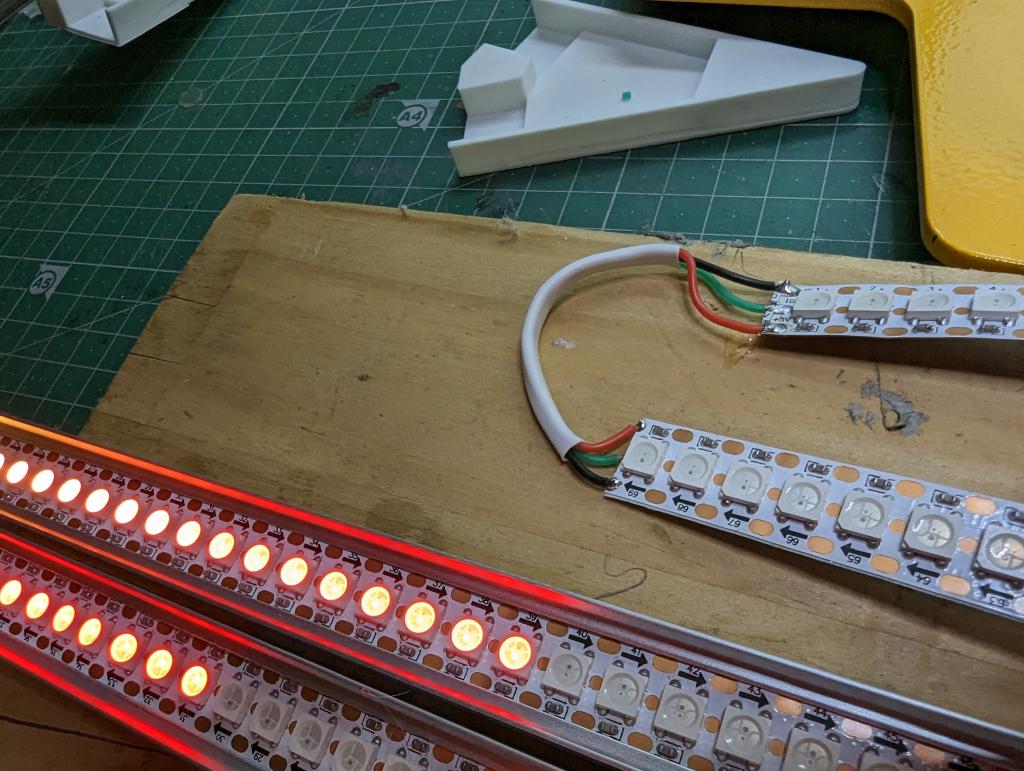
Each LED strip has a postive, negative and data connector. The strips I purchased come in 5m rolls and one roll is enough to do this project. But you will need to cut the strips to size. Measure the strips against the aluminium profile and cut across the pads, ideally leaving enough to solder some wire onto both sides. Mine ended up being 69 leds for each profile.
Grab your flexible connecting wire and start soldering! You're going to need to cut tiny little connectors between each and then soldering them onto tiny little pads! You're going to need a magnifying solder station (or your eyes will need to be much better than mine!). Essentially connect each postive to postive, negative to negative, data to data.
The centre connectors need to be handled a little differently. For the first (left side) one:
- On the bottom right foot, cut a longer connecting wire for the Data line and run it up the inside of the profile and connect to the next led strip. The data all needs to be connected in serial for the addressing to work.
- You can patch into the power (+ve and -ve) at the point on the led strip that you will connect into (see below)
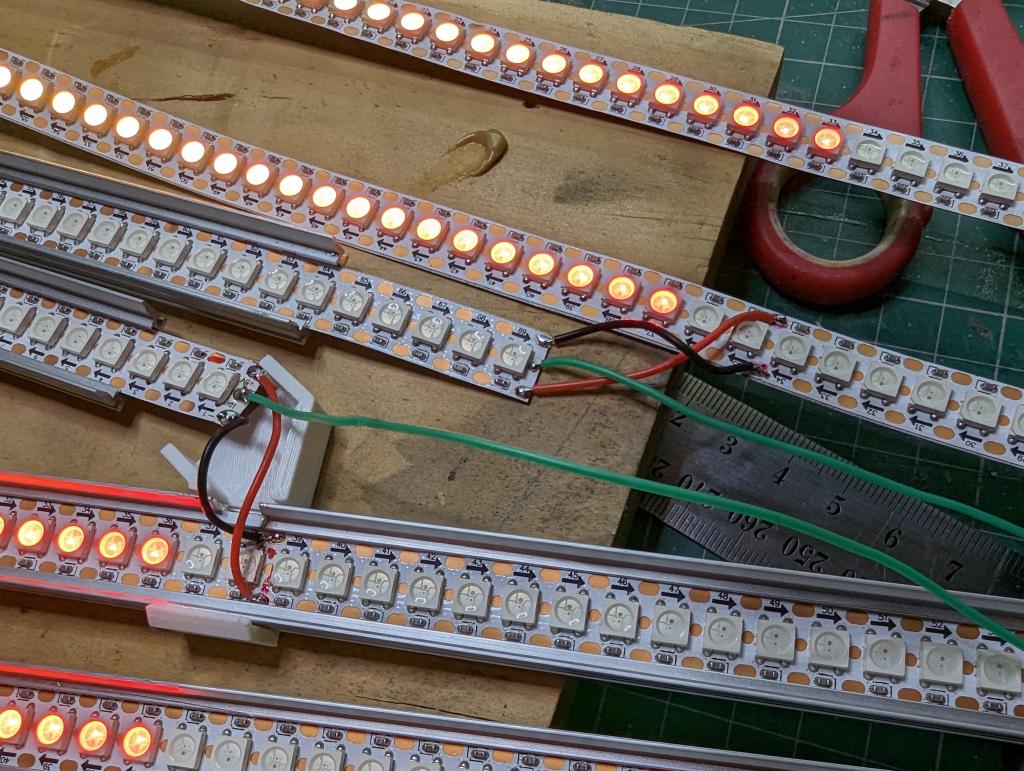
The second centre connector is the same, but the data will be reversed. Take the data from the centre connector and run a longer line down to the 3rd foot. Essentially you should be able to draw a line that shows the flow of data along the connected strip and have no cross overs
Keep going until everything is connected. Test along the way with your controller to ensure your solder joints and LEDs are good. You don't want to get to the end and have to fix one in the middle (this definitely didn't happen to me, I'm too clever for that :/ )
Putting it all together#
With all your 3d printed parts, solders LEDs and built WLED controller, you can now put it all together:
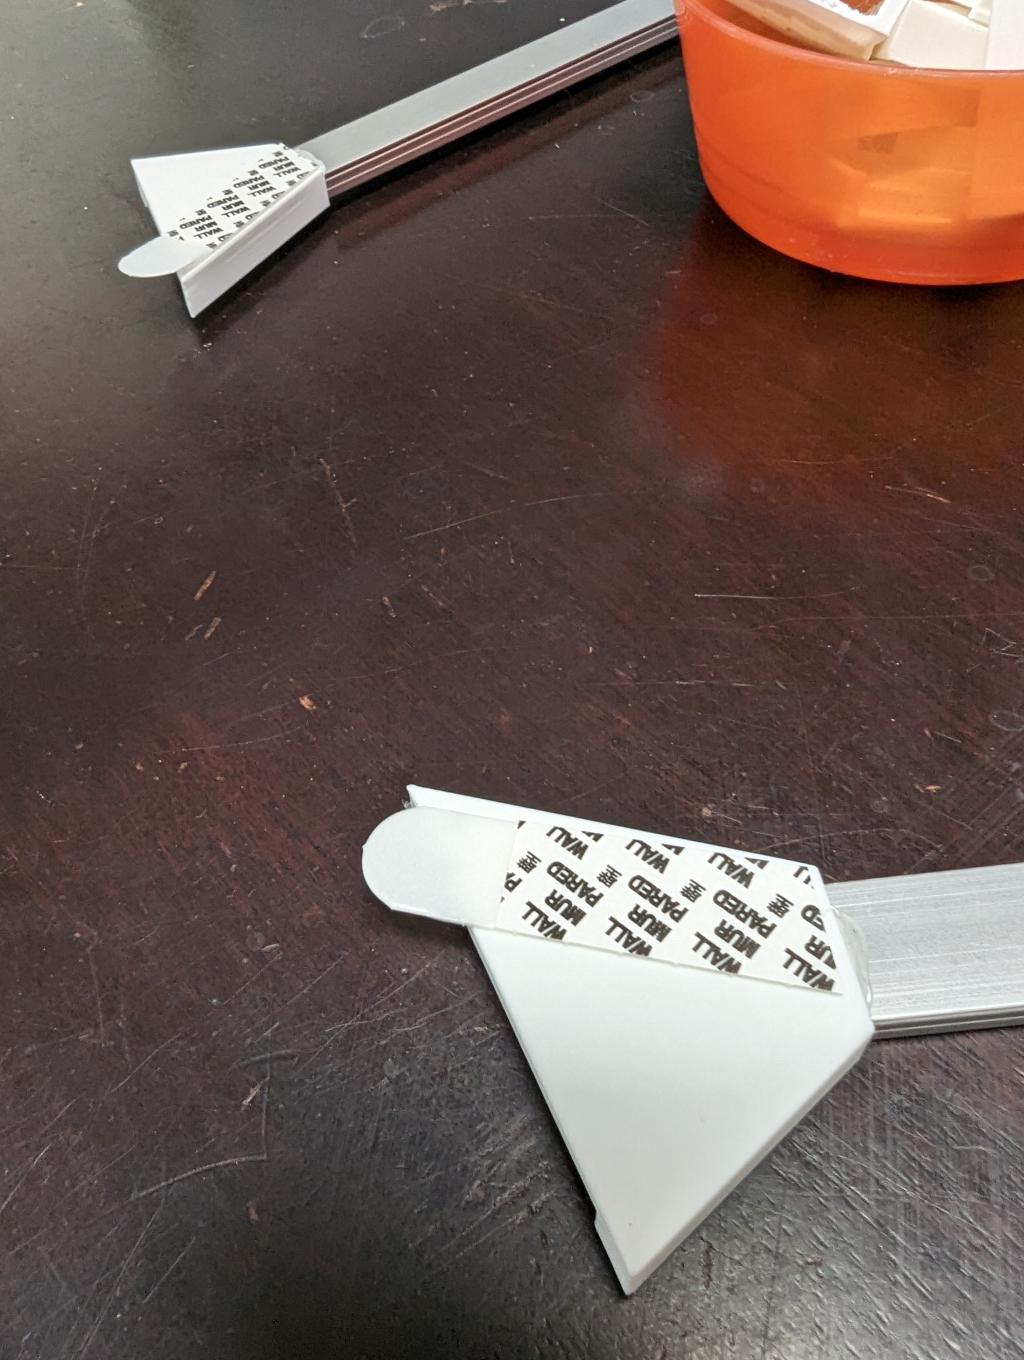
- slide the LED strips into the profiles. They fit nicely into the channel designed for them.
- slot the profiles into the feet and peaks. I drilled a hole into the top and bottom of the profile and hot glued them in
- put some 3M wall mount strips on the back of each
- carefully carry it all to the wall your want to mount it to and stick it down
- turn it on - celebrate!
If you want to build it, check out the downloads and links below!
Gallery#