Overview#
Our existing catdoor already had small plastic nuts on each side of the door that could be rotated to be either set to allow:
- fully closed - no entry or exit
- entry only
- exit only (not sure why you'd want that but, hey, you do you!)
- fully open - entry and exit
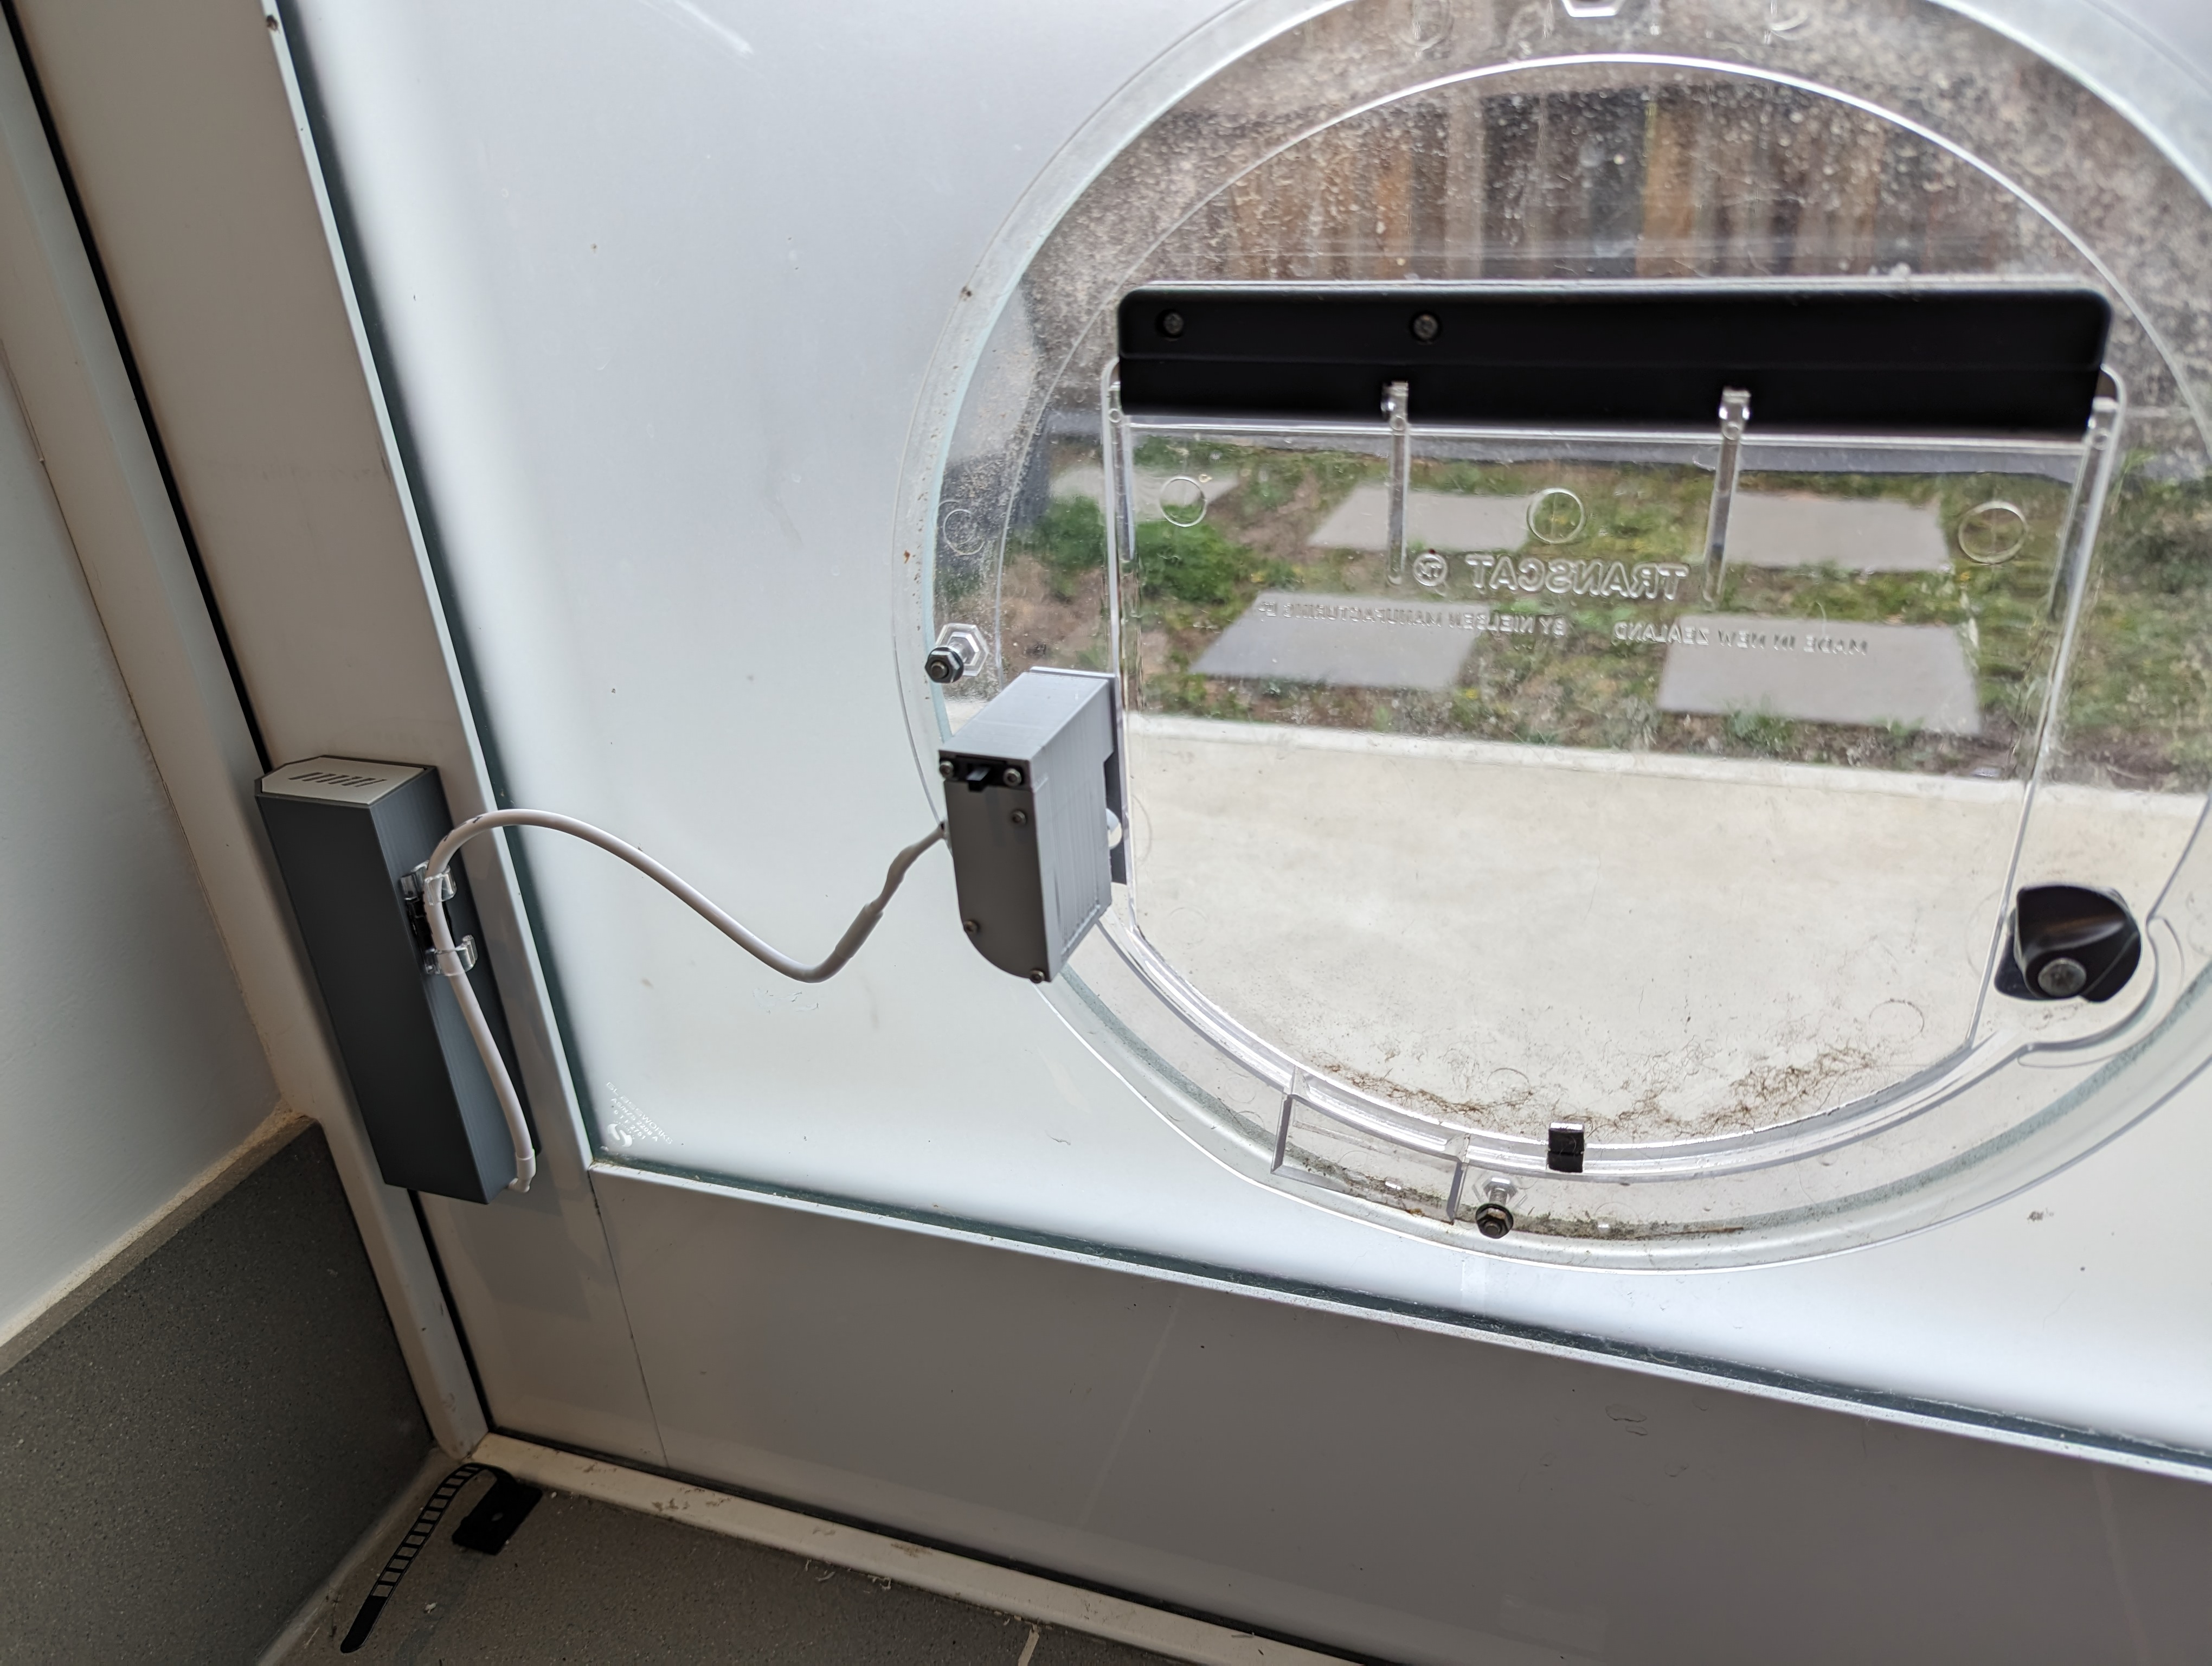
So I have removed one of these and replaced it with servo driven "arms" connected to my home automation system that would behave in much the same way.
What you'll need#
- An ESP8266 microcontroller. I used this Wemos D1 Mini board
- ESPHome is the firmware running the ESP8226 microcontroller
- An SG90 servo. These are very common.
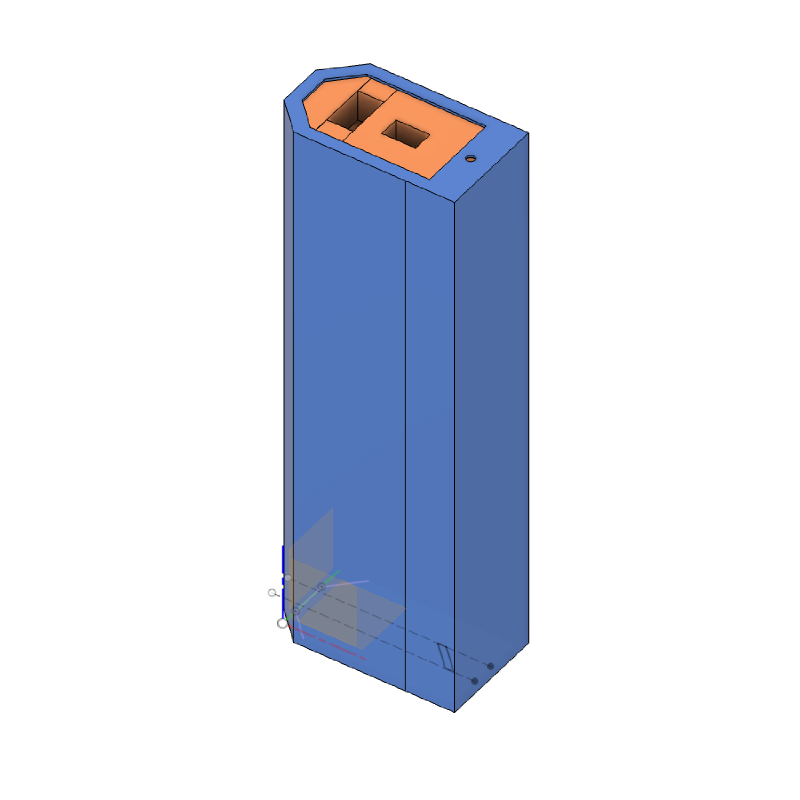
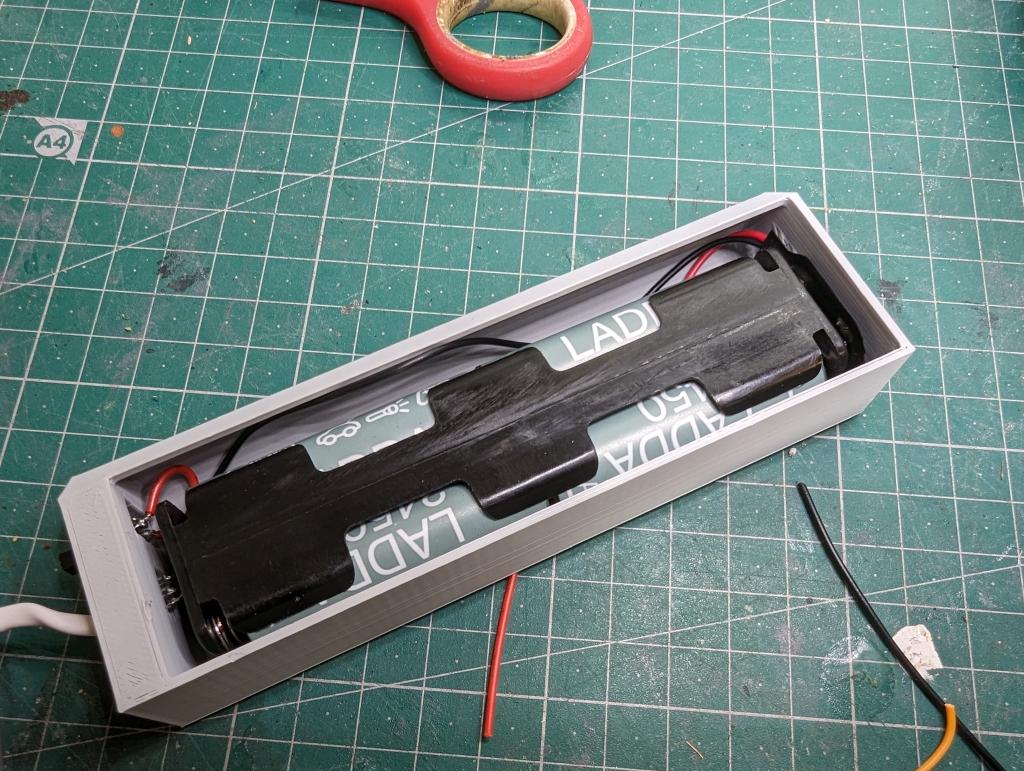
- A 4x AA Battery holder. I used a vertical type to fit on the side of the door
- Some JST connectors (in this case JST ZH 1.5 2 wire
- Some SPDT switches
- A range of M2 hex bolts
- A 3D Printer (or access to one), to print the enclosures for the servo, microcontroller and batteries.
- You'll already be using OpenHAB home automation (it should work on Home Assistant too - but I haven't tried it)
How it was done#
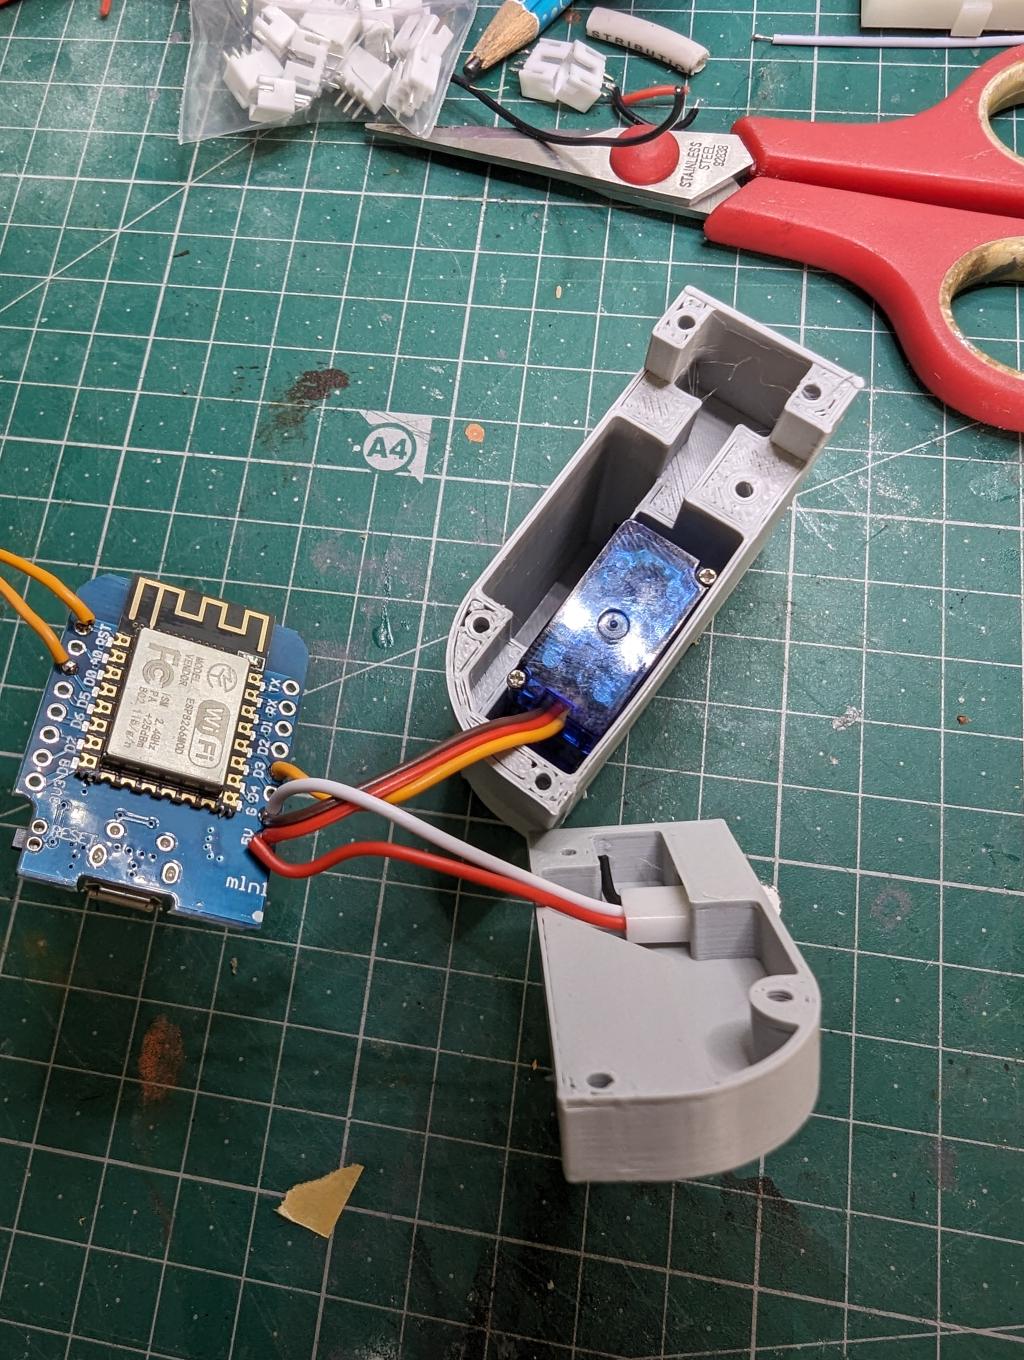
ESPhome and electronics#

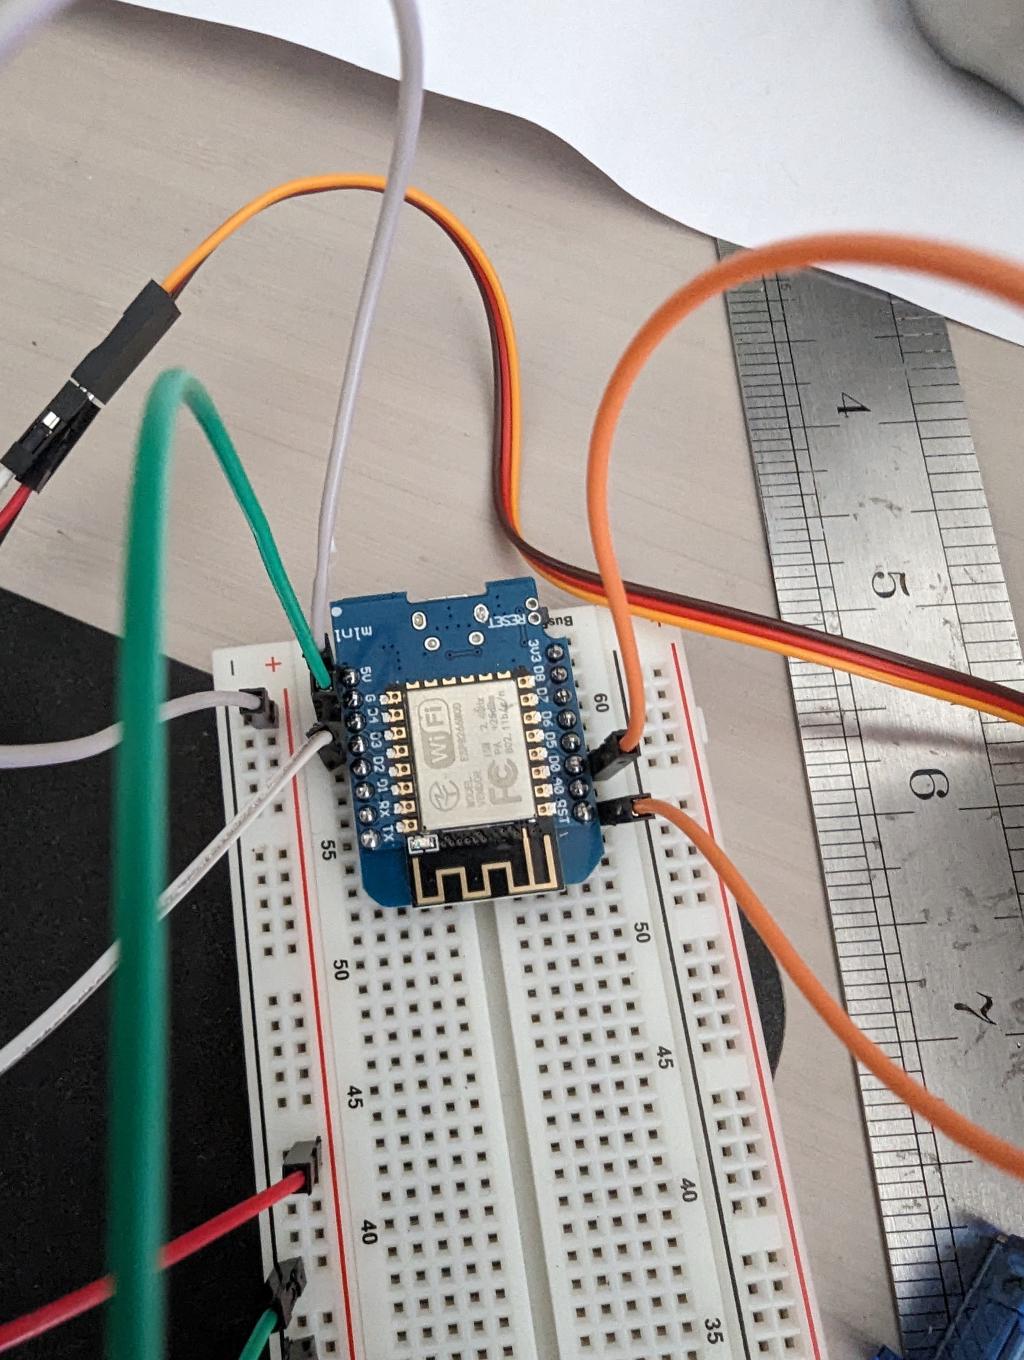
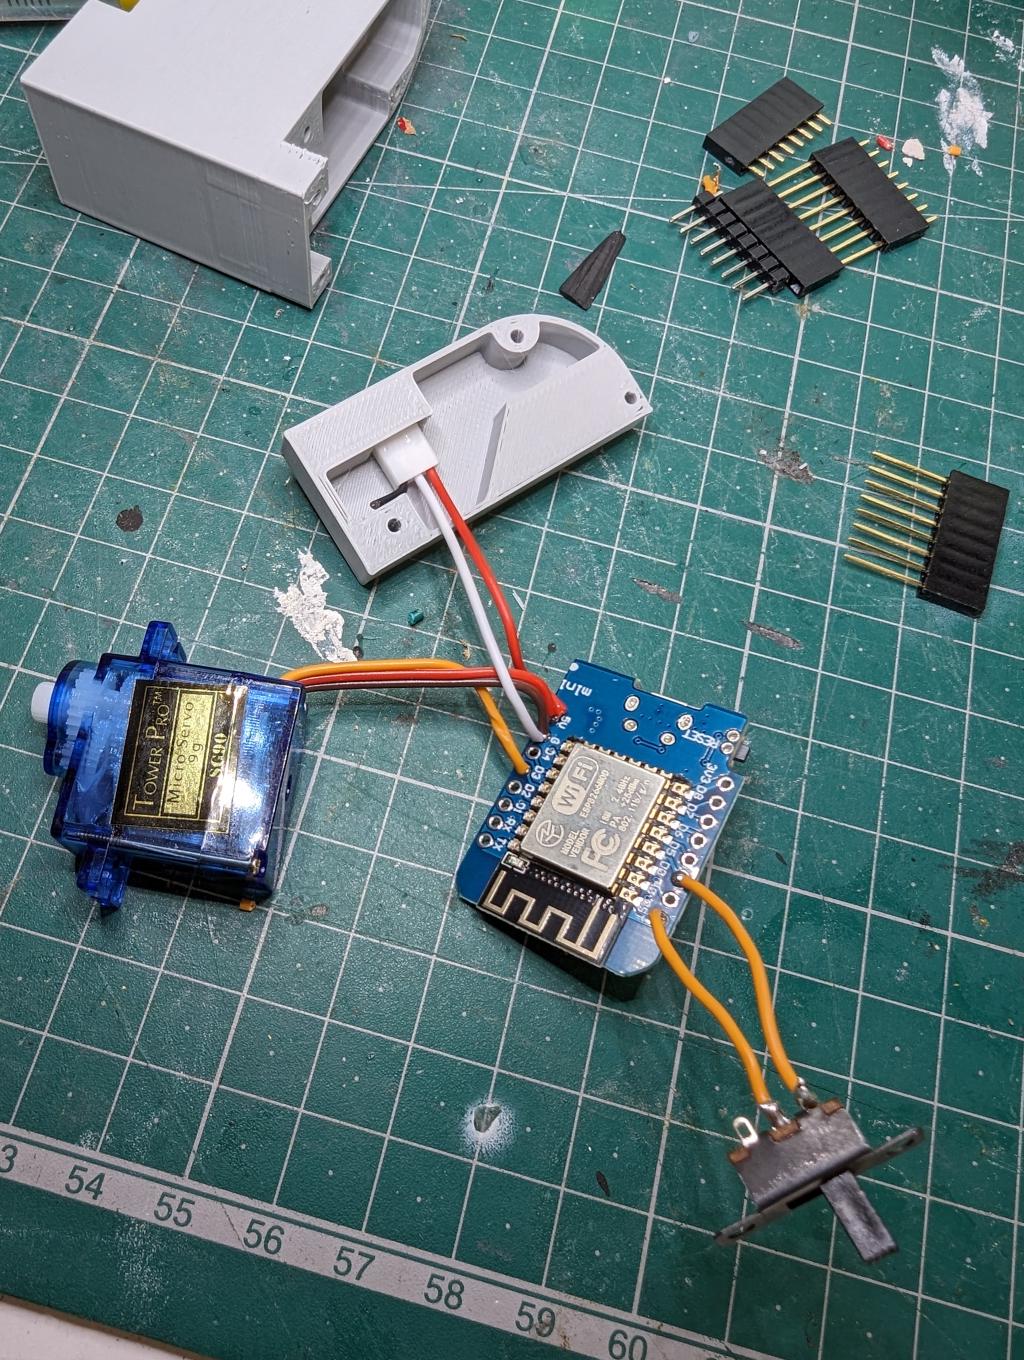
Connect everything to your ESP8266 microcontroller. It's fairly simple, as follows:
| ESP8266 GPIOs | Target |
|---|---|
| 5V | +ve on SG90 servo, +ve on JST connector |
| GND | -ve on SG90 servo, -ve on JST connector |
| D3 | data on SG90 (yellow wire on mine) |
| D0 & RST | connect a slide switch |
Note: you need the slide switch on RST & D0 to enable both sleep and flashing over USB. When shorted (ON) it will enable the ESP to successfully wake from deep sleep. If you need to reflash it over USB, you'll need to turn OFF first.
If you haven't already, you'll need to setup and install ESPHome locally . I'm on a Mac and used Homebrew to install it using:
brew install esphome
With the esphome command line installed, grab the configuration file for the catdoor
on ESPHome from Github, modify the IP addresses and MQTT Broker (see Home Automation below) addresses for your environment and flash your device. Connect the Wemos D1 Mini to your machine and run:
esphome run catdoor.yaml
You should see the firmware compile and then follow the prompts to flash your device.
Battery power#
I've setup ESPHome to be very aggressive in sleep mode. The D1 Mini isn't the most efficient board, so it will still use battery while sleeping (apparently), so I power this with 4xAA batteries in series. When fully charged, this supplies close to 6V to the board which is within allowed limits. It should run for a long time, currently waking for 480 seconds per day (5s every 15mins). Adjust these settings to your liking - I chose every 15 mins so in a worst case, the cat door would move within 15 mins of sending a command from OpenHAB.
When you're first setting things up, having it constantly go to sleep is annoying tho. To fix this, you can either:
- Enable the
OTA_modeby setting the MQTT Topichomeassistant/ota_modetoON(make sure to yes theRetainedflag). There is an OpenHAB 'Thing' to help with this, but you can do it from MQTT tooling too. - OR, comment out the
deep_sleepsection from the ESPHome config and reflash the board.
# deep_sleep:
#   id: deep_sleep_1
#   run_duration: $sleep_duration_awake
#   sleep_duration: $sleep_duration
Home automation#
This should work out of the box with Home Assistant, but I use OpenHAB, so I needed to jump thru a few hoops to get this working. The catdoor controller is setup to use an MQTT Broker to send & receive information from the home automation system. This allows it to be in deep sleep for most of the time and wake up once every 15 mins or so (you can change this in the config), check for messages and go to sleep 5 seconds later. This saves LOTS of battery!
In OpenHAB, you'll need an existing functioning MQTT Binding and have configured a Broker/Bridge - I use the eclipse-mosquitto docker container. Setting this up is beyond the scope of this project, take a look at this tutorial if you need help .
Assuming you have that working, you'll need to configure Things, Items, Rules & Sitemaps in OpenHAB.
Things#
Create a new catdoor.things file in your OpenHAB Things configuration directory (/etc/openhab/things on Linux normally):
Thing mqtt:topic:mqttBroker:catdoor "ESPHome - Catdoor (mqtt)" (mqtt:broker:yourbrokerid) {
    Channels:
        Type number : catdoor_position "Catdoor Position" [
          stateTopic="homeassistant/catdoor/number/catdoorposition/state",
          commandTopic="homeassistant/catdoor/number/catdoorposition/command",
          retained=true  // Set this option to retain command messages
        ]
        Type number : voltage "Voltage Level" [
          stateTopic="homeassistant/catdoor/sensor/vcc_voltage/state"
        ]
}

Thing mqtt:topic:mqttBroker:esphome "ESPHome Config" (mqtt:broker:yourbrokerid) {
    Channels:
        Type switch : ota_prod_enabled "OTA Enabled [prod]" [
          commandTopic="homeassistant/ota_mode",
          on="ON",
          off="OFF",
          retained=true  // Set this option to retain command messages
        ]
}
Note: I use the generic MQTT Thing here, rather than a automatically discovered ESPHome Thing. This allows you to specify retained=true on the command messages that is critical for sending messages to the device while it is in Deep Sleep.
Items#
Create a new catdoor.items file in your Items folder (/etc/openhab/items):
String Catdoor_Position_Text "Cat door setting"
Number Catdoor_Position_Number "Cat door value" (Motion) {channel="mqtt:topic:mqttBroker:catdoor:catdoor_position"}
Number Catdoor_Voltage "Current voltage [%s]" (Battery) {channel="mqtt:topic:mqttBroker:catdoor:voltage"}

Switch ESPHome_OTA_Mode_Prod   "OTA Mode [prod]" {channel="mqtt:topic:mqttBroker:esphome:ota_prod_enabled"}
Rules#
Create catdoor.js in automation/js folder (/etc/openhab/automation/js):
These rules handle two tasks:
- A cron that runs hourly to send commands to open/close the catdoor in the morning / evening. Adjust the hours and positions as you see fit.
- A rule to convert the String representation of the door state to a Number so we know how much to turn the servo. This rule also gets triggered from Sitemaps if you manually adjust the door setting.
const logger = log('catdoor');

/** schedule change to cat door position */
rules.JSRule({
  name: "Schedule updated catdoor positions",
  description: "",
  triggers: [
    triggers.GenericCronTrigger("0 0 * * * ?"), // run every hour. ensures it gets set even if device is rebooting at action time
  ],
  tags: [],
  id: "Catdoor_ScheduleChange",
  execute: (event) => {
    var now = time.ZonedDateTime.now();
    logger.info(`Got trigger to schedule catdoor position change ${now.hour()}`);

    if(now.hour() >= 19) {
      logger.info("Setting catdoor to IN ONLY on schedule");
      items.getItem('Catdoor_Position_Text').sendCommand('in only');
    } else if(now.hour() >= 6) {
      logger.info("Setting catdoor to OPEN on schedule");
      items.getItem('Catdoor_Position_Text').sendCommand('open');
    }
  }
});

/** New MQTT Generic thing method */
rules.JSRule({
  name: "Manage changes in catdoor [prod] state from UI or rules",
  description: "",
  triggers: [
    triggers.ItemStateChangeTrigger("Catdoor_Position_Text", undefined)
  ],
  tags: [],
  id: "Catdoor_Battery_Prod_MoveCatdoor",
  execute: (event) => {
    // allowed positions
    // open, in only, closed
    logger.info(`Received catdoor change to: ${event.newState}`);
    const newState = event.newState;
    let newPosition = null;

    switch(newState) {
      case "open" :
        newPosition = -100;
        break;
      case 'in only' :
        newPosition = 100;
        break;
      case 'closed' :
        newPosition = 55;
        break;
    }

    if(newPosition !== null) {
      logger.info(`Sending message to update Cat door [prod] to position: ${newPosition}`);
      var catdoor_mqtt_item = items.getItem("Catdoor_Position_Number");
      catdoor_mqtt_item.sendCommand(newPosition);
    }
  }
});
Sitemap#
Add a new line to your Sitemap where needed. This will allow you to press buttons in your mobile apps or webpages to adjust the catdoor
sitemap label="Catdoor" {
  Text label="Catdoor" {
    Switch item=Catdoor_Position_Text label="Cat door" icon="door" mappings=['open'='Open','in only'='Entry only','closed'='Closed']
    Text item=Catdoor_Voltage icon=battery
    Switch item=ESPHome_OTA_Mode_Prod
  }
}
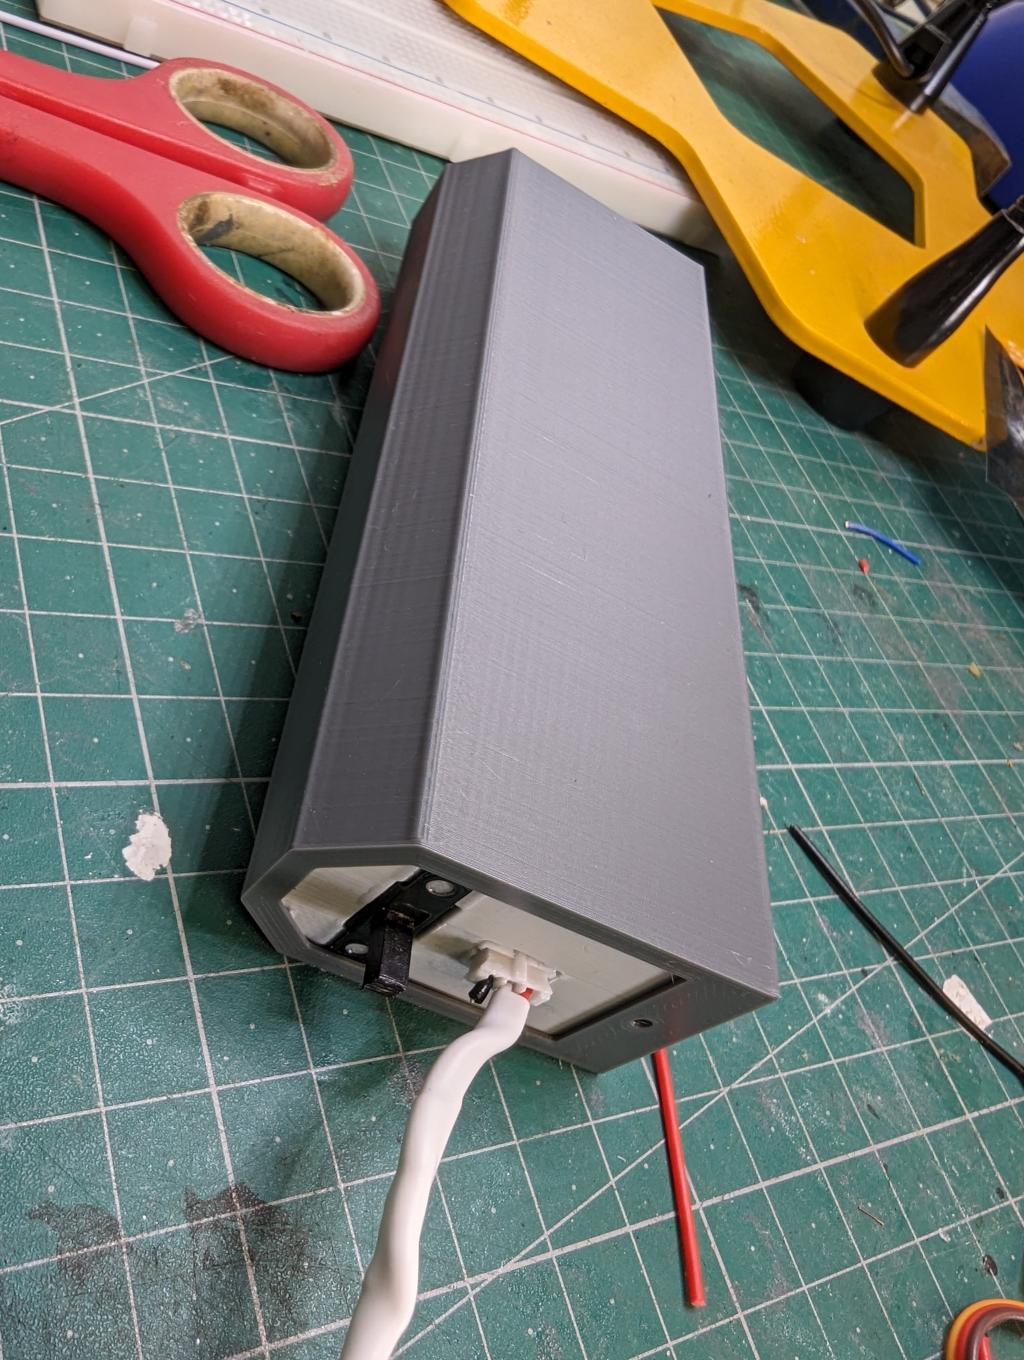
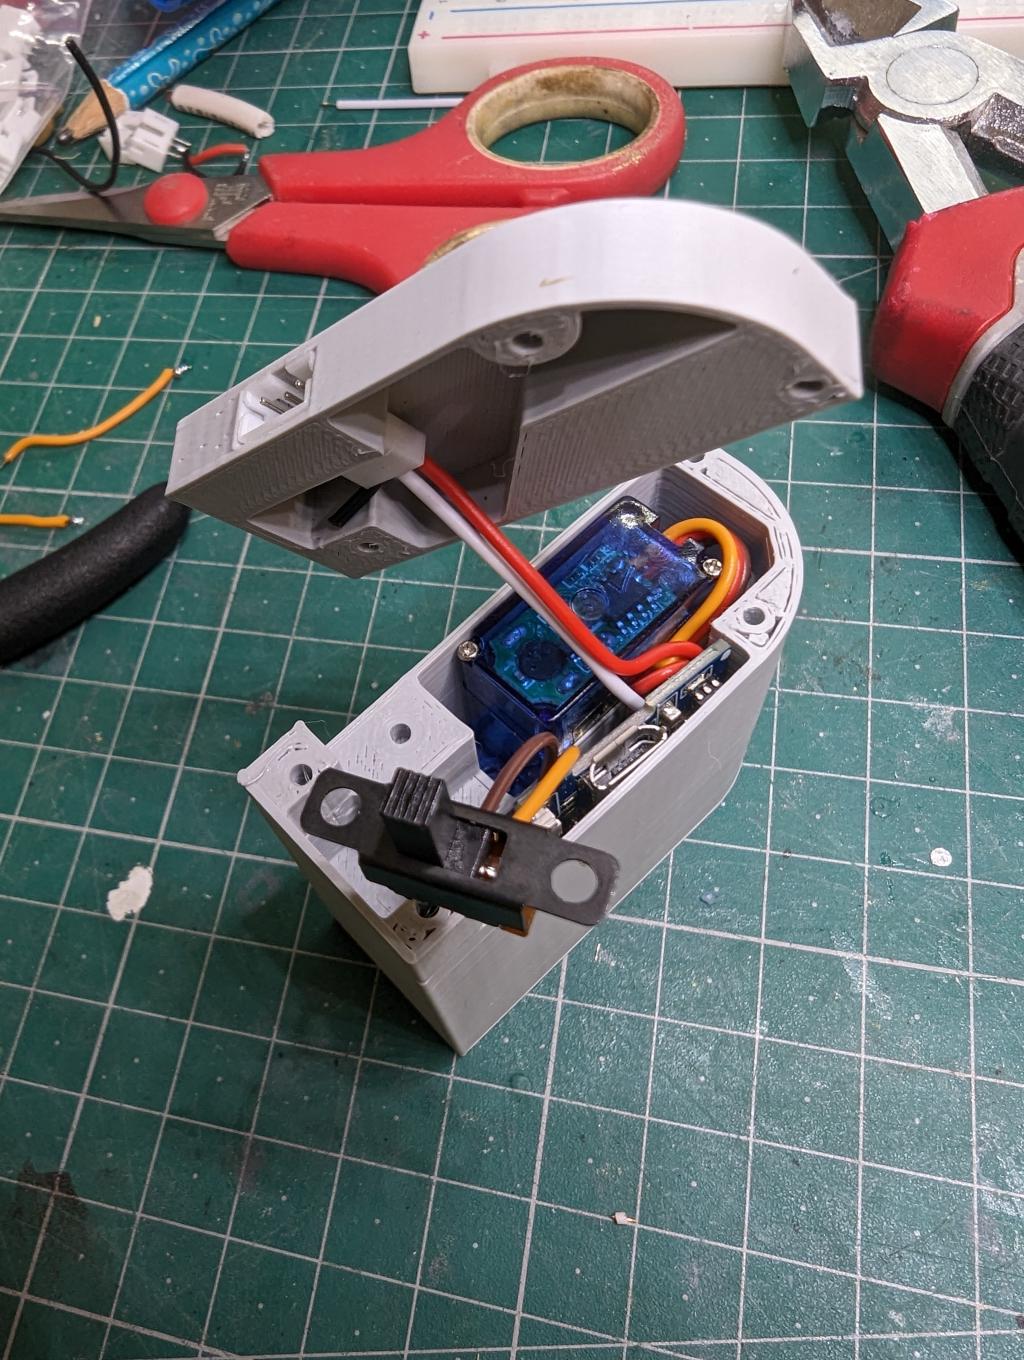
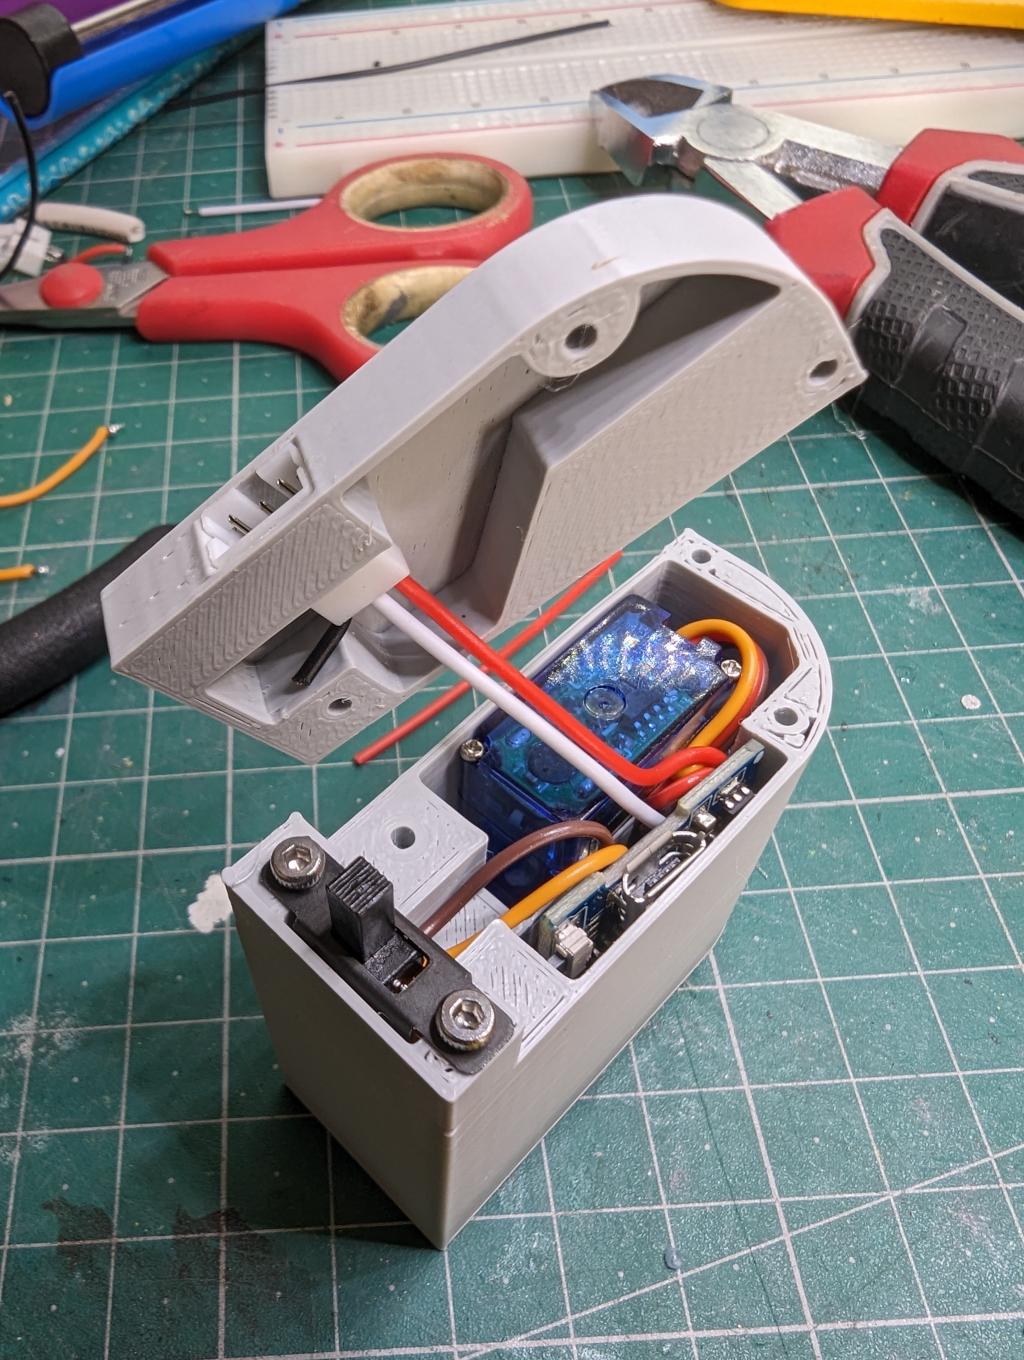
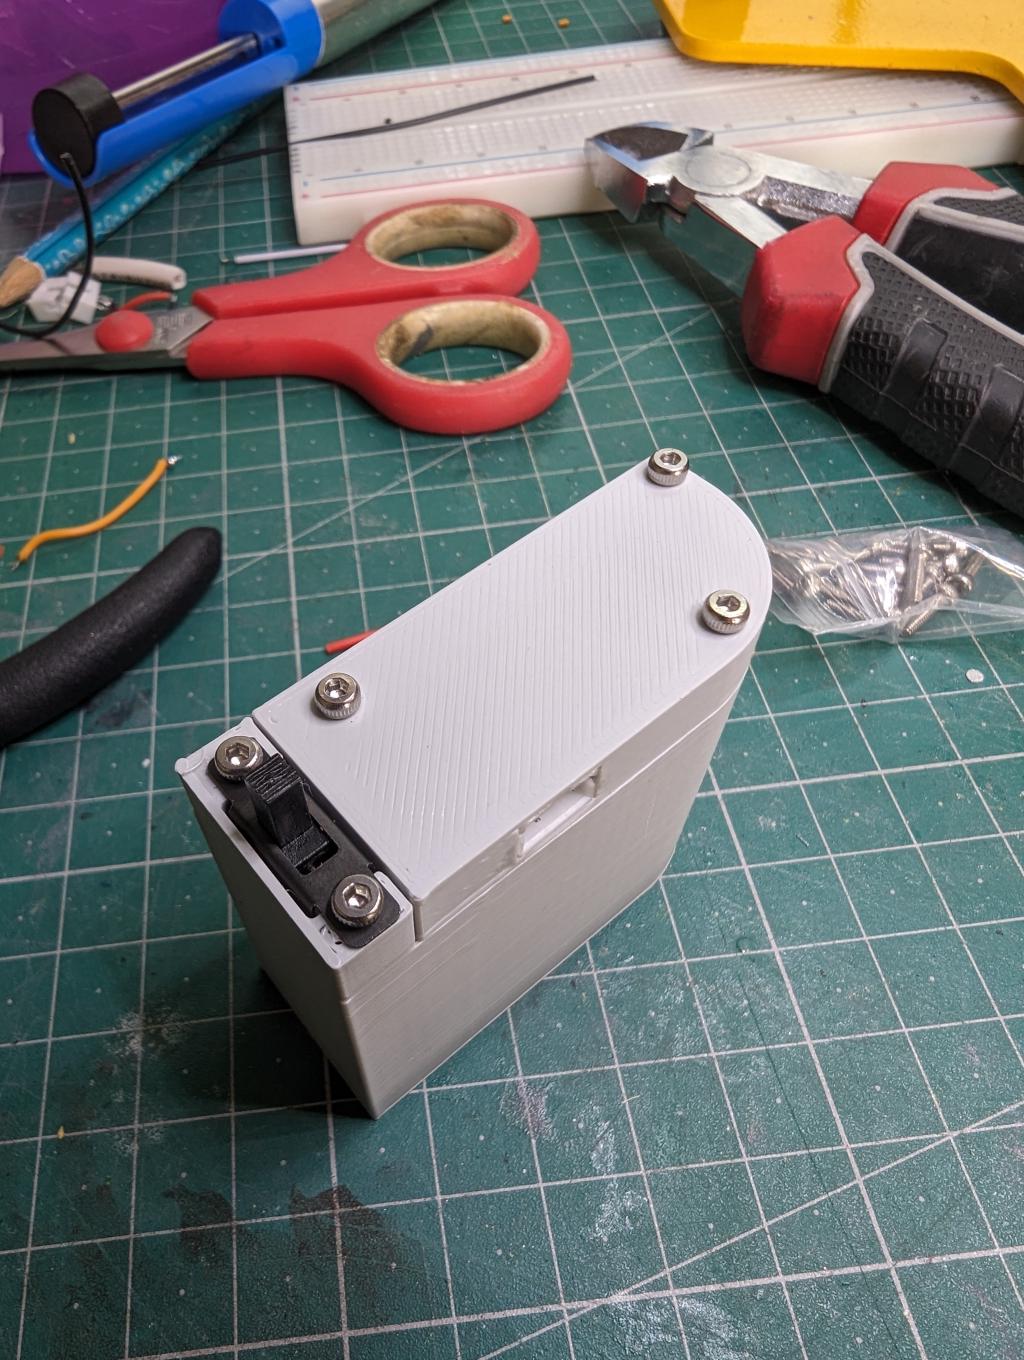
Enclosures#
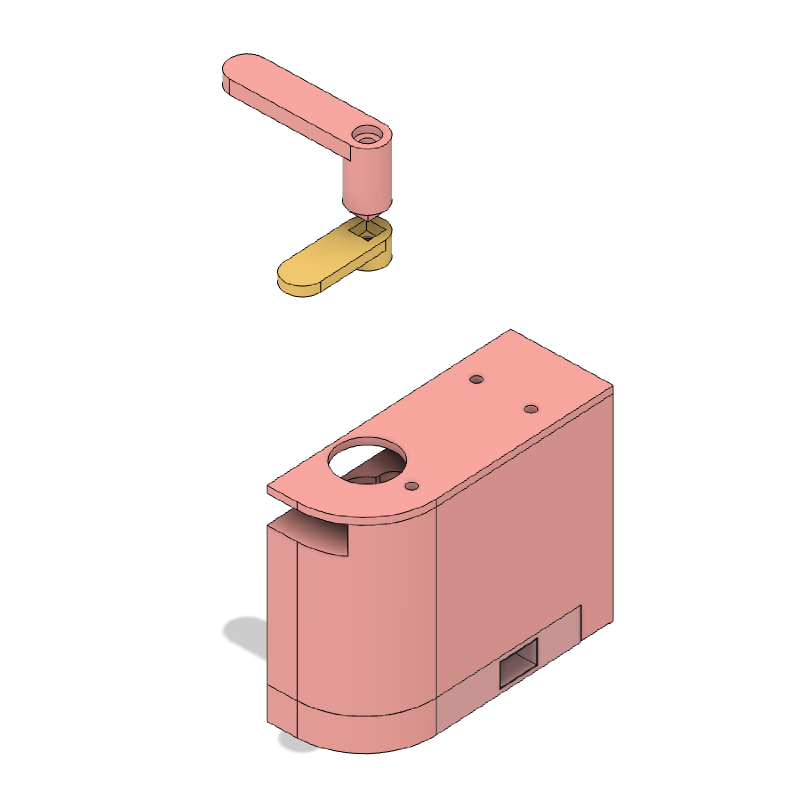
Servo & controller enclosure#
The main enclosure has 5 seperate parts:
- Main body
- Rear door
- Front panel (this goes on the outside of the catdoor)
- 2 x arms - these connect to the servo and do the actual catdoor opening/closing
Grab a zip file of the STL and Fusion360 files if you want them below. The project is also on Printables
Battery holder#
Troubleshooting#
With all the OpenHAB configuration in place, if you have the ESP8266 flashed with the firmware, the servo is connected and it's all powered, you should be able to control it now from your sitemap. By default it will be going to sleep for 15 mins and staying awake for only 5 seconds. You can switch the OTA_mode on by turning the switch itemESPHome_OTA_Mode_ProdtoON.
If you're having trouble, grabMQTTXorMQTT Explorerto check what is being sent via MQTT. You should see the OTA Topic being set correctly and you should be able to read the debug log from the ESP8266. Alternatively, you can also try viewing the logs from theesphomecommand line:
esphome logs catdoor.yamlGallery#

Attachments#
- Cat door main body STLs - 3d printables (zipped)
- AA battery case STLs - 3d printables (zipped)
- Cat door and battery case Fusion360 projects (zipped)