Life-Size Minecraft Diamond Sword with Motion-Reactive LED Lighting
Table of Contents
Overview#
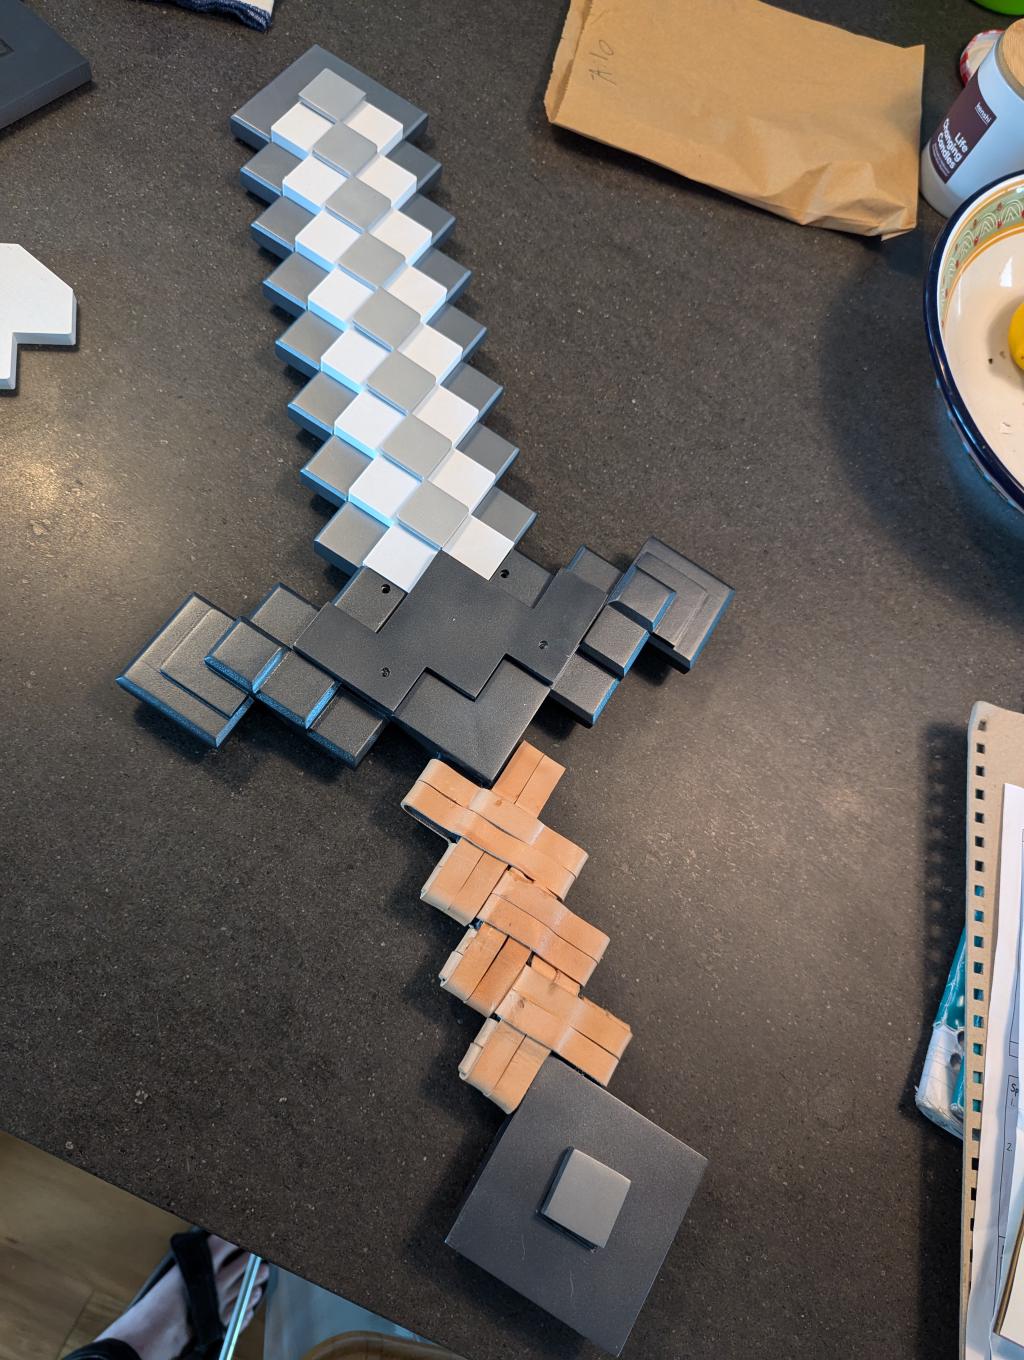
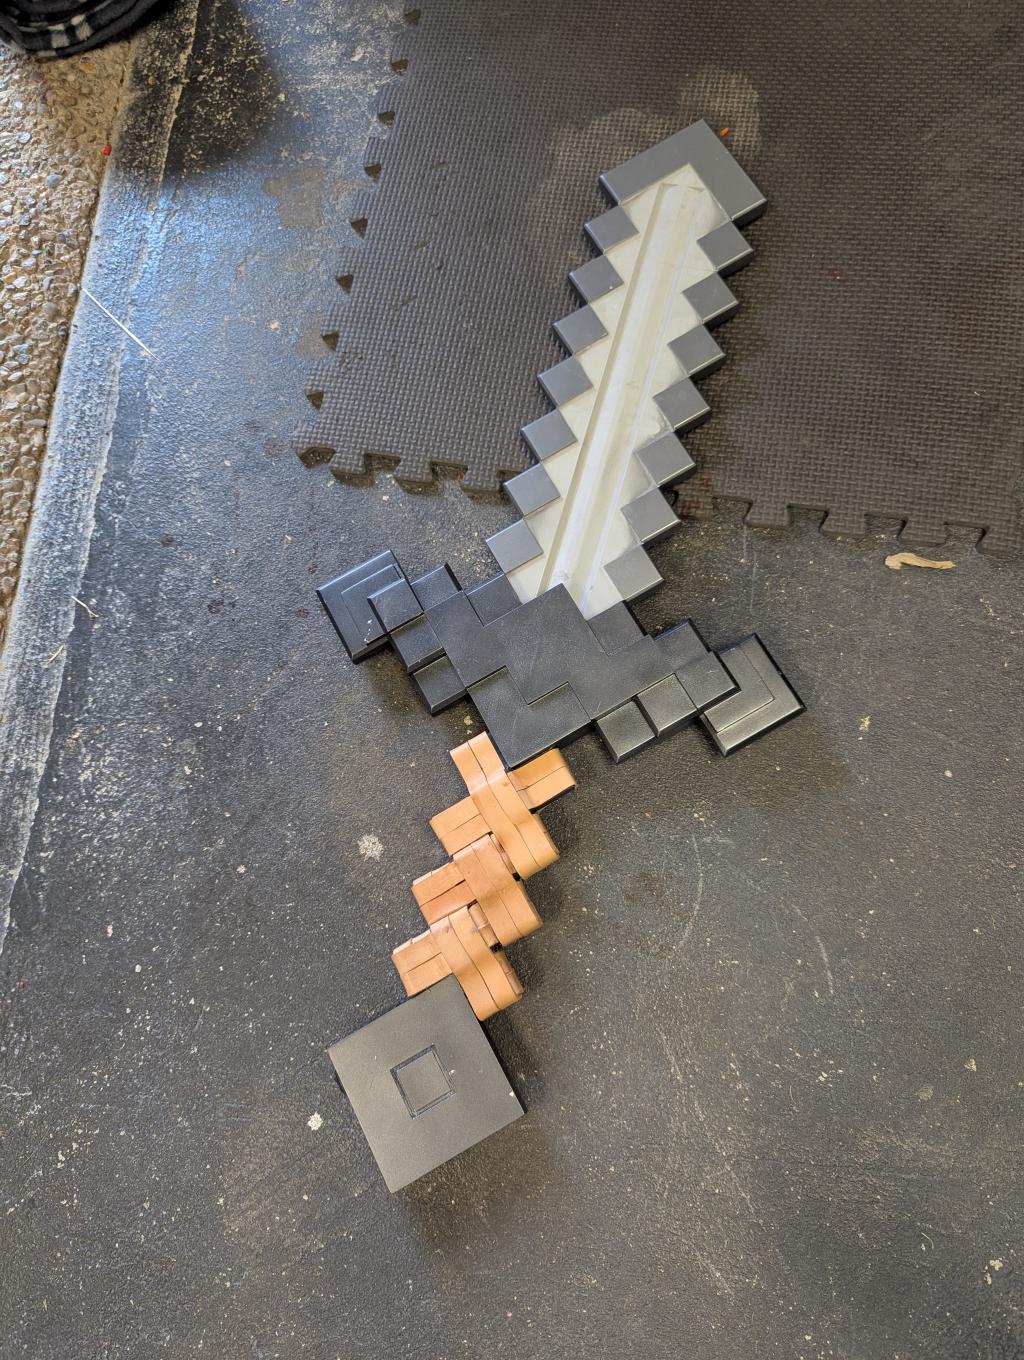
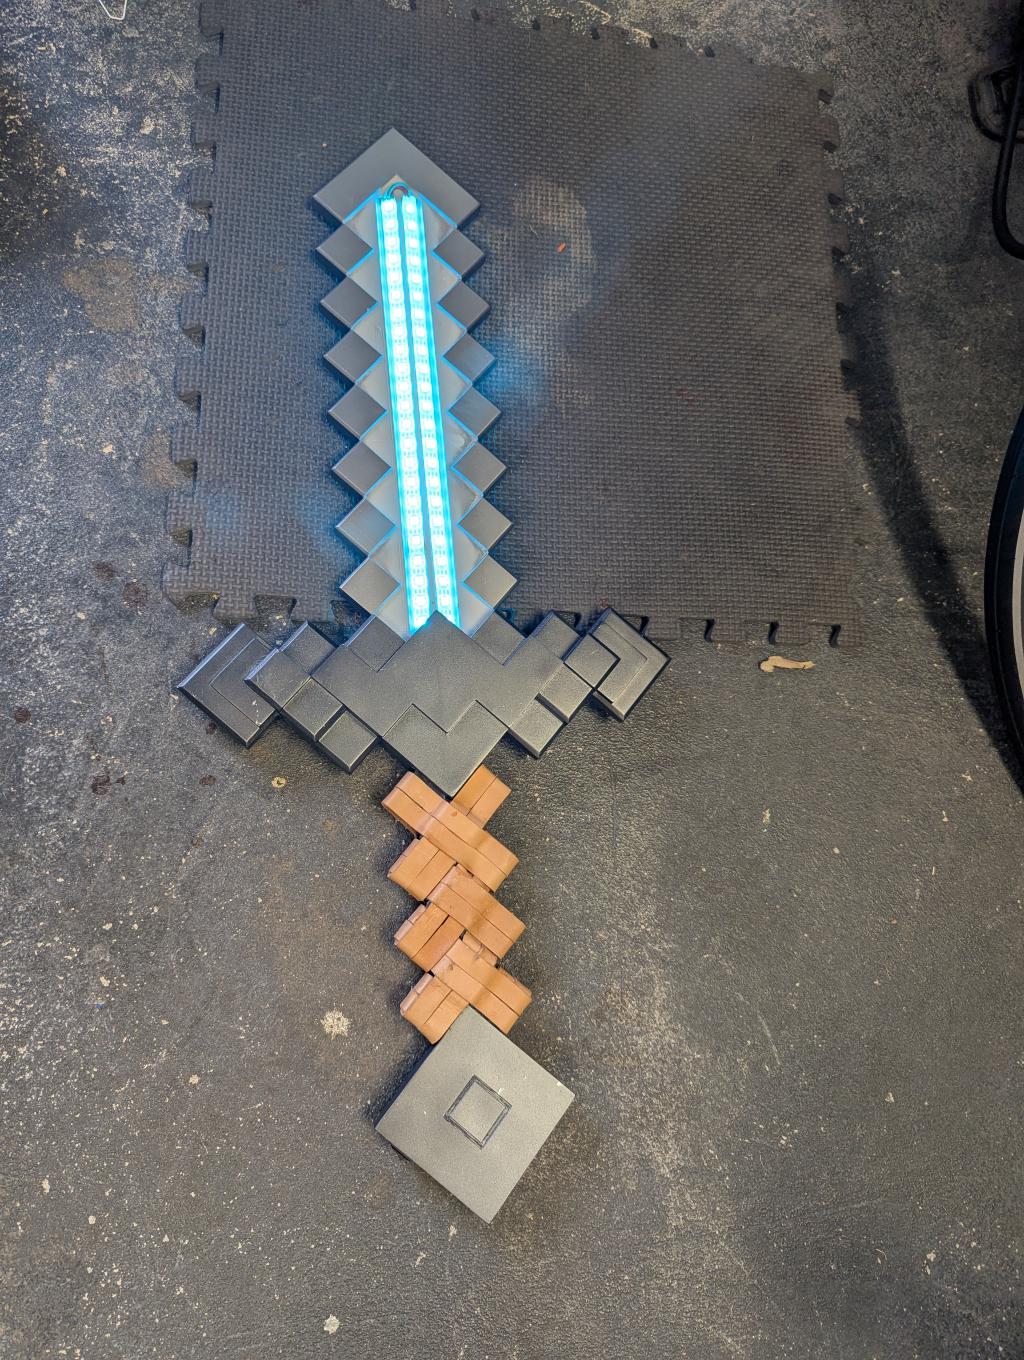
What started as a simple suggestion from my child Meika about one of her original characters having a Minecraft sword turned into an ambitious project combining 3D design, electronics, and programming. The result? A 710mm (2'4") life-size diamond sword that lights up and reacts to movement!
After learning from previous projects (like my Great Frostblade where the lighting broke after assembly), I designed this sword with serviceability in mind, making the electronics accessible for maintenance and upgrades. This approach has already proven valuable, as the gyro has needed attention after Meika took the sword to various events and conventions.
Key Features#
- Life-size dimensions: 710mm long (2'4") × 310mm wide (1')
- Motion-reactive lighting: Uses an MPU-6500 accelerometer to change lighting patterns based on movement
- Customized WLED firmware: With a custom usermod for processing gyro input
- Rechargeable: Built-in LiPo battery with USB charging port
- Modular design: Separates into blade and hilt sections for easier maintenance
- Durable construction: Internal fiberglass rods for structural integrity
Major build elements#
3D Printed Components#
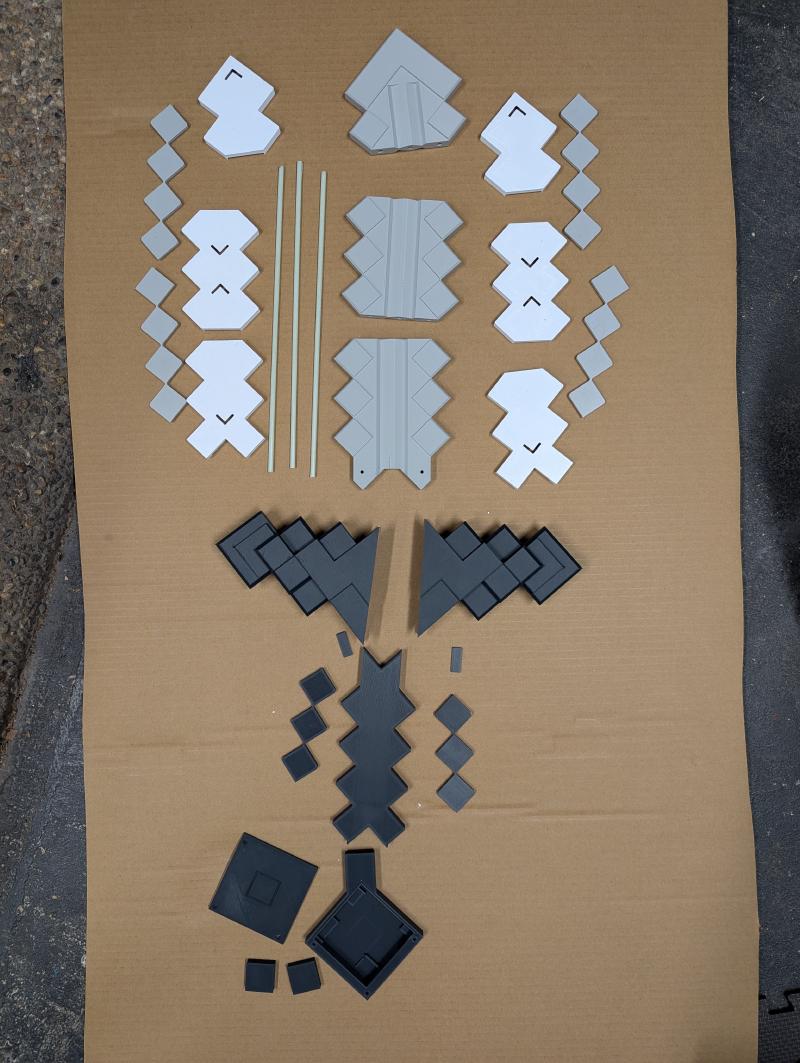
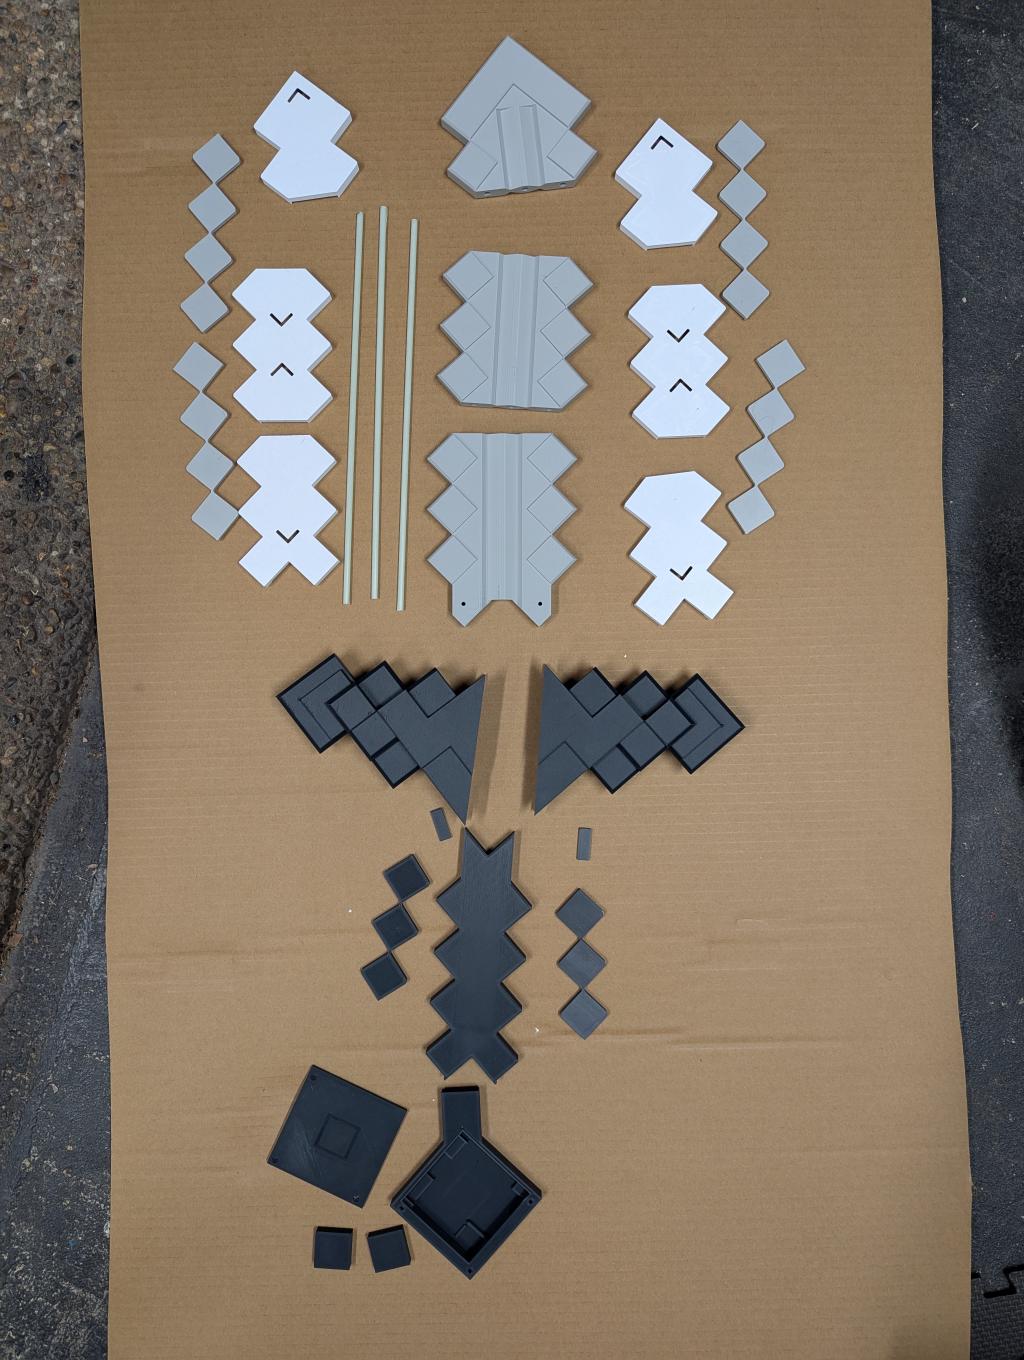
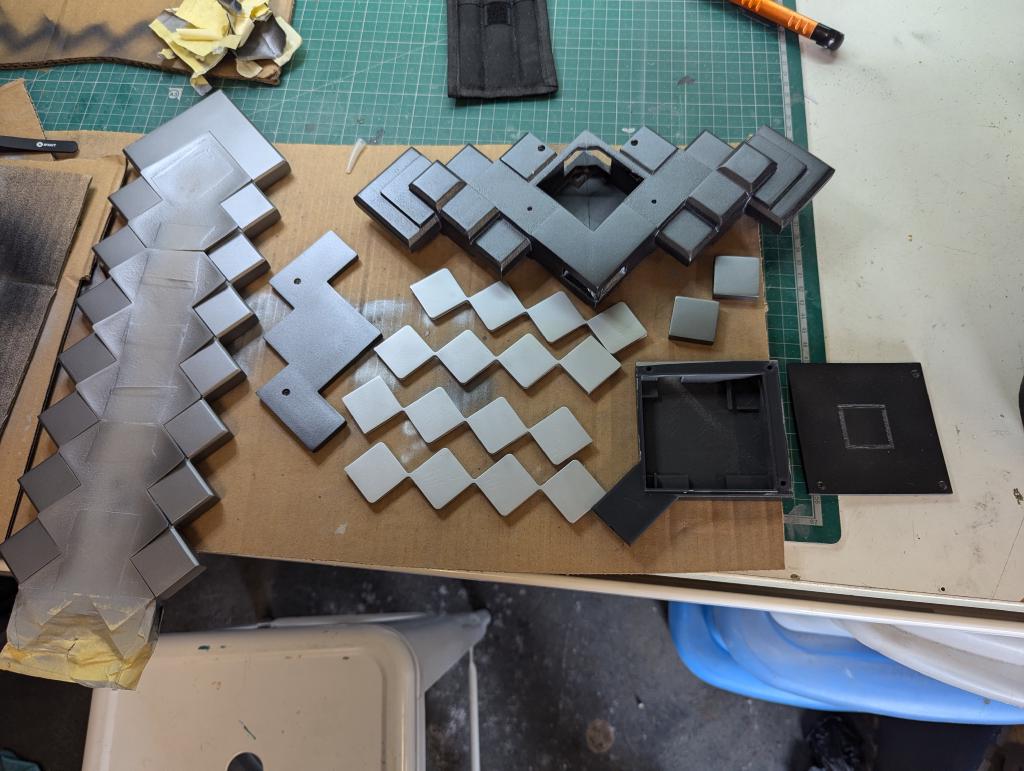
The sword consists of 23 separate PLA parts that come together to form two main assemblies: the blade (which houses the LEDs) and the hilt/handle (containing the electronics).
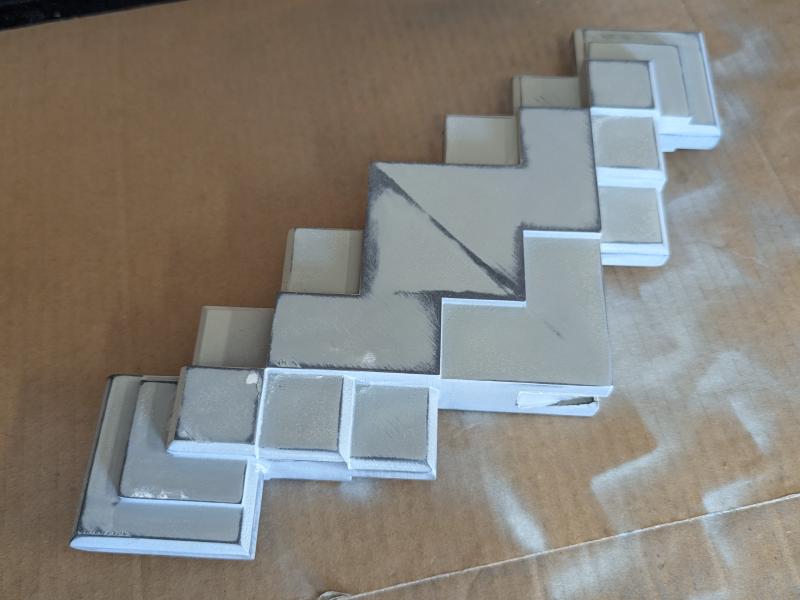
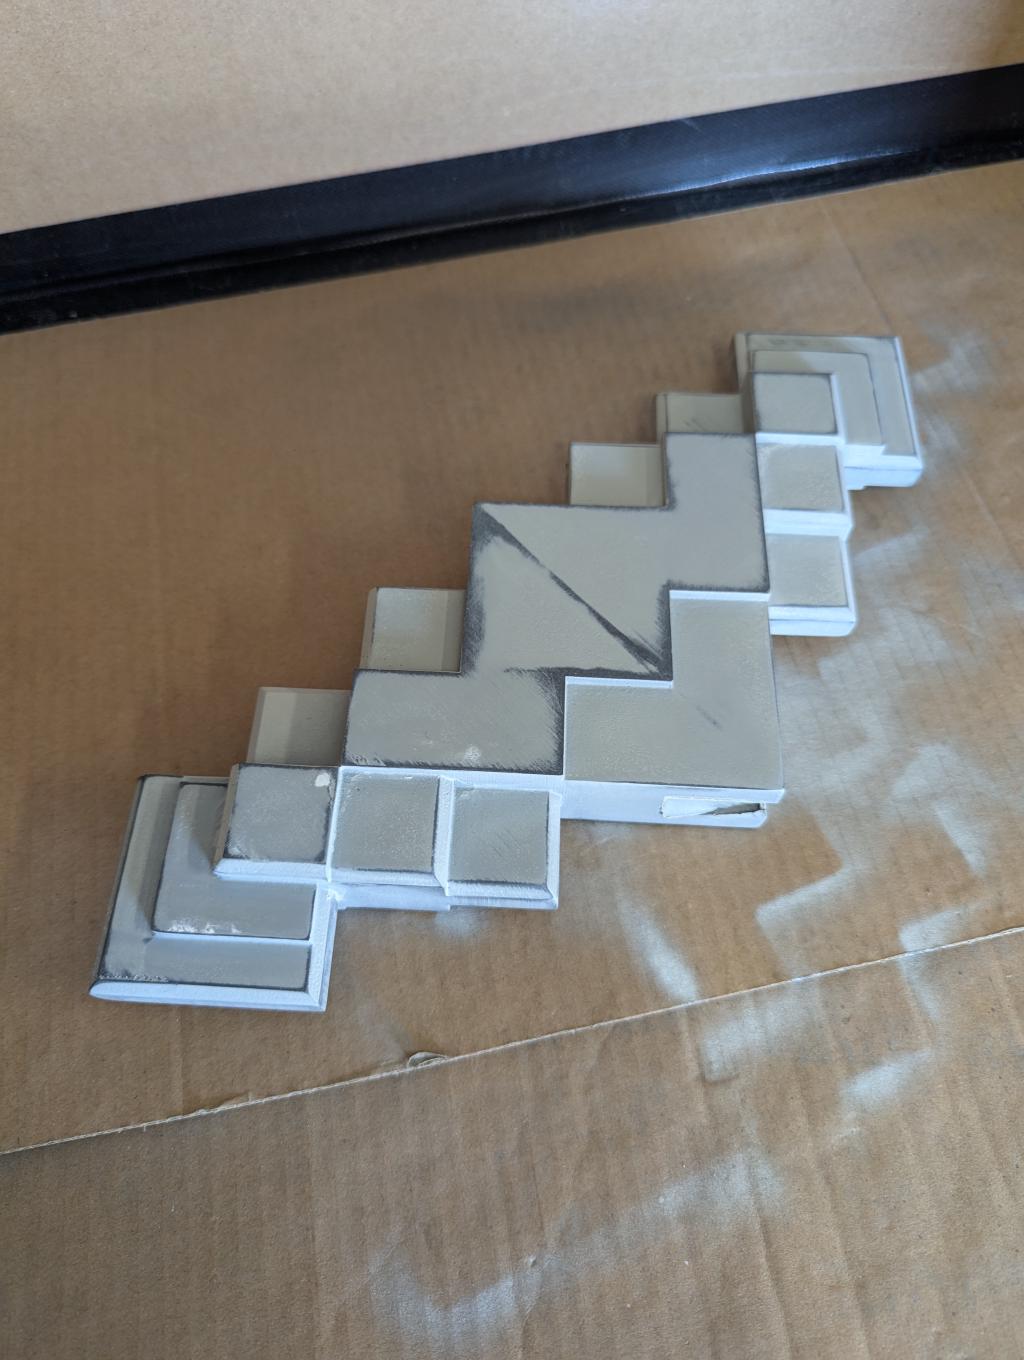
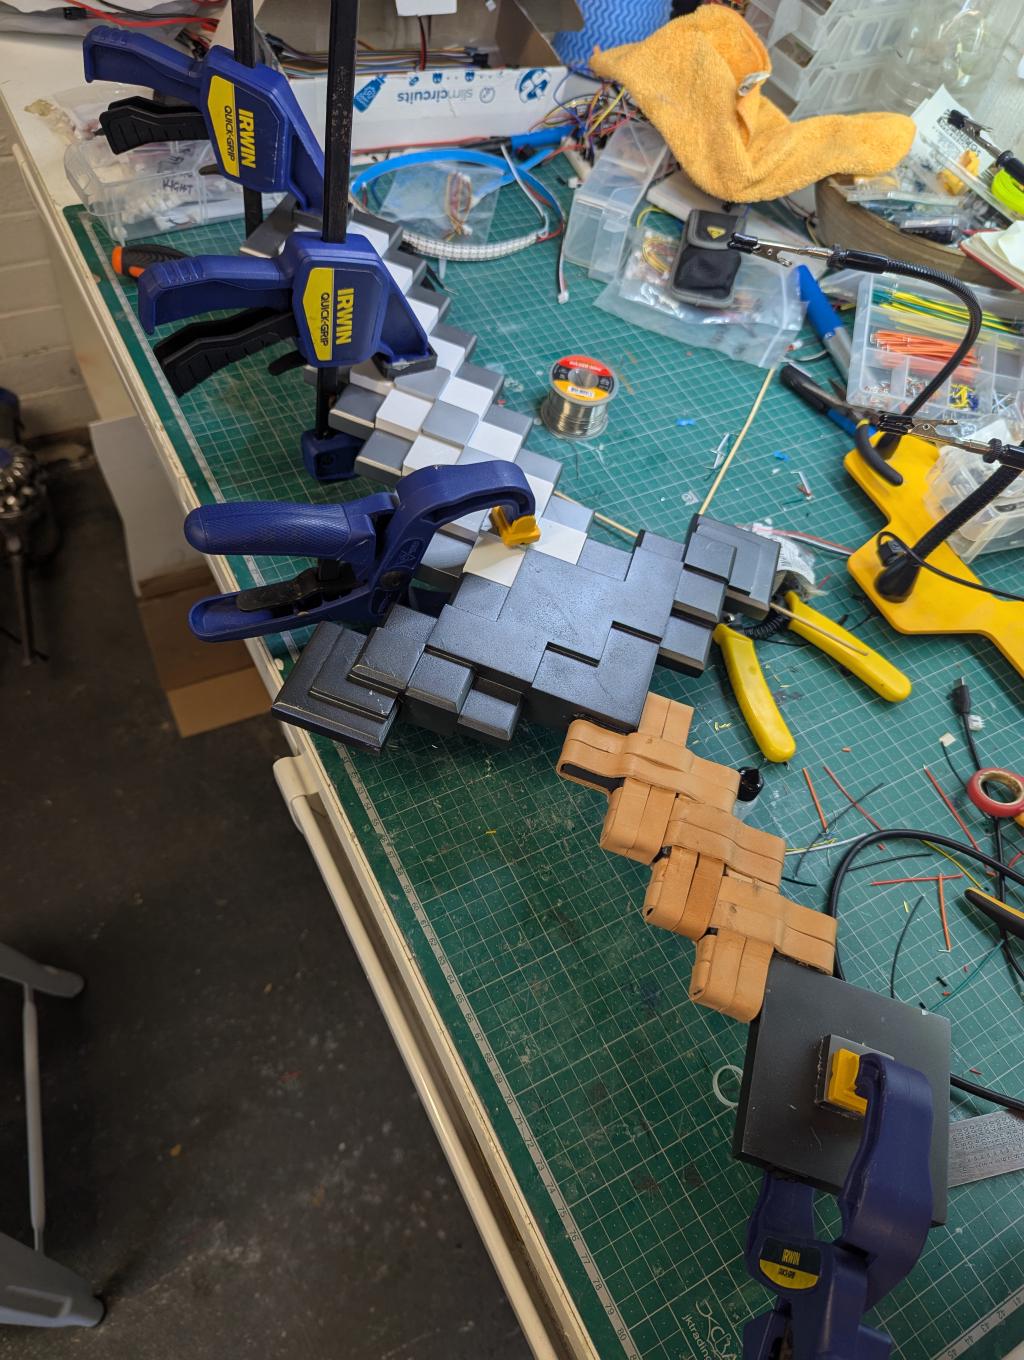
After printing, I assembled each of the main compents, glued where needed with SCIGRIP Weld-On #16 which I use for constructing all my PLA projects. It really holds on for dear life once glued. Each part then gets a few rounds of automotive spray putty and sanding. Each round going up in smoothness, up to 400-600 grit. Really depends on how much patience you have!
Once done, a few coats of appropriate paint with the airbrush and the parts are looking pretty good!
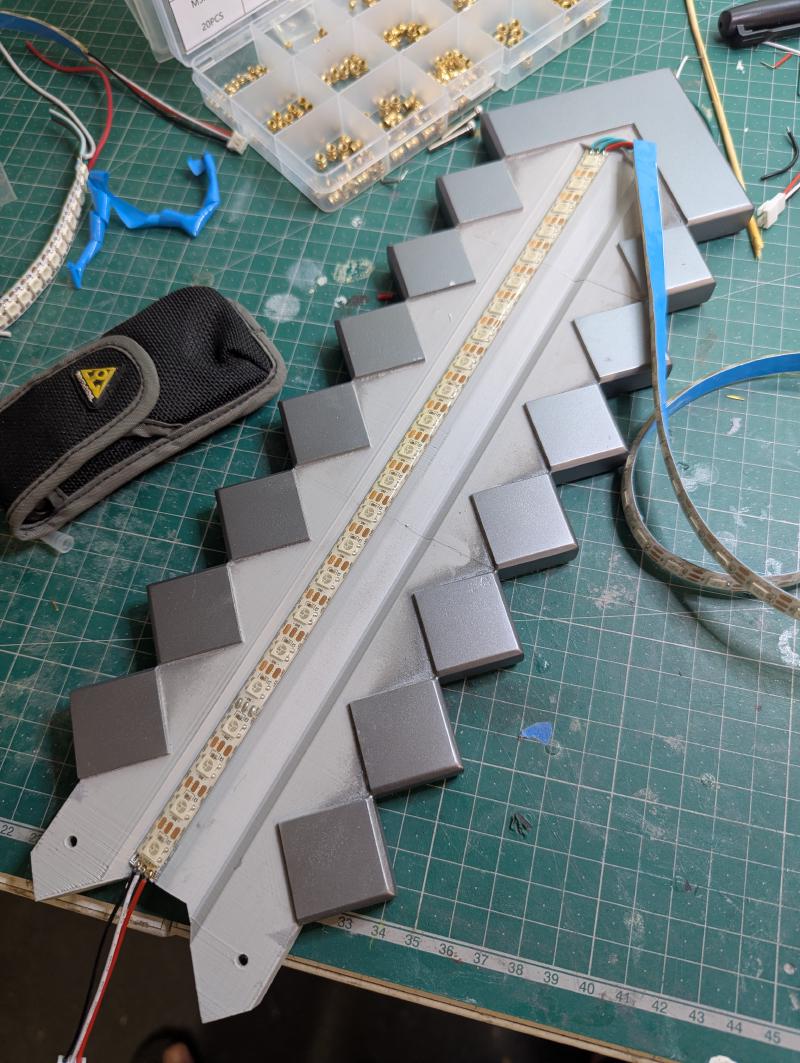
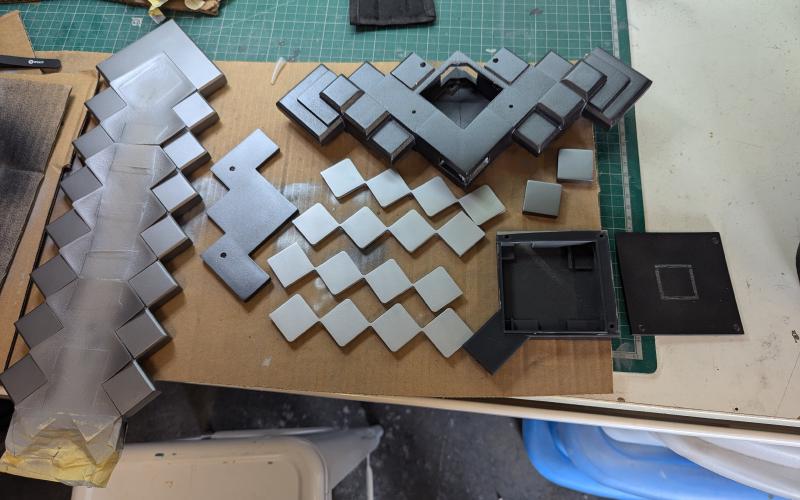
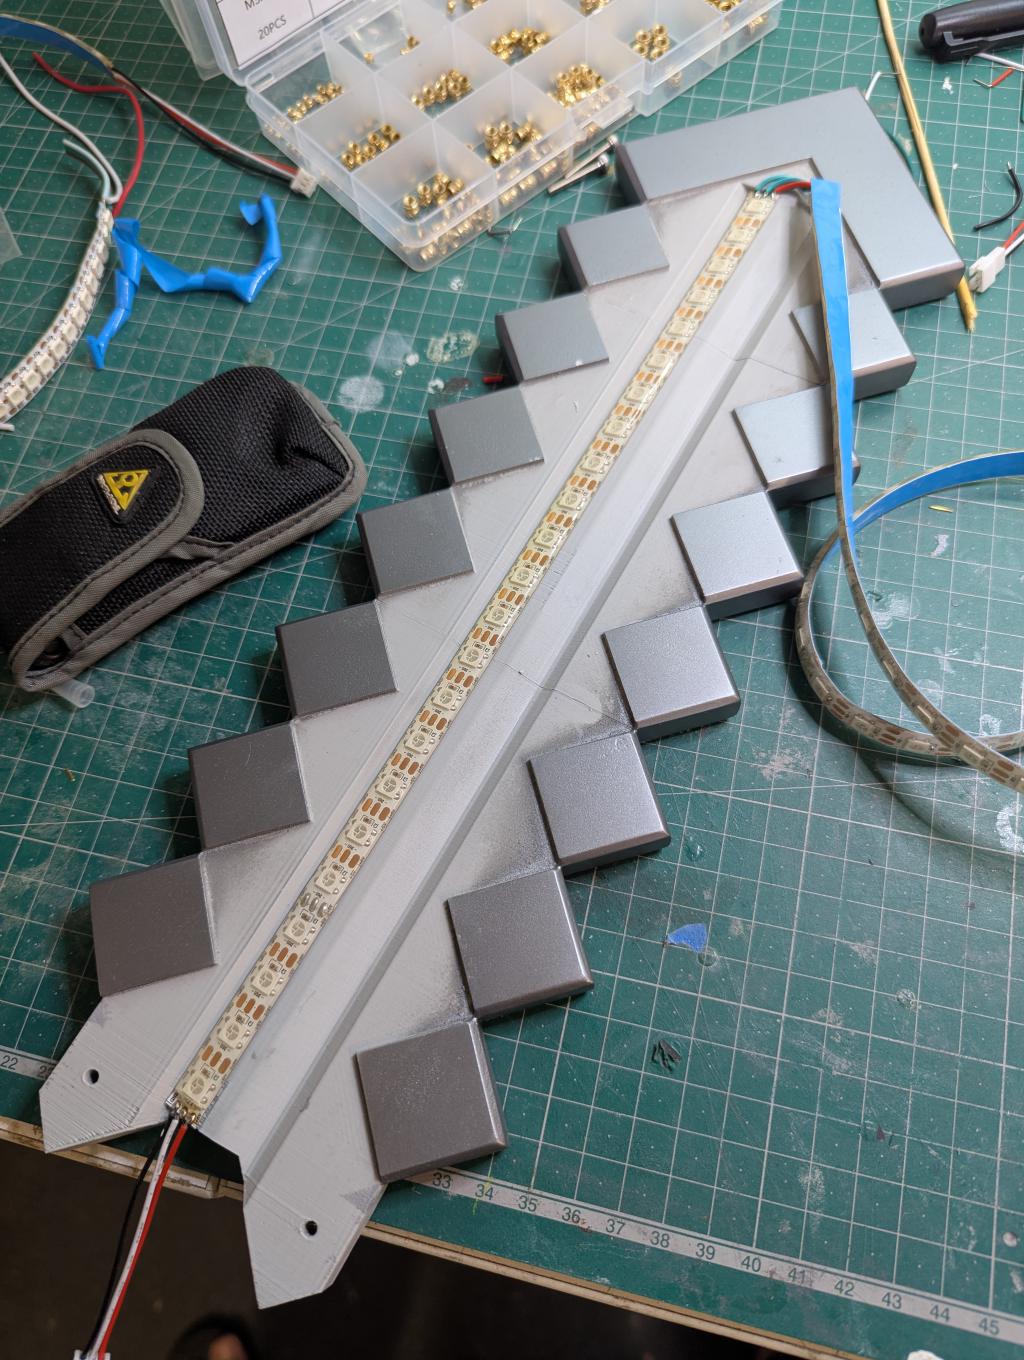
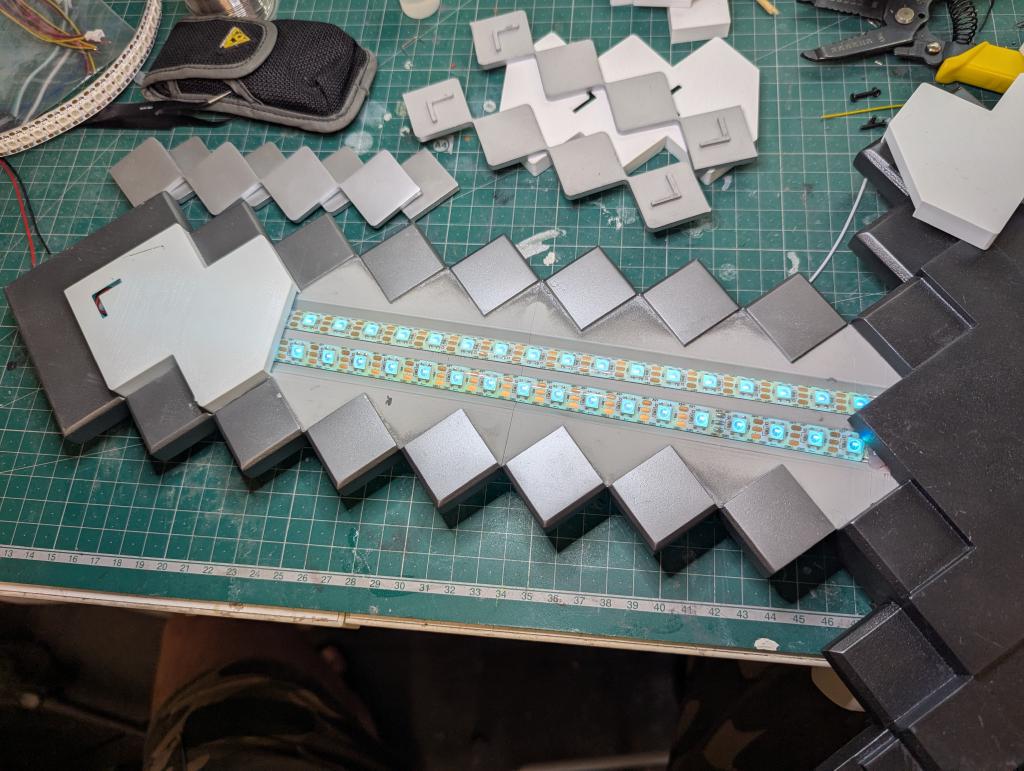
The blade has a few rails ready to accept the LED strips. These are prepared in 4 sections, all wired in series. We’ll set them up later as segments in WLED.

With the LEDs in, the specially designed diffuser printed intentionally thin (3-4 layers) can be added on top to create the glow effect when the LEDs are active. There are small notches on the diffusers to accept the top layer of blocks. These get glued in with SCIGRIP and the notches make sure they get lined up perfectly.
I wrapped the handle in some leather strap. You could paint it instead, but this gives it nice look and feel. When all assembled, you get this!

For assembly, I used a combination of:
- SCIGRIP Weld-On #16 adhesive for permanent joints
- Hex screws (various lengths) and threaded inserts to connect the blade to the hilt & handle, cover the electronics bay and cover the battery compartment.
LEDs and Controller#
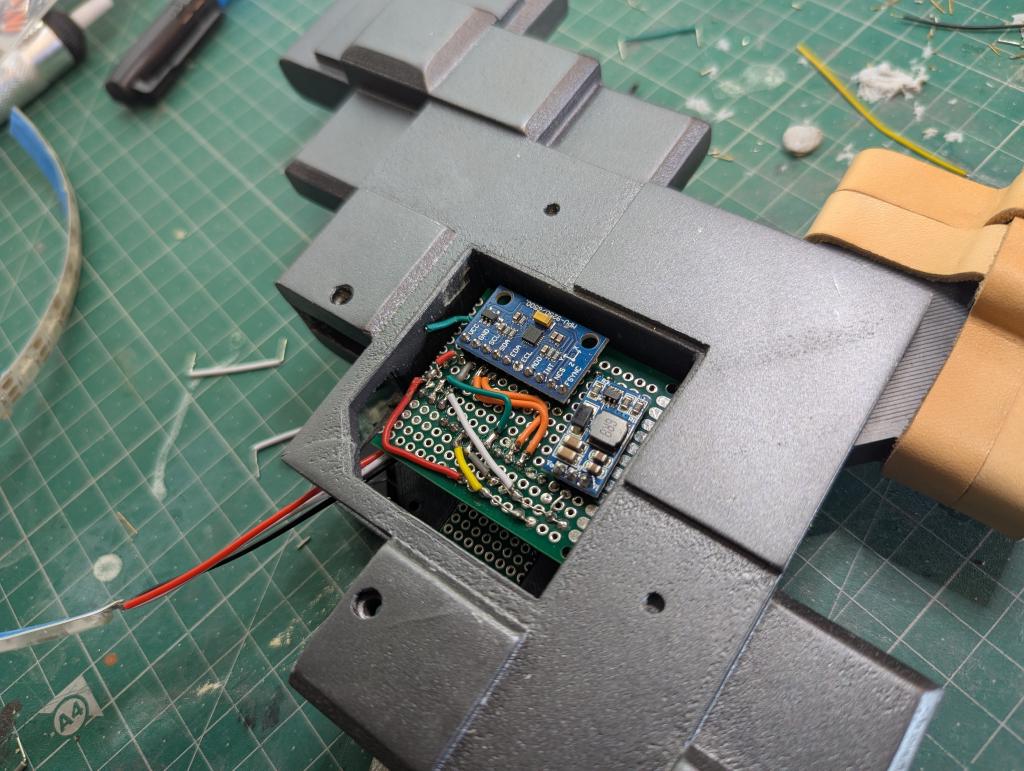
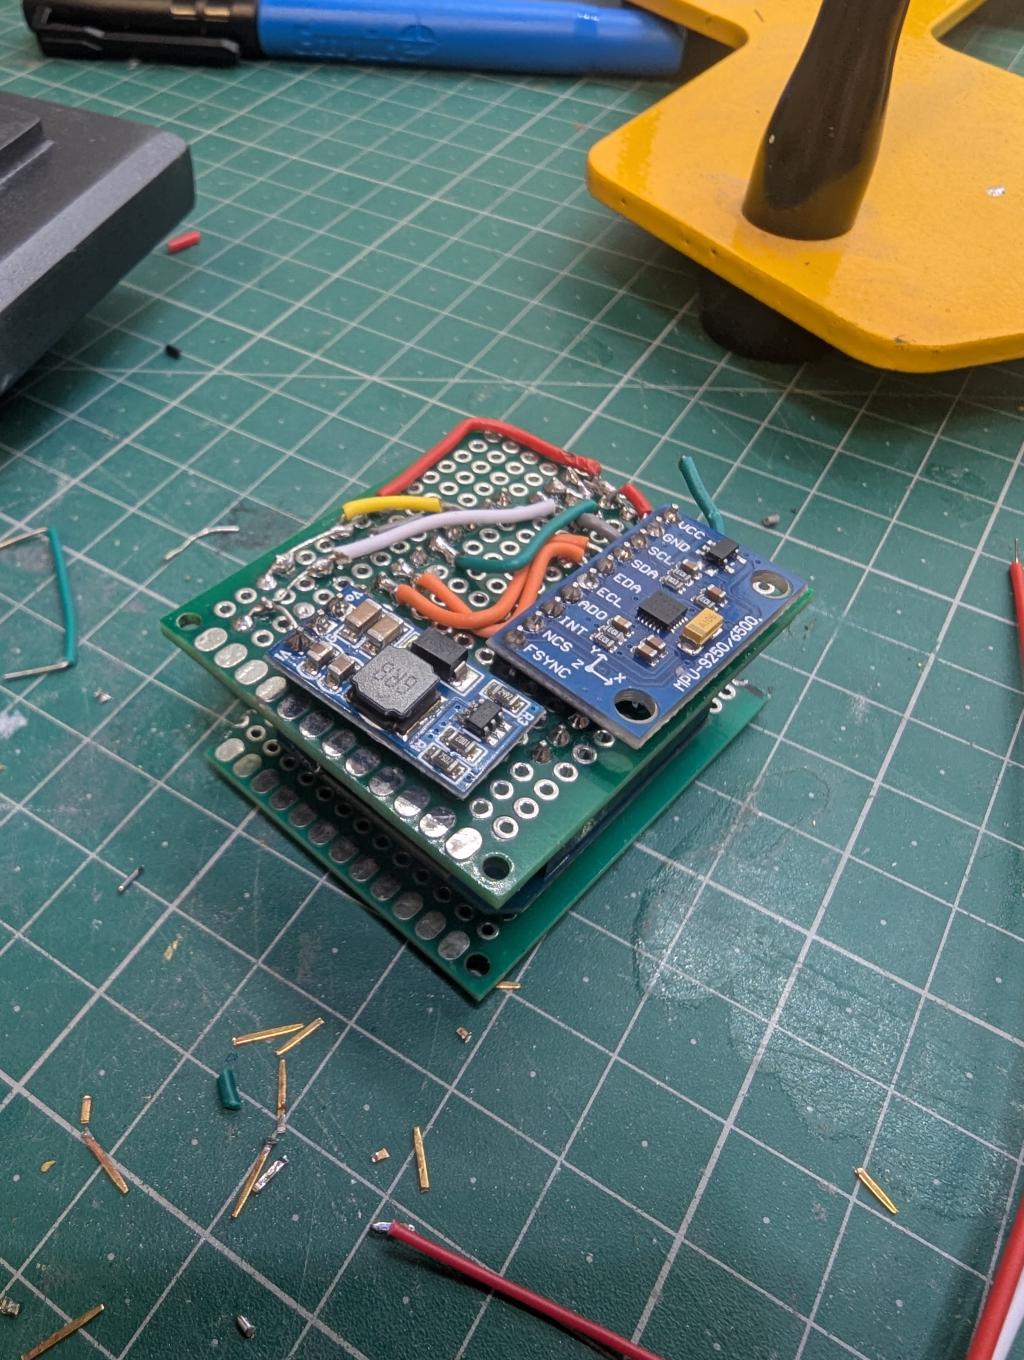
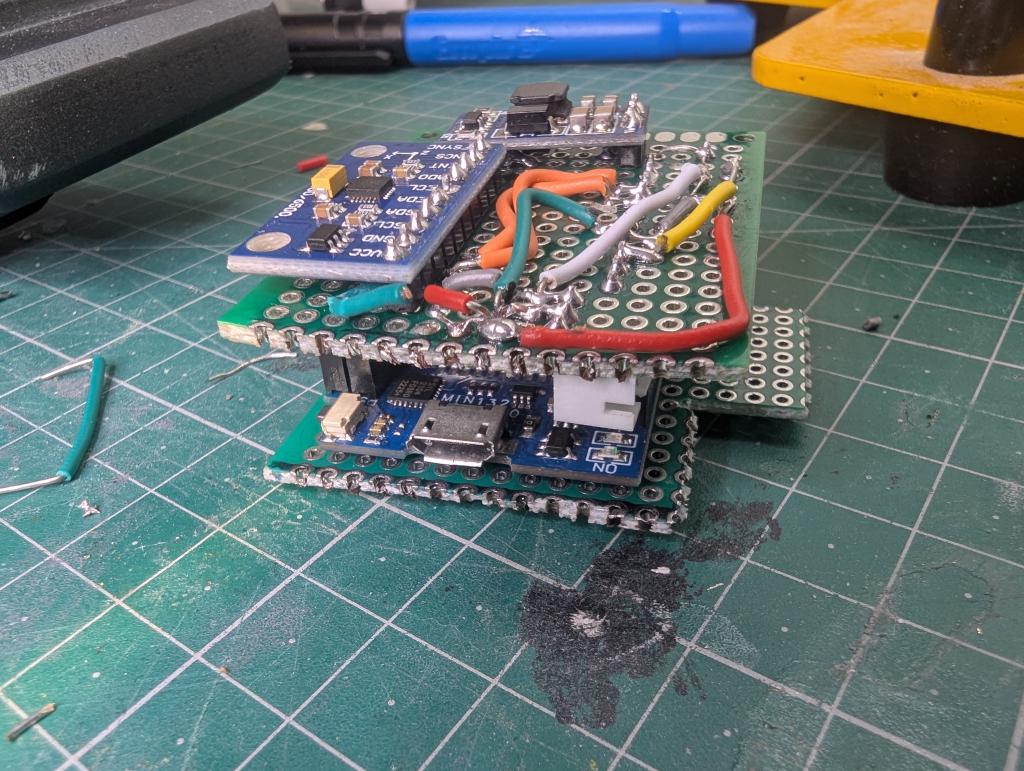
The heart of the sword is a compact ESP32 microcontroller package and a few modules. Overall:
- Base layer: ESP32 D1 Mini microcontroller running WLED with a custom usermod firmware
- Top layer: MPU-6500 accelerometer/gyro and voltage converter (3.7V to 5V)
- Power: 606066 3.7V 2400mAh LiPo battery
- Lighting: Standard WS2812B addressable LED strip (60/74 LEDs/m)
- Controls: Power rocker switch and USB charging port integrated into the pommel

The two-layer trimmed protoboard stack connects toghether with a DIMM socket, allowing the top layer with the gyro to be removed or replaced without affecting the base microcontroller. JST connectors for battery and LED connections make maintenance straightforward. It’s not the prettiest board, but it gets the job done.

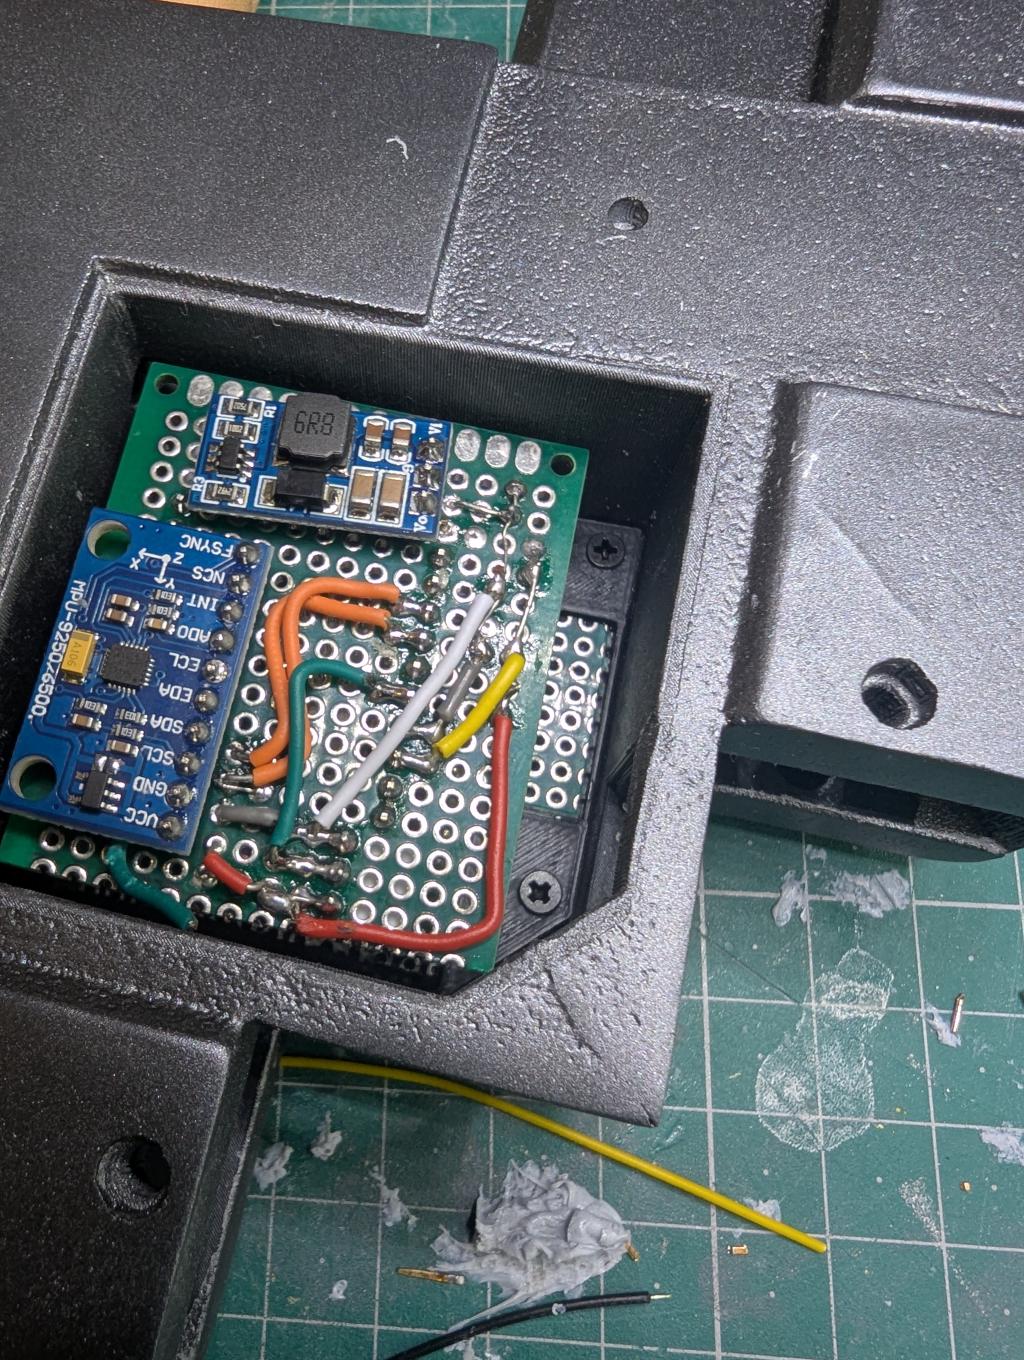
If I get time, I might design a custom PCB for this project to make the assembly much easier. Building this two layer system was a bit of a pain, but everything needed to fit into a pretty tight space. There is a small 3d printed caddy the board is glued into which screws into the sword hilt (shown above). This stops it rattling about while still being user serviceable. A 3d printed cover sits on top and is screwed down.

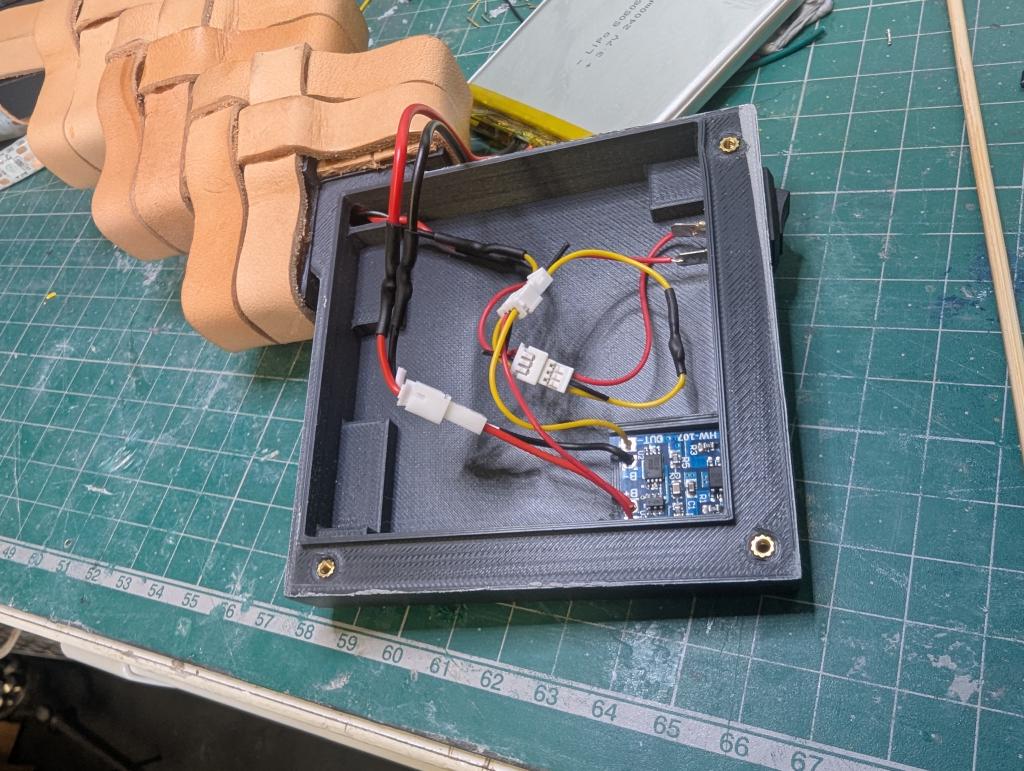
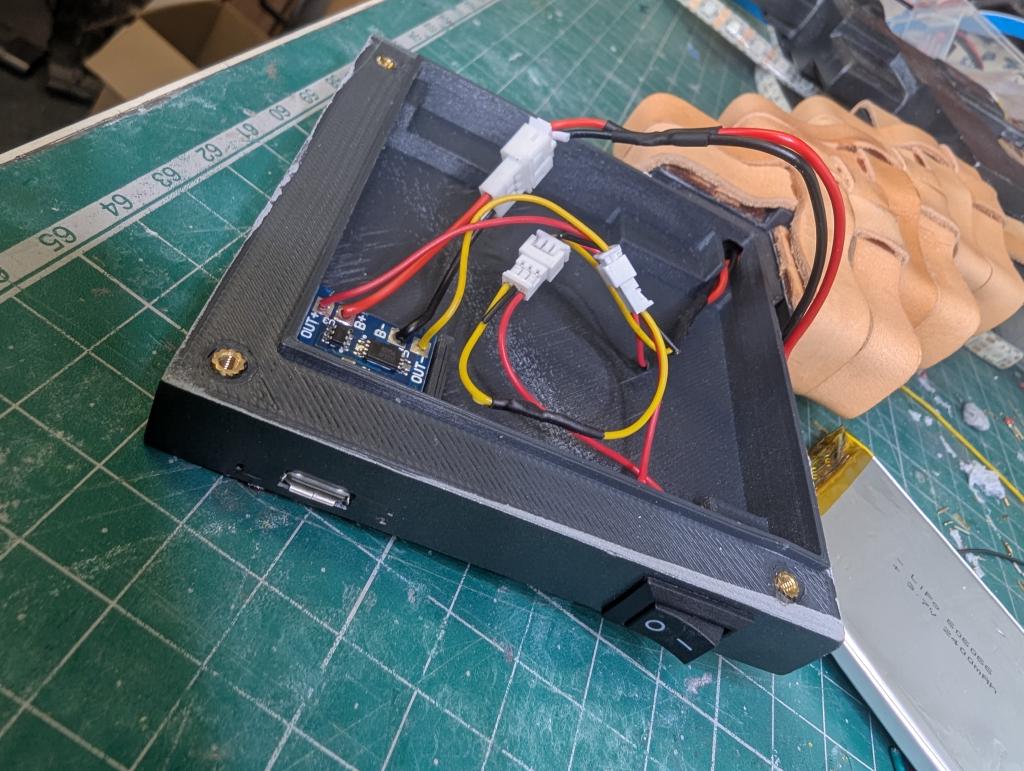
The battery compartment is at the end of the handle and holds the 606066 3.7V battery and a LiPo battery charging module that has a USB port. When all wired together with the rocker switch, this allows the battery to be recharged by plugging into a USB-C port when needed and the sword to be powered on and off easily as needed.
WLED usermod - Motion-Reactive lighting effects#
I really went to town on this one, using WLED again for the addressable LED controls (like my other WLED projects: Mountain Peaks and Zelda Triforce wall art). What makes this project special is its ability to change lighting patterns based on how it’s being handled. The custom WLED usermod interprets data from the MPU-6500 accelerometer to switch between different lighting presets:
- Startup: Initial animation when the sword is powered on
- Idle/Standby: Subtle pulsing effect when the sword is held but not in motion
- In-use: Dynamic effects that activate when the sword is swung
- Collision: Bright flash effect triggered by sudden deceleration (simulating hitting something)
The sword runs on a customized version of WLED with a special usermod to handle the gyroscope input:
- Follow the Compiling WLED tutorial to set up your development environment
- Add the custom usermod code (available in the GitHub repository)
- Configure the appropriate pins for your hardware setup
- Flash the firmware to your ESP32
After installation, you’ll need to set up specific presets in WLED for each motion state (idle, swinging, impact). The usermod will automatically switch between these based on gyroscope readings. This is where the project really shines (literally!) - creating a responsive, interactive prop that enhances the cosplay experience. The code for the mod will be on Github soon.
Materials List#
Electronics:
- ESP32 D1 Mini microcontroller
- MPU-6500 accelerometer/gyroscope module
- WS2812B LED strip (10mm wide, 60-74 LEDs/m) - plenty of options on Aliexpress
- 606066 3.7V 2400mAh LiPo battery (any 3.7v of similar size is fine too. eg. 66x60mm 6-10mm high)
- TP4056 LiPo charging module
- DC-DC boost converter (3.7V to 5V) - ideally one that will output 1-2A @ 5V. Need this for the LEDs.
- Rocker power switch - I used these mini 10x15mm ones.
- Protoboard
- JST connectors
- Assorted wires
Materials:
- PLA filament
- Fiberglass rods (3mm diameter, ~700mm length)
- Hex screws and nuts
- SCIGRIP Weld-On #16 adhesive
- Automotive spray putty
- Sandpaper (various grits)
- Airbrush paints
Challenges and Solutions#
This project presented several unique challenges:
First-time accelerometer integration: This was my first project using a gyroscope/accelerometer. Learning how to interpret the raw data and translate it into meaningful light pattern changes took experimentation. It’s still not perfect, but it works fairly well.
Diffuser design: Creating a diffuser that evenly distributed the LED light while took several iterations. I’ve used transparent or opaque PLA in the past and wasn’t happy with the finish. Just using white filament that is quite thin looks much better and works quite well.
Serviceability: Designing the sword to be serviceable took more design time and required more screws and installation of threaded inserts. This made this a little more time consuming to put together but is a much better outcome I think.
Future Improvements#
My original circuit design for this also had a small amplifier and speaker. I wanted to add audio effects at times, but I couldn’t get this working in the code. Maybe I’ll return to this in the future.
Gallery#


Downloads & Resources#
- 3D Print Files - COMING SOON
Conclusion#
Building this Minecraft diamond sword was a satisfying blend of traditional crafting, 3D printing, and electronics. The motion-reactive lighting brings an extra dimension of interactivity that makes it stand out from static props.
The modular design approach has already proven its worth, allowing for maintenance without complete disassembly. If you decide to build your own, I’d love to see your results - tag me on social media or leave a comment below!