
Overview#
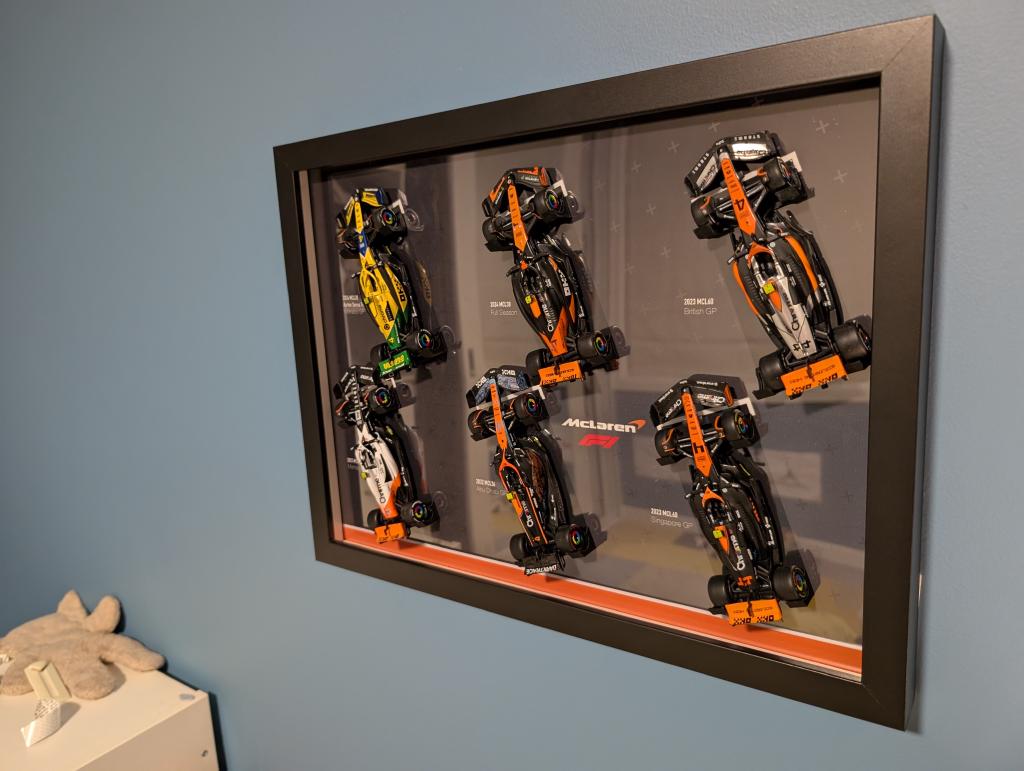
As a massive McLaren and Lando fan, my son saved up his birthday cash and grabbed the McLaren MCL36 & MCL60 Norris Gift Pack from Hobby Co. Suddenly we had six McLaren cars (you know, the Matchbox-sized ones) and they deserved better than sitting in a drawer.
I'd seen plenty of Instagram posts where people buy ready-made picture frames for Bburago cars. But I'm a builder, so there'd be no "adding to cart" happening here. Instead, I set about turning an inexpensive IKEA picture frame into a proper McLaren showcase.
The goal was simple: make something that looked at home with other F1 merch or products, using the iconic McLaren logo and colours. I'm not claiming to be a design wizard, but I wanted it to look good on the wall.
What You'll Need#
- IKEA RÖDALM Frame - Black, 30x40 cm ($10-15)
- Custom printed background - I designed mine in Illustrator and had Vistaprint do the honours
- 3D printed car mounts - Files available below
- Double-sided tape or adhesive - For mounting the car holders
The Build Process#
Step 1: Design the Background#
I fired up Illustrator and created a McLaren-themed background using the team's logo and signature papaya orange and blue colours. Nothing too fancy, just clean and professional-looking. The key was getting the spacing right for six cars arranged at an angle.
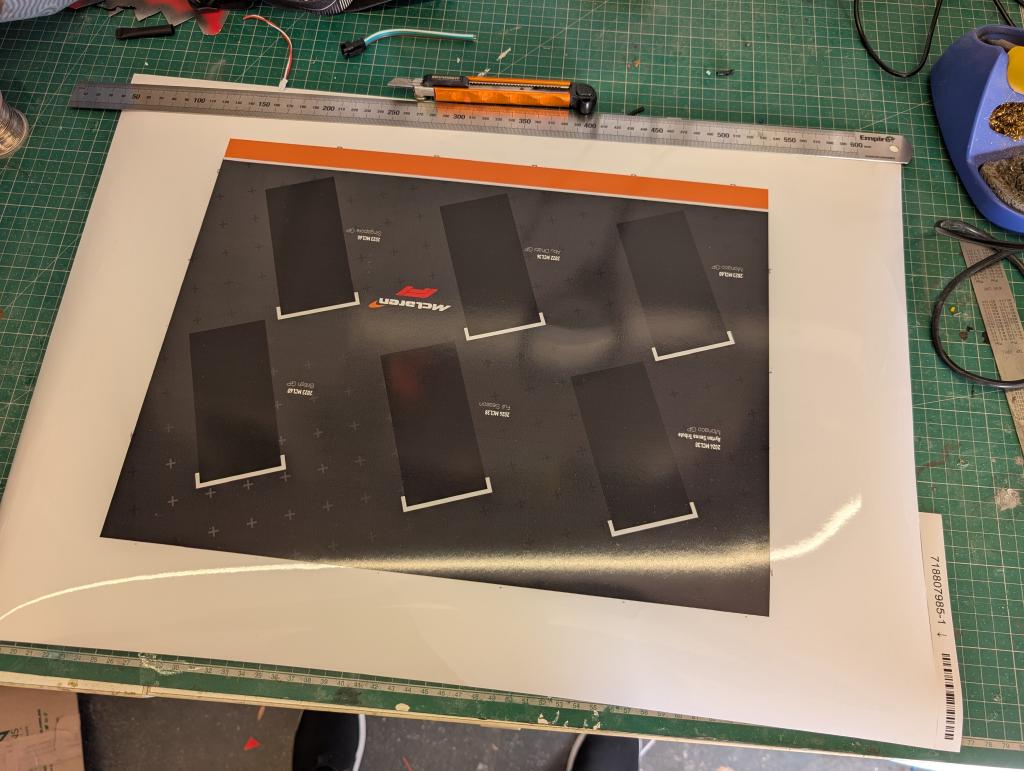
Once I was happy with the design, I exported it as a PDF and sent it off to Vistaprint for a quality print at the right size for the IKEA frame.
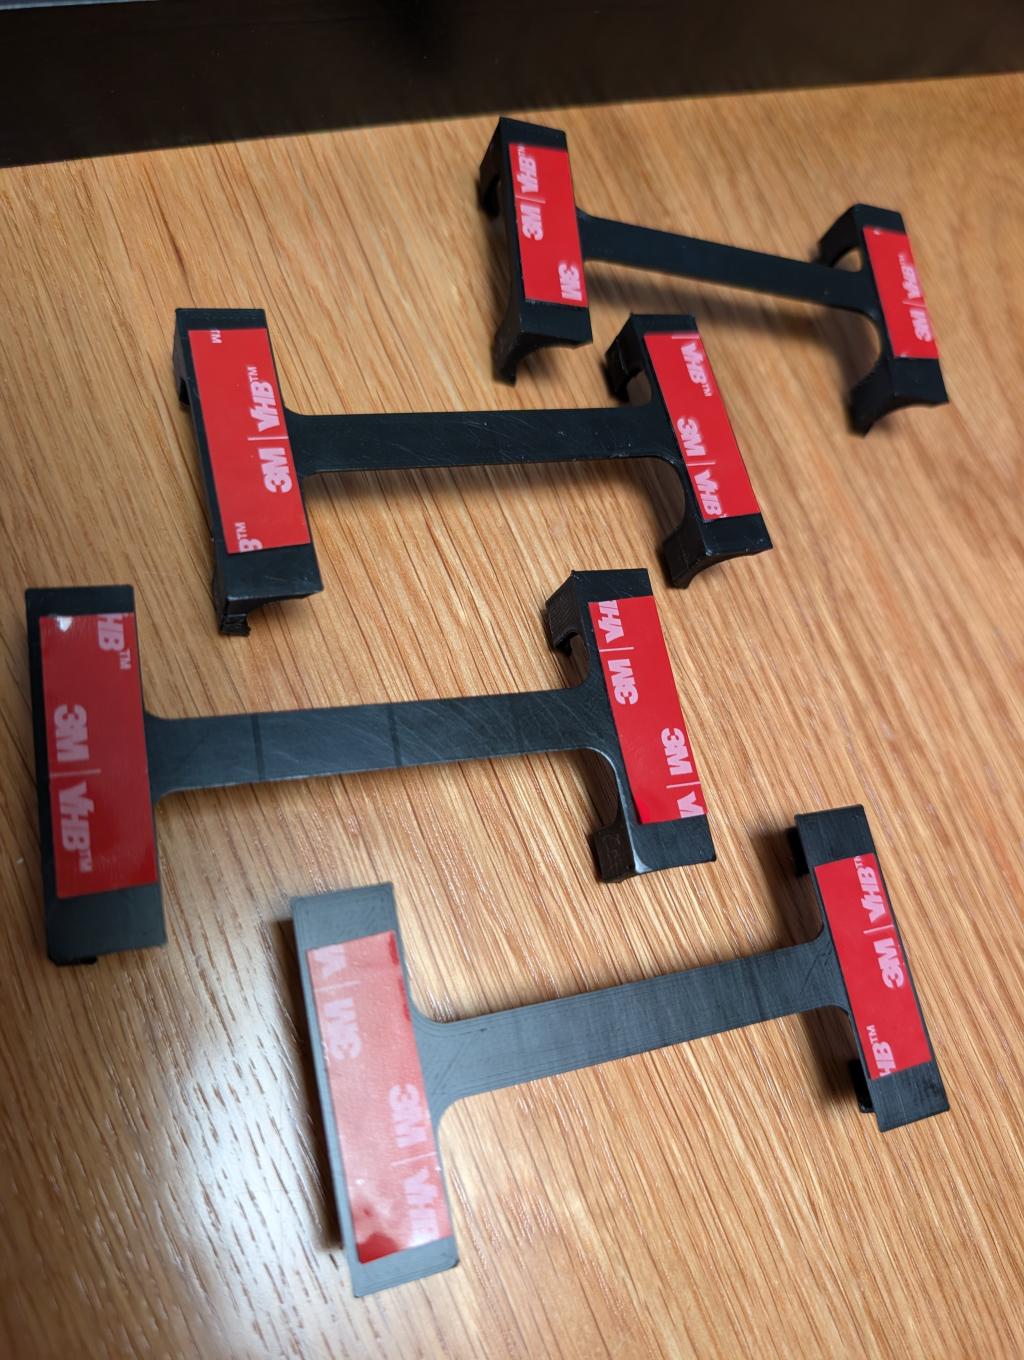
Step 2: Sort Out the Car Mounts#
I wanted the cars mounted at an angle to give them some visual interest. I found Julian Jimenez's 2-wheel Bburago mount design on Printables , but it didn't quite work for what I needed. So I remixed it to hold all four wheels properly and give the cars that nice tilted display angle.
The design is simple - just a small platform with wheel channels that grip the tyres. Nothing complicated, and it prints without supports. Big thanks to Julian (@julianjz_3309941 ) for the original design that inspired this remix!
Step 3: Assembly#
Once the background print arrived from Vistaprint, it was just a matter of putting it all together:
- Mount the printed background in the IKEA frame
- Mark out where the car mounts should go
- Stick down the 3D printed mounts with double-sided tape
- Pop the cars into position
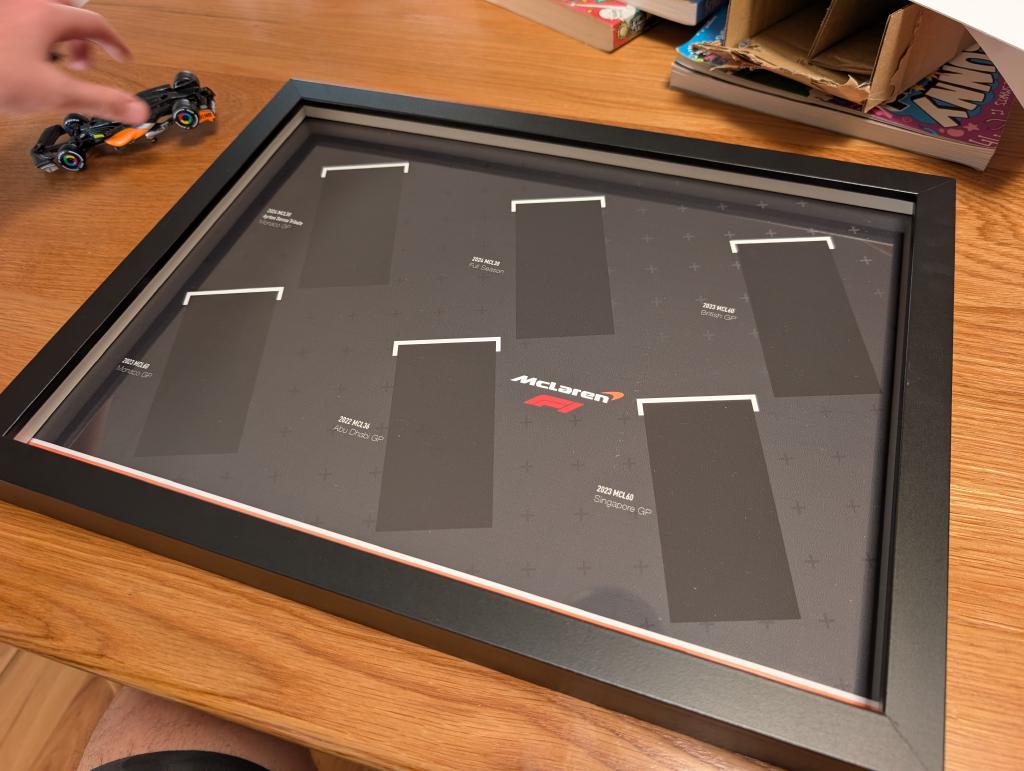
The nice thing about using these mounts is that the cars can be removed and swapped out easily. No permanent fixing required.
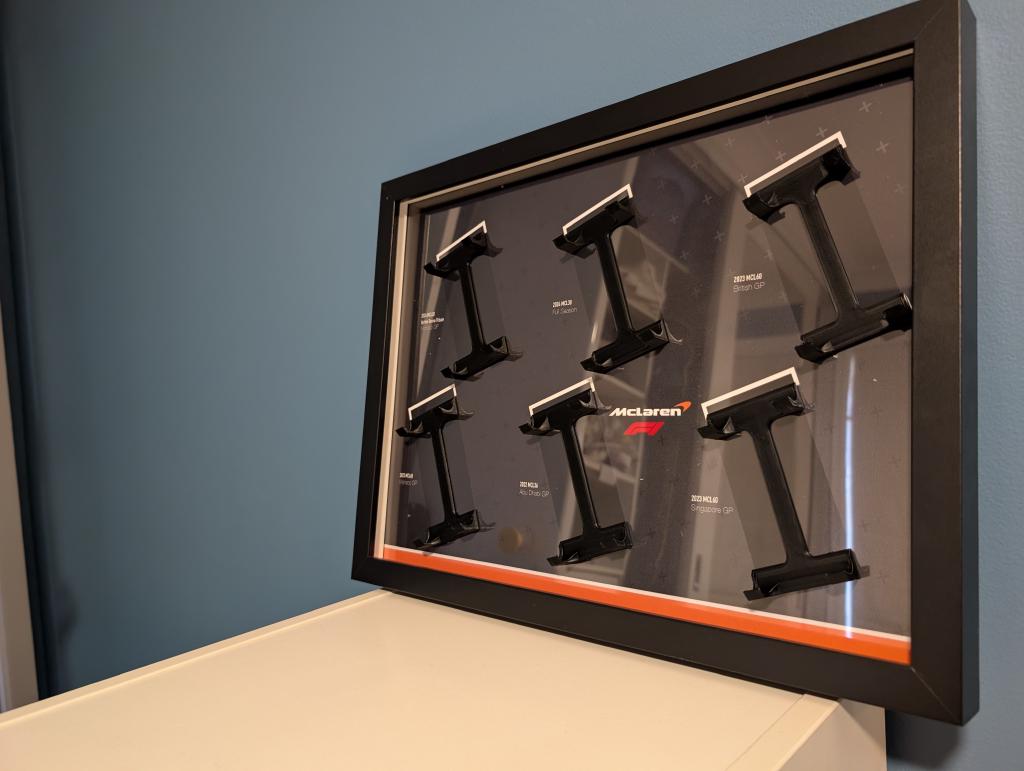
The Result#
Hanging on the wall, it looks brilliant. The angled mounts give the cars some presence, and the McLaren-themed background really makes them pop. My son's stoked, and it's a hell of a lot cheaper than buying a dedicated display case.
Total cost was maybe $15-20 for the frame and print, plus a couple of hours of design and print time. Not bad for a custom display that looks like it came from the McLaren merch store.
Downloads & Resources#
Want to build your own? I've got you covered:
- McLaren Background (PDF - A2 size) - Layed out as A2 for printing with Vistaprint. Adjust as you need. Trim as required for mounting in IKEA RÖDALM 30x40cm frame.
- Bburago 1:43 F1 Wall Mount (4-Wheels) on Printables
The mounts print easily in PLA - no special settings needed. I printed mine in black to match the frame, but any colour works. This is a remix ofJulian Jimenez's original 2-wheel design- modified to grip all four wheels for better stability.
If you build one, tag me on socials - I'd love to see what you create!