How It Started#
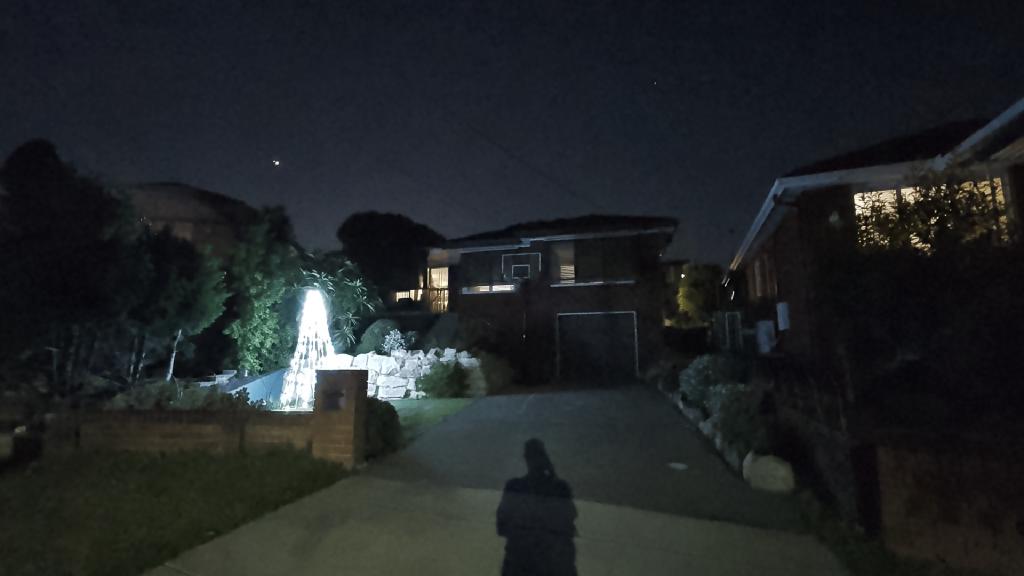
Christmas 2024 was my first proper dive into programmable LED displays. I built my own controller — an ESP32 running WLED — with 4 output ports and around 1,000 addressable pixels. Every waterproof cable was hand-soldered. It took ages, but the result was satisfying: a 2D matrix on the balcony balustrade, LED strings along the handrails, around the garage door, and under the front tree.
It worked well and looked great. But expanding it wasn't really feasible. The manual cable-making was a bottleneck, and I'd already used up available ports on the WLED controller.
For 2025 I had more time on my hands — I was between jobs — and wanted to do something more ambitious. The outcomes was fairly predictable, too much free time = an overly ambitious (but fun) build across off the shelf components and custom 3d printed design.
Christmas Lights 101#
If you're new to programmable Christmas lights, here's a quick primer on the three main pieces of the puzzle.
Controllers#
A controller is the brain of the display. It takes lighting instructions and drives the LED strings. They vary in the number of output ports (and therefore how many pixels they can control), whether they support 5V or 12V, and how they connect to the network. Some are DIY (like my 2024 ESP32 build), others are off-the-shelf units designed specifically for this kind of display.
Sequencers#
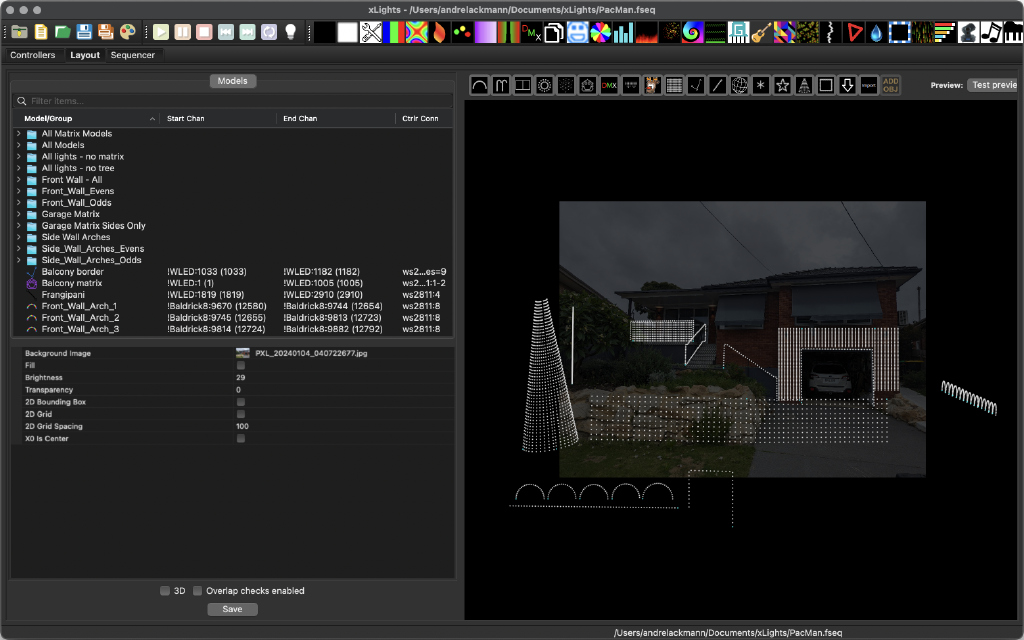
xLights is the free, open-source sequencing software that lets you design what the lights actually do. It has three main areas:
- Controllers — where you define the physical devices driving your lights
- Layout — a virtual canvas where you place your fixtures and tell XLights how many pixels they have and which controller port they're on
- Sequencer — where you build the actual show, assigning effects over time to individual fixtures or groups
This is where the fun happens. I spent a lot of time in here building sequences — including a PacMan animation that ended up being a crowd favourite.
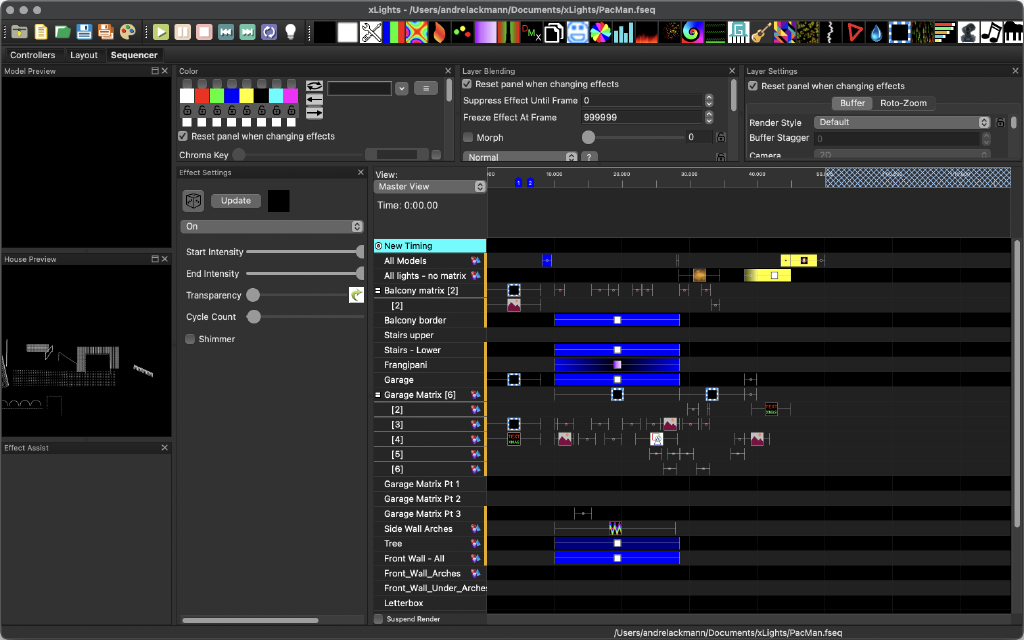
Going from 2024 to 2025 meant adding the new controller and fixtures and building new sequences for the expanded layout. A bit of mucking about, but worth it.
Sequence player#
FPP (and programs like it) takes the output from xLights and plays it back on a schedule. I run it in the official Docker container on a VM (many people use a Raspberry Pi), and it handles everything — scheduling the show sequences, syncing between controllers, and turning things off at 10pm so the neighbours don't lose their minds.
The 2025 Upgrade#
The core problem with 2024 was scalability. Hand-soldered waterproof cables are fine for a small display, but it's just too time consuming. I had more time, but even I'm not that crazy... so the 2025 strategy was built around as much "off the shelf" product as possible.
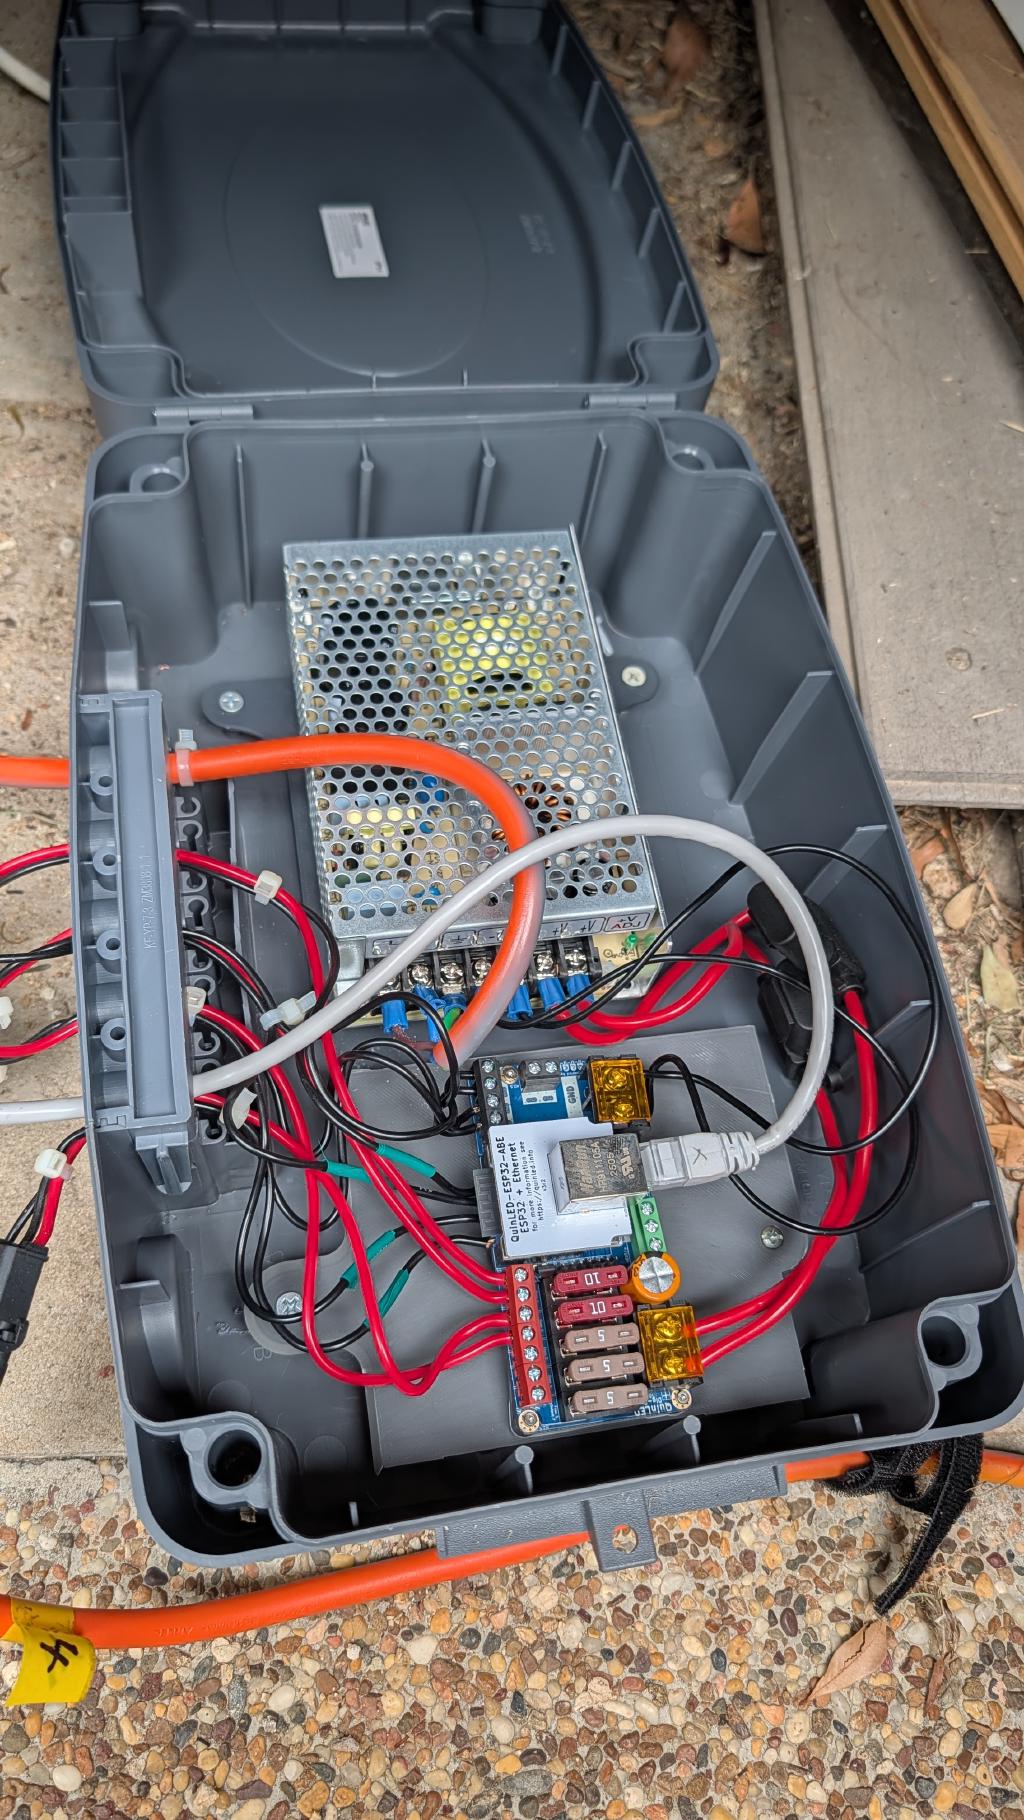
New Controller: Baldrick8 from Hanson Electronics#
The headline upgrade was the Baldrick8 RTR from Hanson Electronics. Eight output ports, Ethernet built-in, and designed around standardised Xconnect cabling. Alan at Hanson Electronics was incredibly helpful throughout — highly recommended if you're in Australia and getting into this hobby.
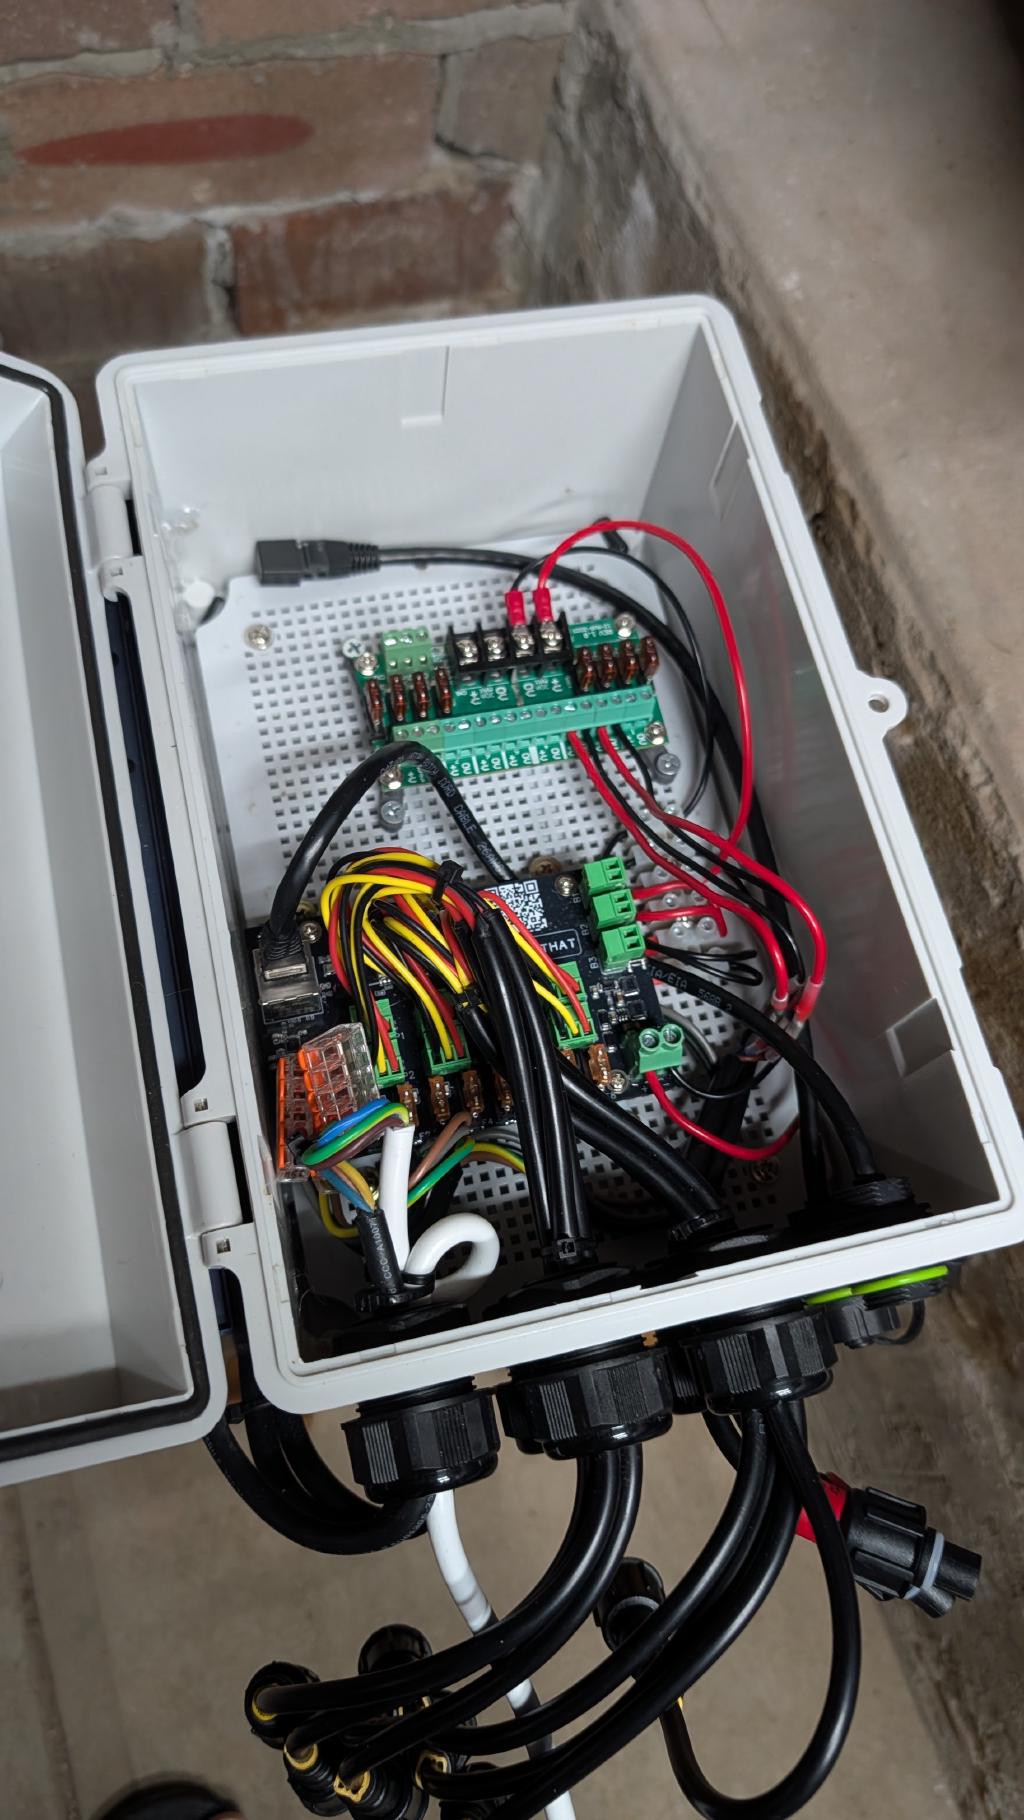
I also replaced the 2024 WLED controller. The original ESP32 build was on WiFi, which wasn't going to cut it for a two-controller setup where sync matters. I swapped it for a QuinLED Dig-Quad — Ethernet, more reliable, always in time.
Switching to 12V#
The 2024 display ran on 5V. For 2025 I moved the new controller to 12V, which gives you longer string runs with less voltage drop. Colours are more accurate at the far end, and the display is noticeably brighter overall.
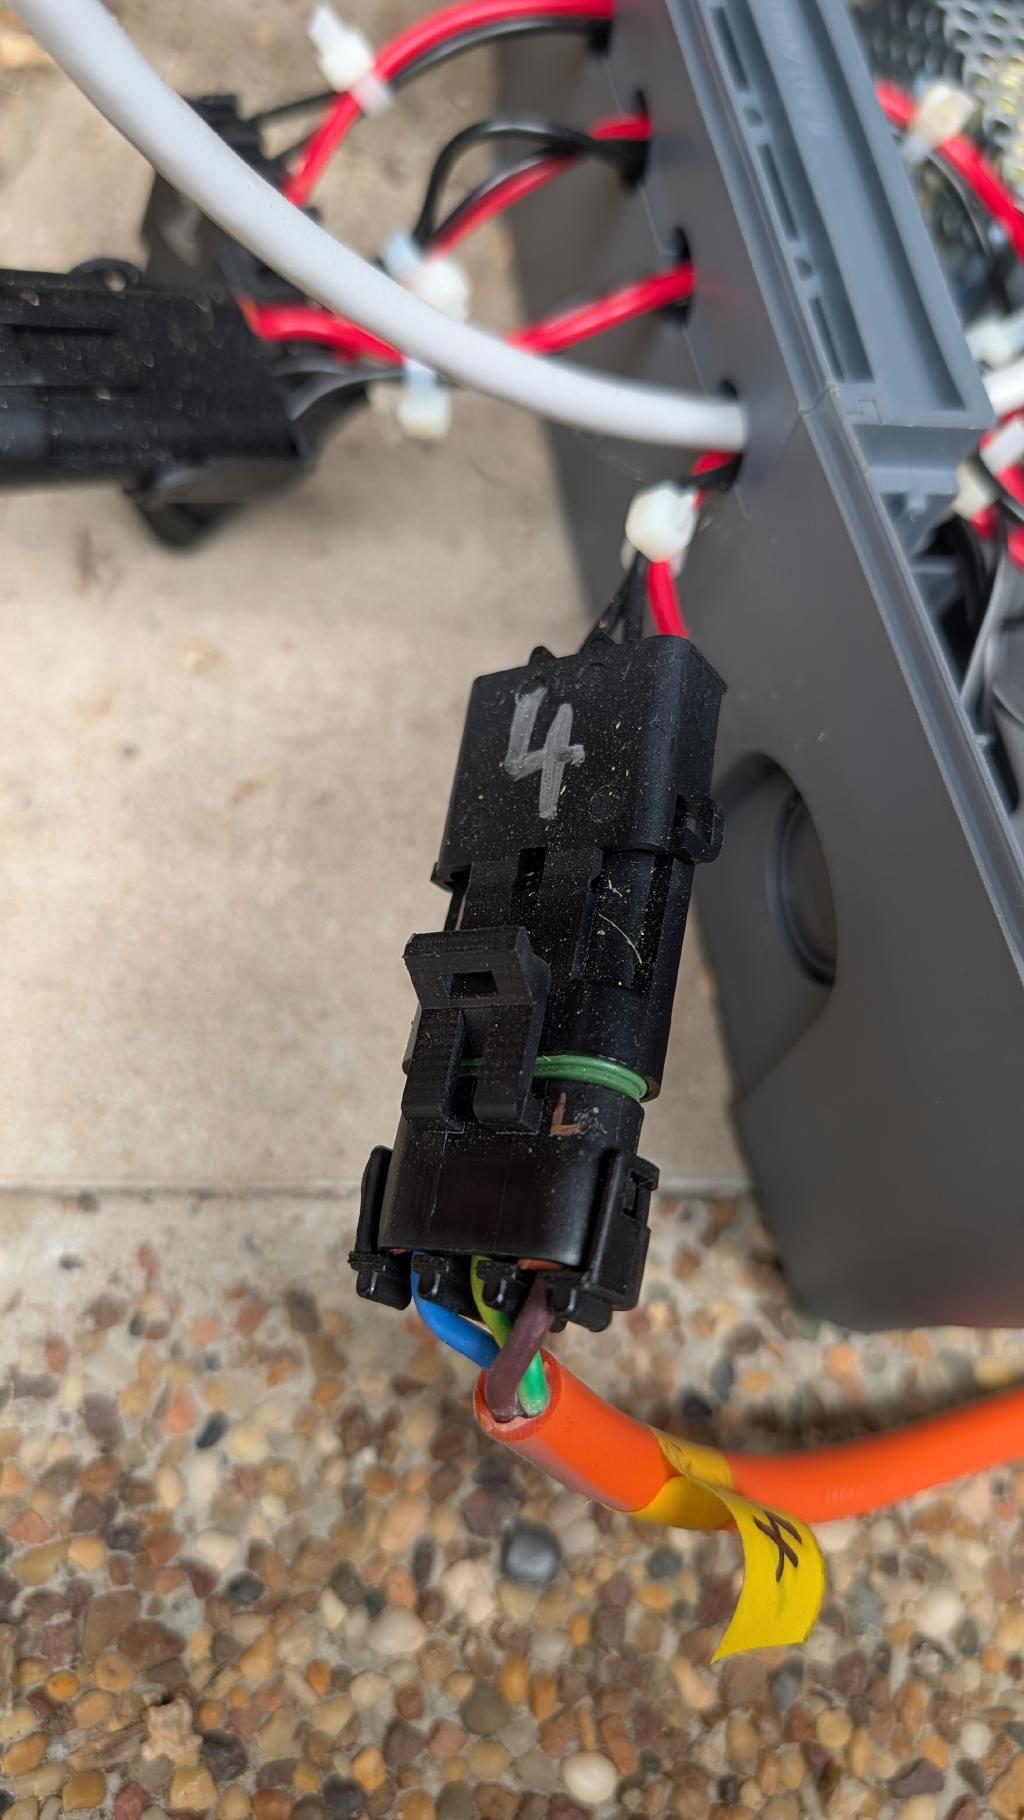
Xconnect Cabling#
This was the single biggest quality-of-life improvement. Standardised Xconnect extension cables from Ray Wu on AliExpress replaced the hand-soldered custom cables from the previous year. I sourced both 1.5m and 6m lengths, and the whole process of connecting the display went from days of soldering and waterproofing to make cables to an afternoon of plugging things in.
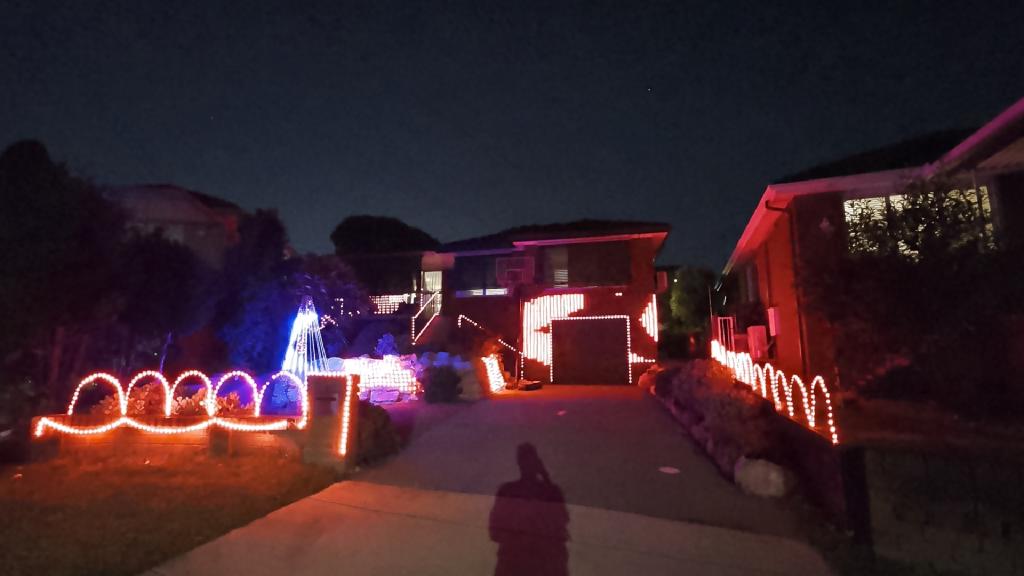
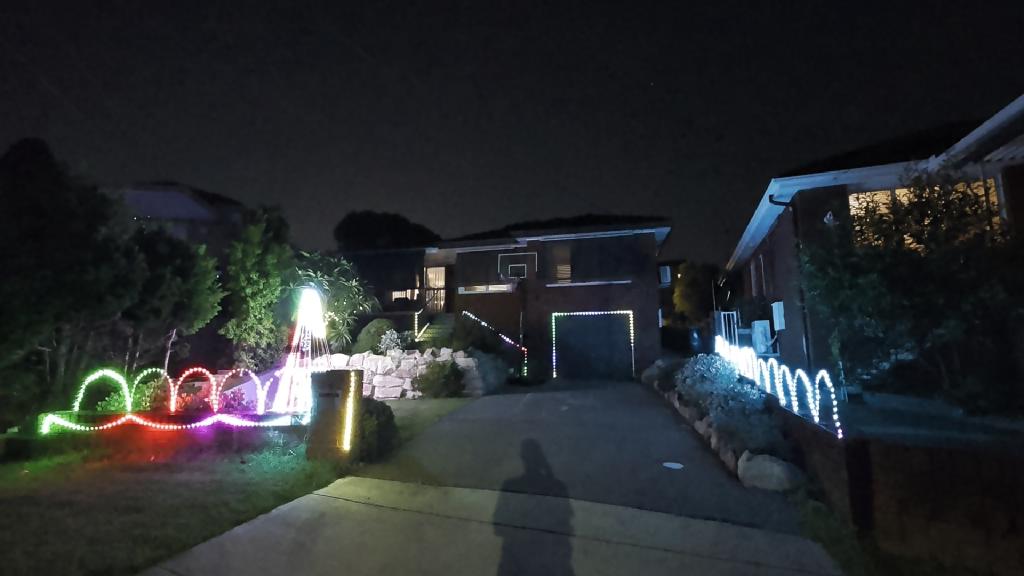
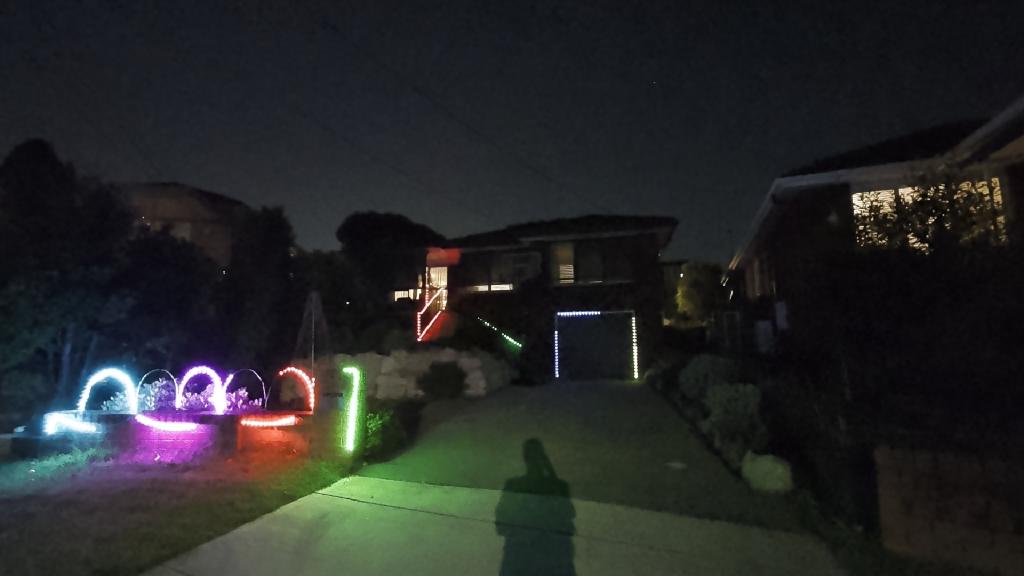
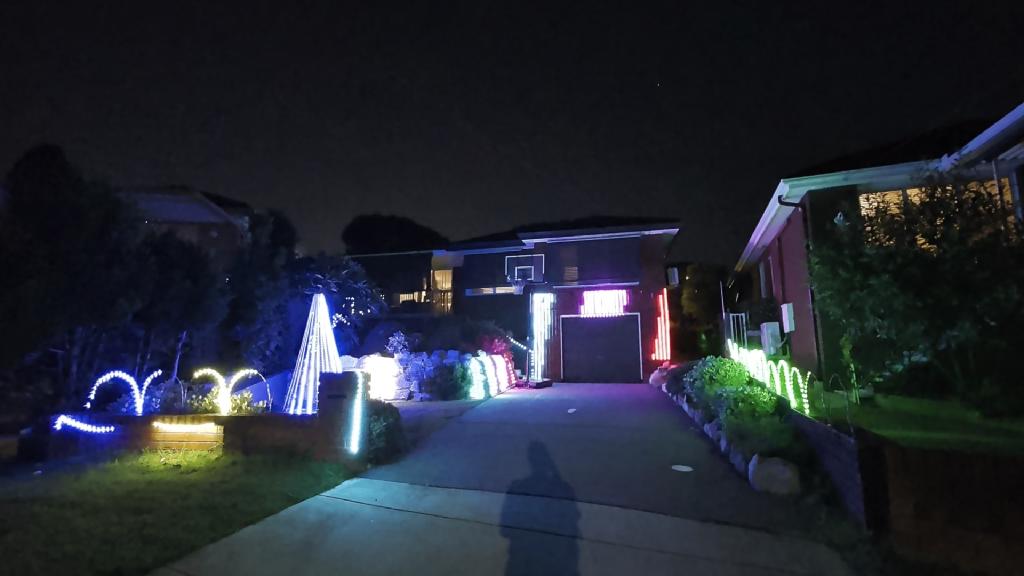
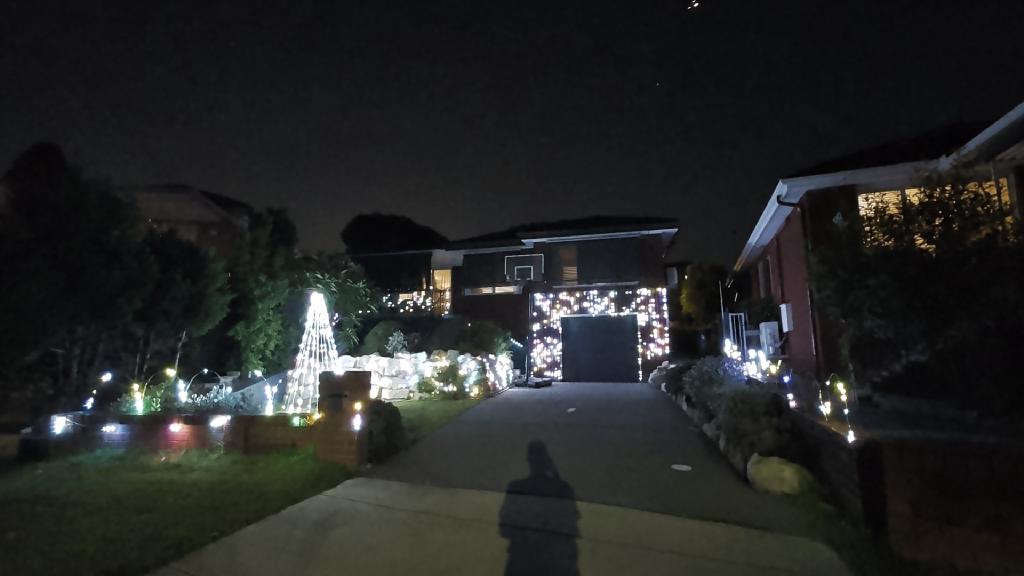
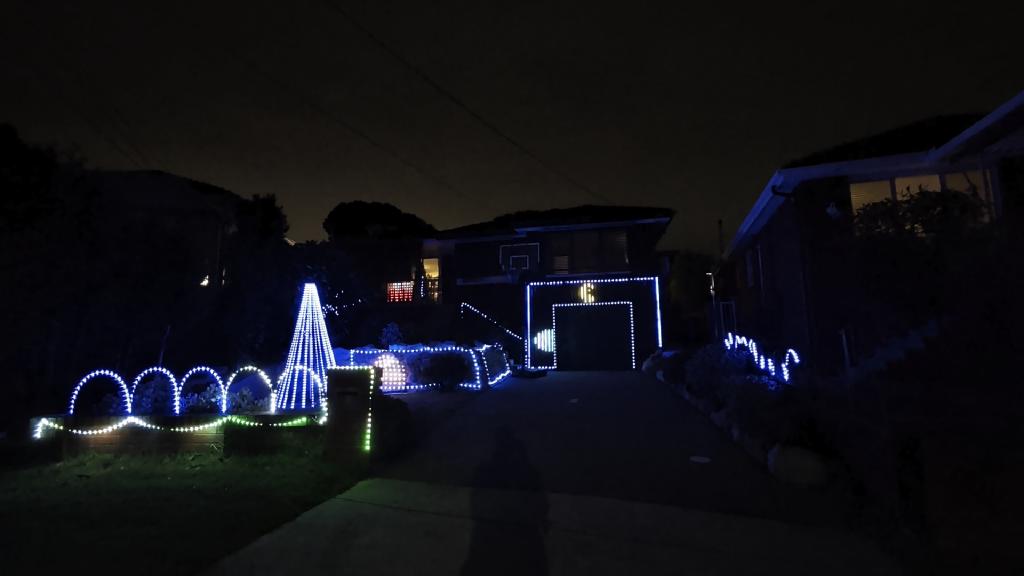
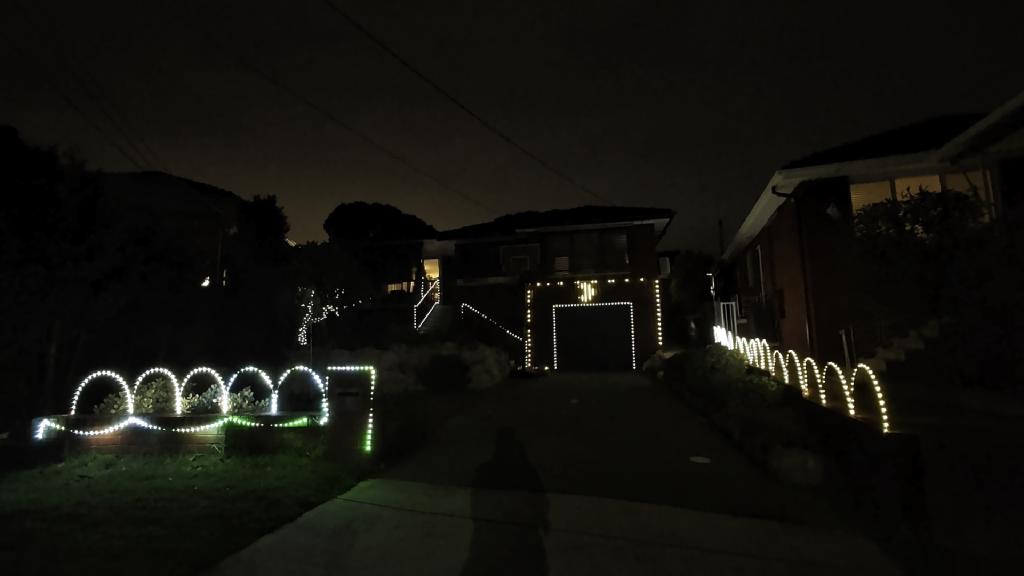
The 2025 Display Layout#
With the new controller in place, I was able to go much further than the year before. This year I added a number of fixtures above and beyond 2024:
- Front of house 2D matrix — surrounding the garage door, built around aluminium poles and 3D printed LED string holders, mounted to the brick wall using my 3D printed Brick Clips
- Arches along the front and side fences — fibreglass rods mounted using some more new brick clips, strung with LED strings
- 2m Christmas tree fixture — a custom-designed and 3D printed tree structure on a camping tarp pole
- 2D matrix on rock walls — I was smarter here and bought pre-made off-the-shelf seed pixel nets . Simple, effective, and no soldering required
With the extra fixtures, the total display went from 1000 to just shy of 4000. Yeehaa!
Challenges#
It wouldn't be a maker project without a few things going sideways.
Power Injection#
More pixels and longer strings meant power injection — something I didn't need to worry about at the 5V/1,000-pixel scale. Without it, some fixtures were erratic, and colours at the far end of long runs would shift or dim.
I went with backside power injection (injecting at the end of each string) using Xconnect pigtails I made myself. If I had my time again, I'd buy LED strings that already have Xconnect connectors fitted — it would save a lot of time soldering and waterproofing. The seed pixel joiners from Hanson Electronics were invaluable here — they make connecting anything to the tiny seed pixel wires much more manageable.
I also learned that Power injection tees are the cleaner long-term solution - worth knowing about before you start making your own cables, but you'll need to think about sourcing both 2 and 3-pin xConnect cabling which I originally tried to avoid to keep things simple. Do yourself a favour and just get both (2-pin just for power, 3-pin for power+data), it avoids the data interference I experienced (see below).
Data Line Interference#
This one took a while to track down. I was running 3-wire extension cables everywhere, which I later discovered was causing data line interference and instability in some fixtures. The fix is to use 3-2-3 connections (or pulling the data pin in 3-pin connectors) — carrying power on the 2-wire leg and keeping the data line clean. Either way, just make sure your data connection is as direct as possible.
Distance to Fixtures#
With the Baldrick8 centrally located, some of the front-of-house fixtures were almost 20 metres of extension lead away. At that distance, the data signal can get flaky.
The solution is a null pixel — a single LED placed at the start of the string (before the fixture), which effectively repeats the data signal boosting it's voltage and avoiding issue. I'd heard of them before but hadn't needed them until now. After some inconsistent results and a chat with Alan at Hanson Electronics, null pixels turned out to be exactly the answer. Hanson Electronics sell a ready-to-go Xconnect null pixel that makes it completely plug-and-play.
Gear list#
If you're thinking about building something similar, here's a rundown of the key products:
Controllers:
Cabling & Power:
- Xconnect extension cables — Ray Wu, AliExpress (get lengths as you need)
- Power injection tees — AliExpress
LED Fixtures:
- Seed pixels — AliExpress (I used 12V, 4-wire, 5cm pitch — consider 20AWG for longer runs; get strings with Xconnect pre-fitted if you can)
- Pre-made 2D seed pixel nets — AliExpress
Accessories:
The Final Result#
You might reasonably argue I've misunderstood the assignment — this is less "Christmas lights" and more "Vivid Sydney with a Santa hat on." But it was genuinely fun to build, and I learned a lot. Having the time to do it properly (thanks, job transition) made a huge difference.
Watch the video#
What's Next#
Most of the fixtures are now pre-made, so setup next year should be significantly faster. A few things I'd like to add:
- A star for the top of the tree
- Some light-up Christmas characters or props — life-size Minecraft characters are on the shortlist
- Maybe some Corflute props
We'll see how much time I have - either way, it's going to be fun.