
The Vision#
The 2025 Christmas lights display needed a centrepiece. I had a spot on the front lawn with good visibility from the street, and I wanted something tall that added some variety.
Commercial LED trees exist, but seriously... that would be cheating, right? Building a custom fixture meant I could spec it exactly: 2m tall, designed to route LED strings in a serpentine pattern, weather-resistant, and able to pack down for storage.

The Design#
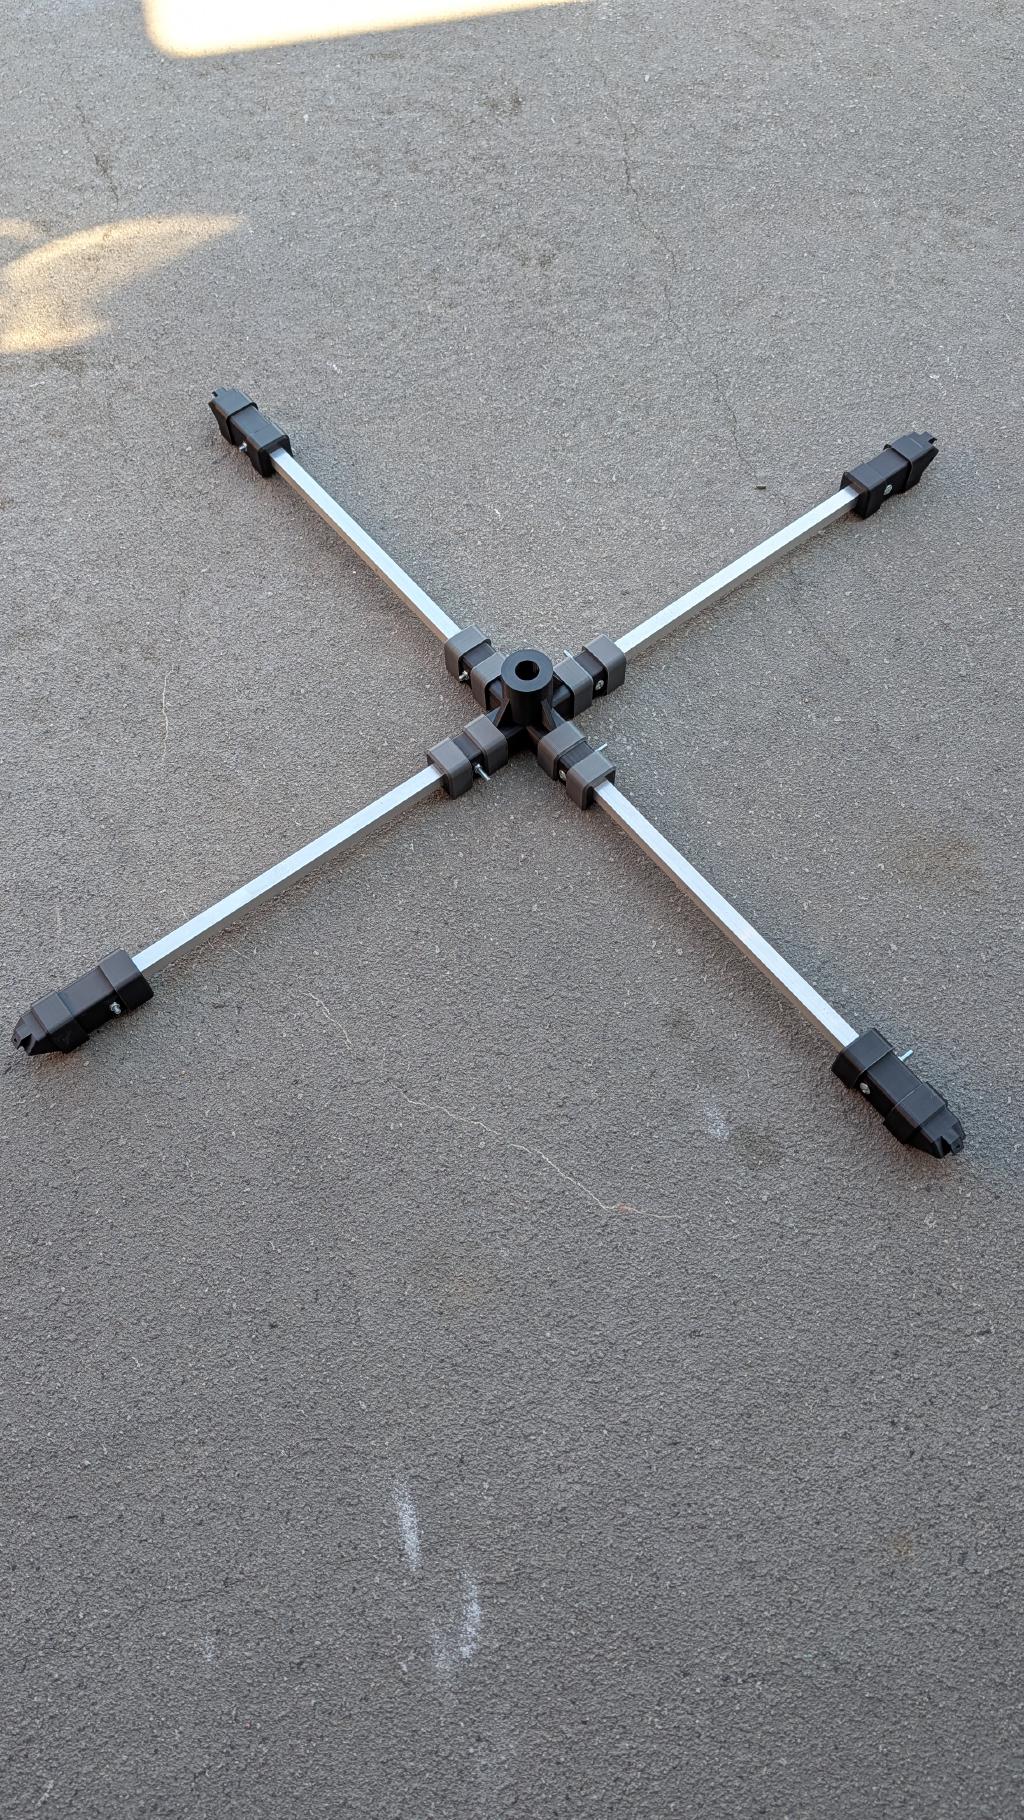
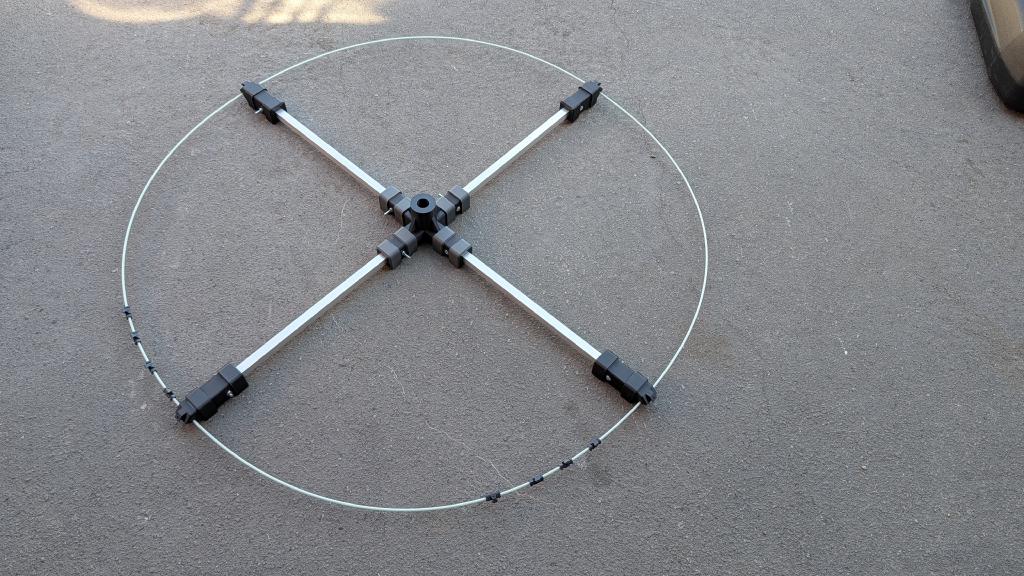
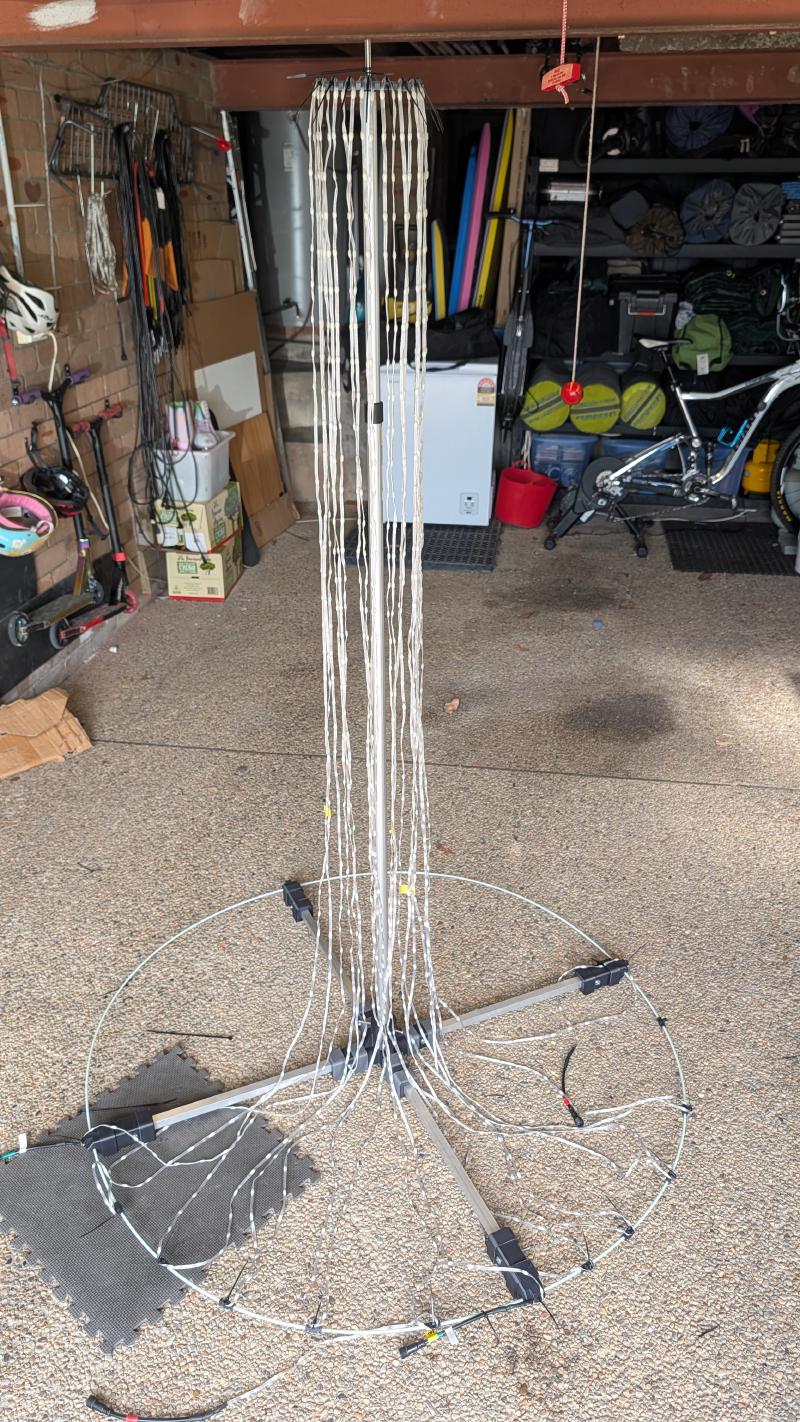
The structural concept is straightforward: a cross-shaped base connects four outer arms, a circle of fibreglass rods forms the perimeter of each tier, and a central camping pole runs vertically through the middle providing the spine.
The key components:
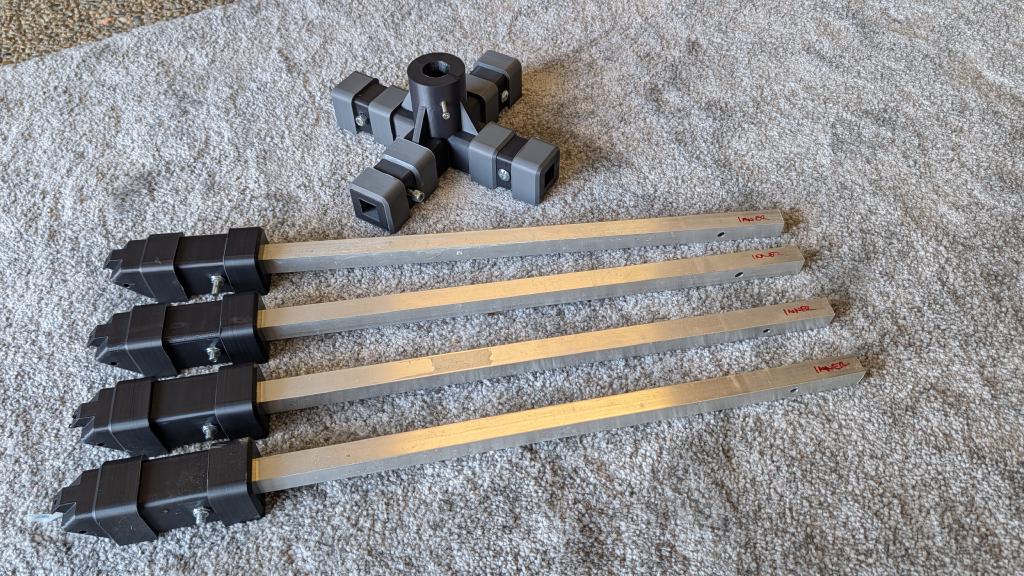
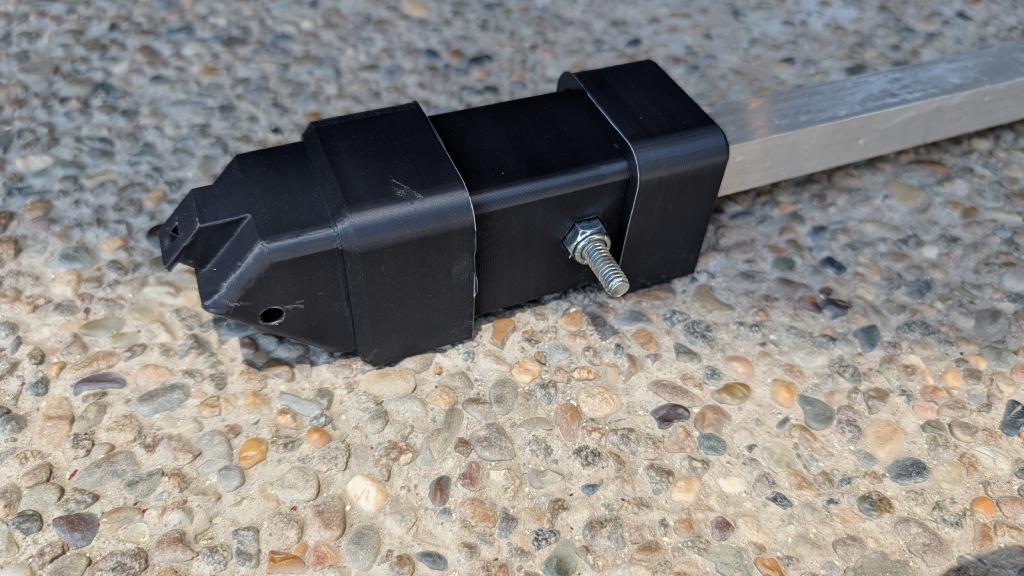
- 3D printed central base hub — connects the four square aluminium arms
- 4 outer base pieces — the feet, also 3D printed, connected to the hub via square aluminium tube
- Fibreglass rods — flexible 6mm rods forming the circular perimeter at the base; sourced from Bunnings
- Square aluminium tube — the structural arms, also from Bunnings; drilled to accept the fibreglass rods
- Adjustable camping pole — runs through the centre vertically, providing height and stability
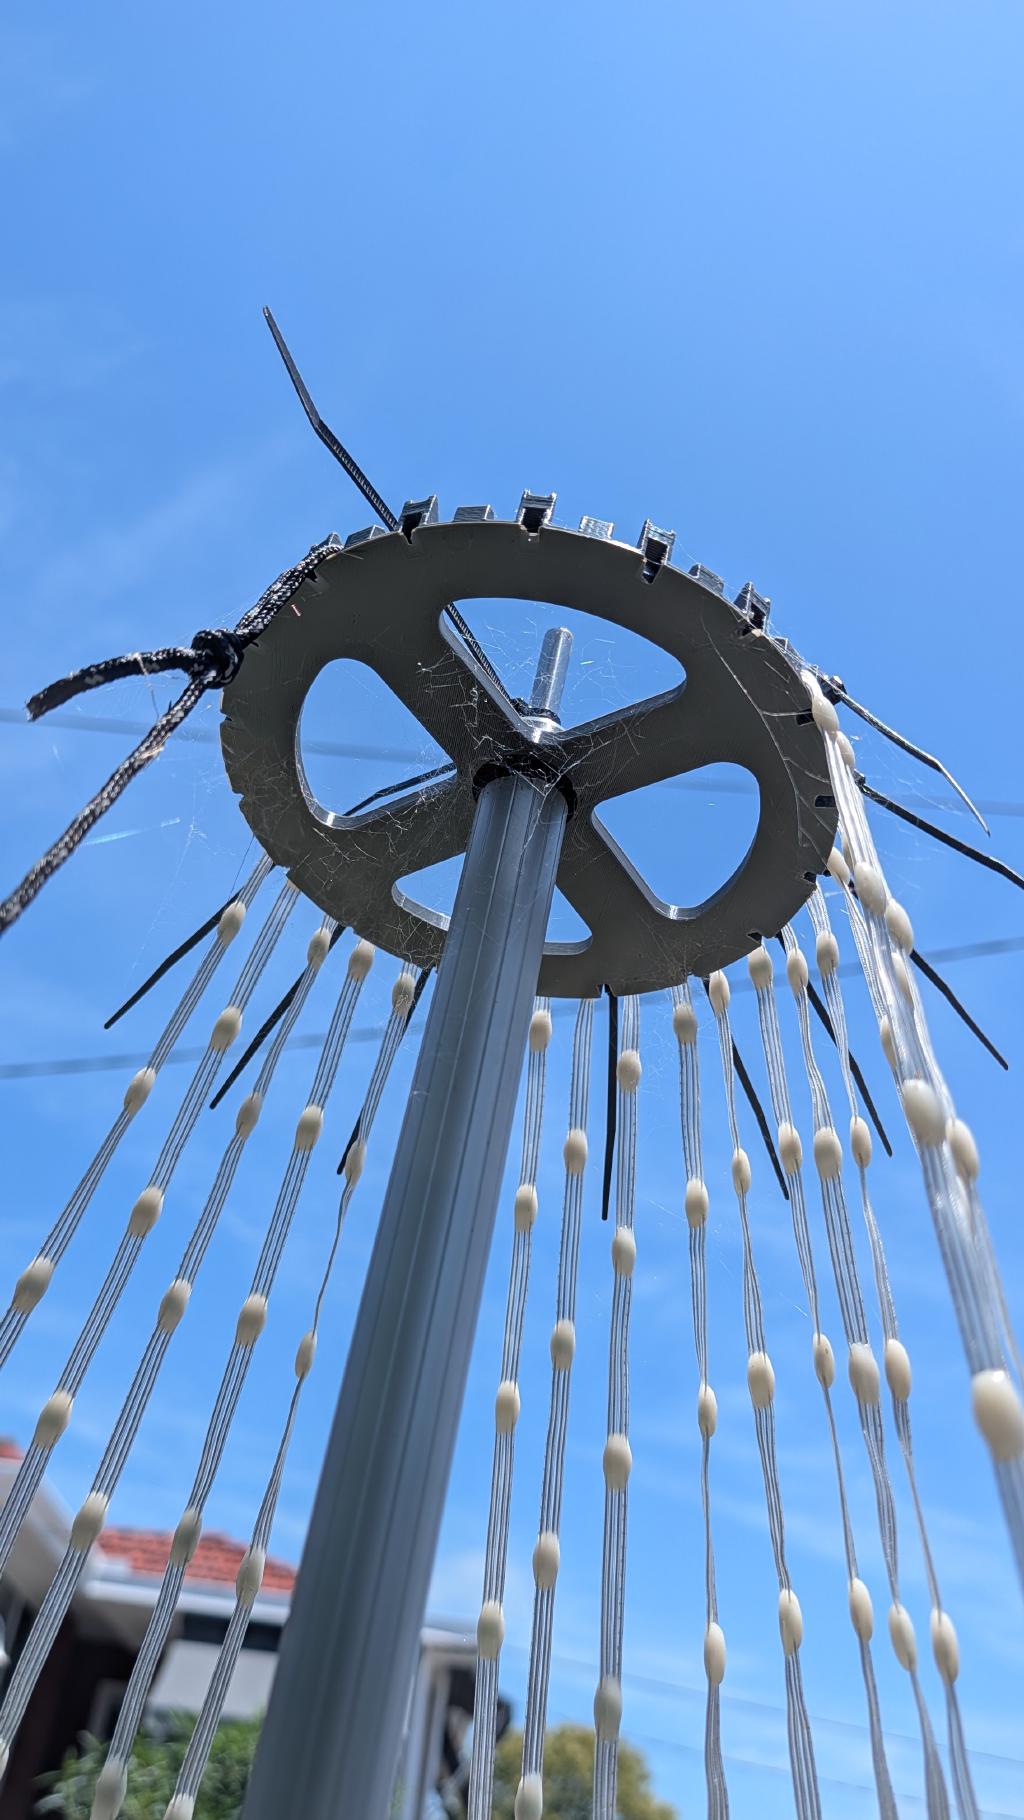
- 3D printed head/topper — top of tree structure, anchors the LED strings at the apex
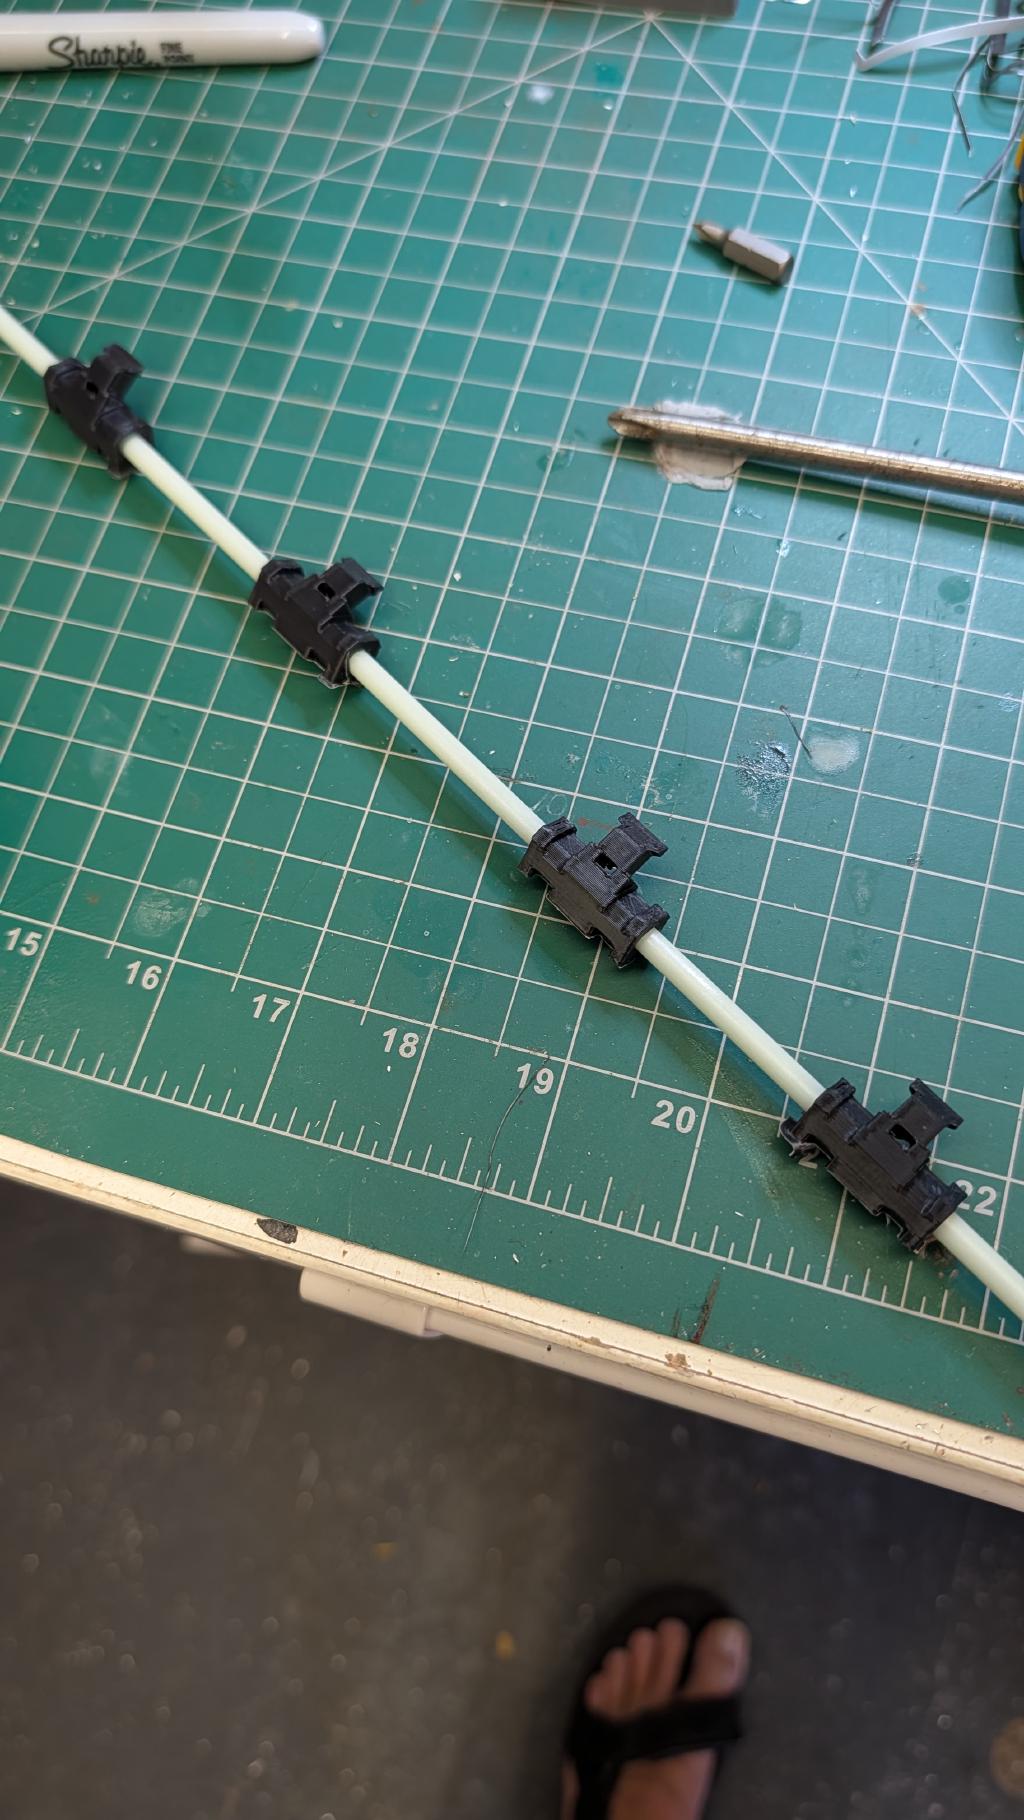
- 3D printed string clips — space and route the LED strings from base to topper in a serpentine pattern
The Build#
The Base#
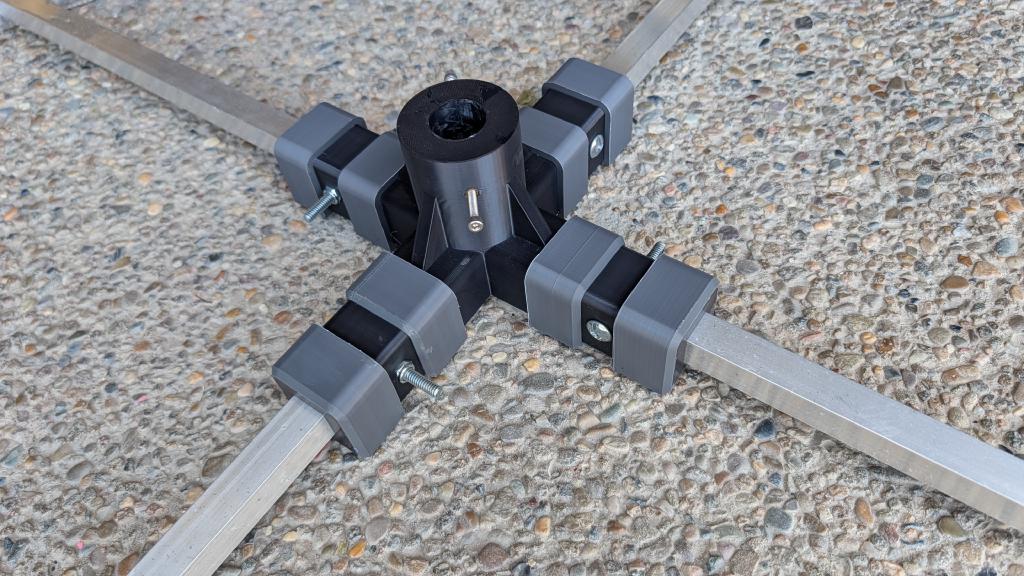
The base hub is made of a number of printable parts, glued together with 3d printing adhesive. Using this method ensured I could print this decent sized part on my small Prusa Mini+ printer.
When brought together, the hub accepts the four aluminium arms and a centre section to grab the central camping pole. Using some bolts to assemble means it's easy to store between seasons.
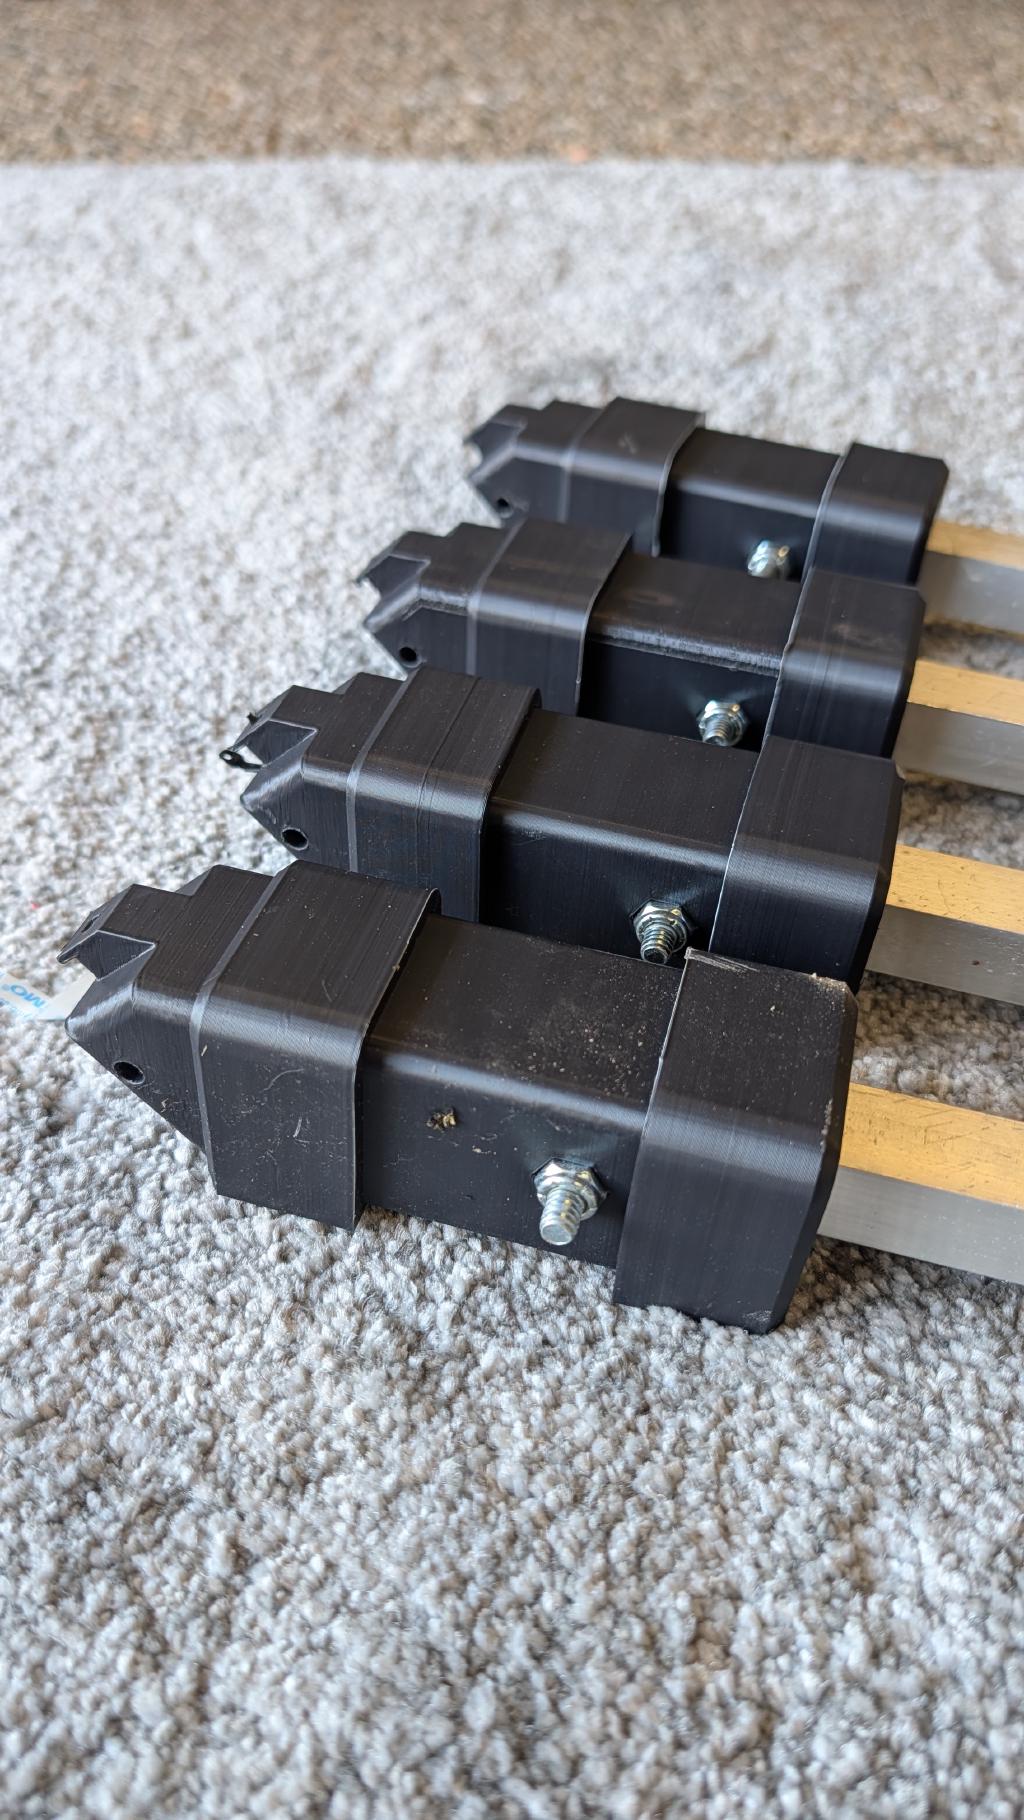
The outer feet hold the outer ring. Printed with decent infill to give it some strength. The tree is outside and needs to survive all types of weather.
The Ring#
Once the base arms are in place, fibreglass rods slot through holes printed in the outer feet to form a circle. The rods flex to form the perimeter — no bending required, they just naturally curve when the ends are brought together.
Printing the pieces#
Everything structural is printed in ASA. The fixture was outdoors for the entire Christmas season through a Sydney summer, in full sun, and held up without any warping or failures. PLA wasn't going to cut it.
Stringing the LEDs#
The LED strings route from the base ring up to the topper and back down in a serpentine pattern. 3D printed clips space the strings evenly around the perimeter at regular intervals making the tree easy to assemble and adjustable in height if needed.

I pre-staged all the LED strings in the garage before taking the fixture outside, which made the install much easier.
Pixels and Power#
Each quarter of the tree ran 490 pixels — split into 10 strings of 49 pixels each at 5cm pitch, giving roughly 2.4m of effective display height. Total for the full tree: 1,960 pixels.
The tree connected to two dedicated ports on the Baldrick8 controller. The Baldrick can run about 750 pixels per port, so one wasn't enough, but in the end it looked great!
Follow my lead#
With a simple pack-down, this is ready for next years display. The STL files are up on Printables if you want to build your own.